


 |
 |
 |
| Home | Research | Delivery | Empennage | Wings | Fuselage | Finish | Engine | Electrical | GRTDecode | Previous|Next|Latest |
| Fuselage | Cockpit | Fuel Systems | Undercarriage | Canopy | Flaps | |
Canopy (Tip-up) | |
Sat 13 March 2004 | |
| I spent a hour or so to finish with, looking at the tip-up canopy parts. I'm lead to understand this is probably one of the harder parts of the fuselage so a bit of thinking time will be useful. It looks like there are multiple parts to fabricate so tomorrow it might be back to making / edging / smoothing parts again (at least I understand that!). | 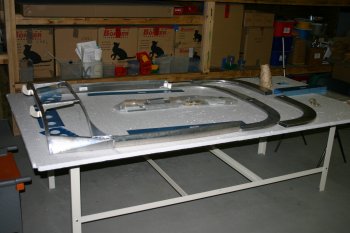 |
Sun 14 March 2004 | |
| Today I continued working with the canopy structure. I started with the normal debur, file, smooth and scotch-brite deal. Didn't do all the parts, but made a good start. | 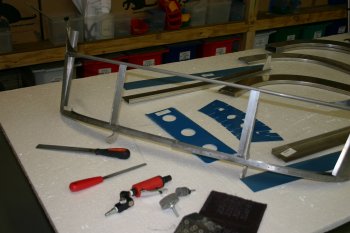 |
| Then moved on to looking at a couple of the sub-assemblies - specifically the latch and the forward hinge area. Reading the instructions it looks like a reasonable amount of fabrication is needed, so this is another list of todo things whilst we are waiting for the fuselage. | 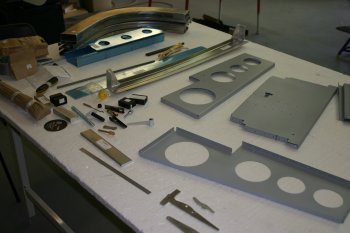 |
| The latch is basically a clever shaped piece of 0.125" AL sandwiched between to AL angle sections. The angle section need fabricating from stock material. |  |
| I drilled the lower bracket with pilot holes and then matched drilled both angle sections together. Worked well. | 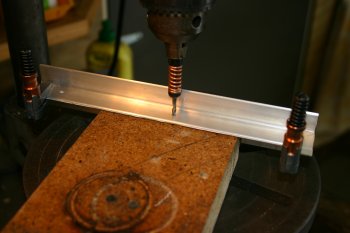 |
| The final stage was creating a recess for the rod end bearing that connects to the mini push-rod. The rotary burr (carefully) made the right general shape and the 1" scotch brite wheel finished the job neatly. | 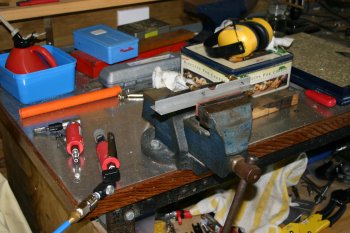 |
| One end of the pushrod could be completed today, drilled out to #3 and then tapped for the 1/4" thread. I had to take this slowly, lots of boelube and backing off the tap to clear out the swarf. | 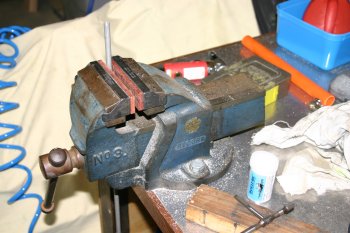 |
| The finished latch assembly. All came out well, I might consider hard anodising these parts - not for the looks but more for the surface wearing characteristics. I'll see how the rudder pedals come out first. | 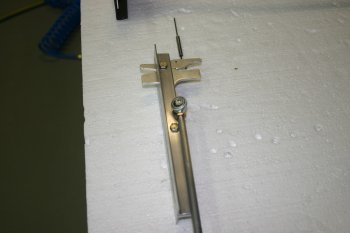 |
| I finished the day making some of the little brackets needed. I'm trying a slightly different technique - rather than marking all the drill locations on the actual piece of metal, I've knocked up a to scale CAD drawing of the layout which I then print, fix to the work and use as the marking out. The advantage is the layout is very precise, the risk is the whole alignment could be slightly out. So far it has worked well, I'll let you know how I get on with it. Dad is back in the shed tomorrow, hopefully finish the seats, a new hole saw for the battery box and continue with canopy preparation. | 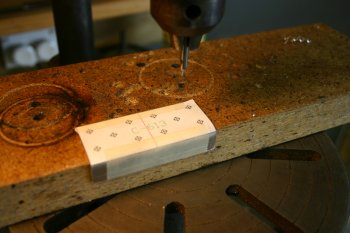 |
Mon 15 March 2004 | |
| Well a frustrating start to the day, I spent most of the morning trying to work out what stock material to use to make the gas-strut supports. The drawings refer to AB3-1 1/2, I couldn't find this anywhere, so I ended opening the wrapped strut, low and behold - two pieces of stock material!! That was the good news, the bad news is the bar is 6" long and that means I'm still about 3" short of material. I'm not sure what the deal is, but I'll probably just get some more from VANs. | 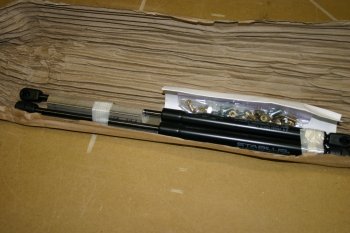 |
| This is 4 of the 6 needed parts, I drilled one side and then match drilled to the second side. | 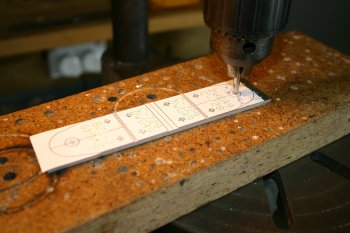 |
| Then I tried a bit of rough shaping with sabre saw, this didn't work particularly well. | 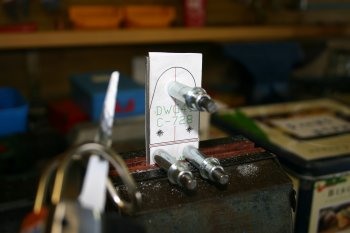 |
| So I went back to the rotary burr, file and scotch-brite method. End result was fine. | 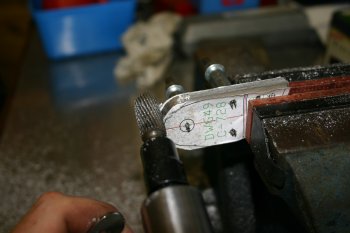 |
| Also fabricated the forward strut mounts including the #10 taps. The central locations will have to wait until we get a 5/16 - 18 tap. | 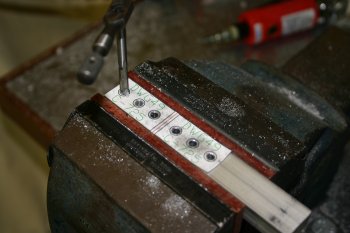 |
Tue 16 March 2004 | |
| The rest of the day I spent working on canopy bits. Lots of fabrication / cleaning up parts. Several of the DWG 24A parts need to be trimmed. | 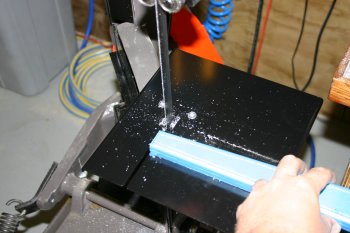 |
| The band saw combined with the sabre saw got everything into shape. | 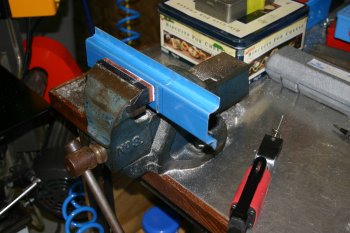 |
| Then it was the normal edge, debur smooth etc.... | 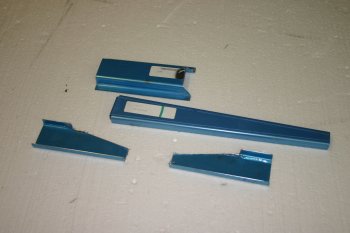 |
| Then it was back to the canopy pivot blocks. Lots of careful marking and layout then a few drills. | 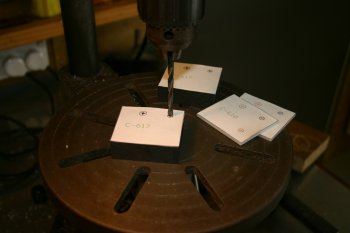 |
| After diner I drilled the hat section on the forward side of the mid support. I drilled the lower and then match drilled the top locations in the centre of the mid section. This then meant the rest of the match drilling was simple. | 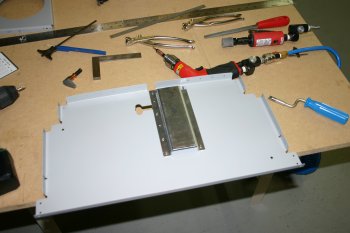 |
| The parts mocked up together. The inner forward supports need to be drilled first thing tomorrow and the mid forward support may need re-drilling, I think it may be a little low we will see. | 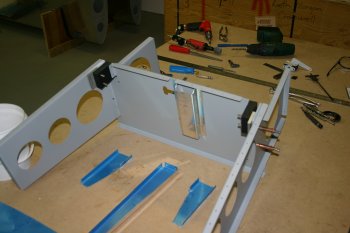 |
Wed 17 March 2004 | |
| I continued with the canopy latch handle fabrication. The parts are now ready to be used on the real thing (which is still a little way off). | 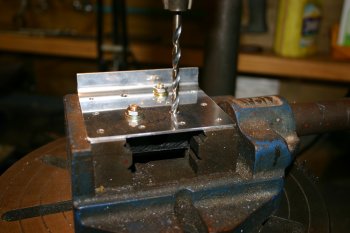 |
| Next was then other various fabrication parts. Normal processes, cut, drill, edge, smooth etc. Dad was also continuing with the fabrication of various pieces of shaped AL angle. |  |
| I then went back to the hat section and the mounting of the UWHM plastic block via nutplates. |  |
| The recesse for the cross-bolt is two 1/2" holes joined along the long edge. Rotorbroach for each end and rotor burr for the joining up. Finish with file and scotch brite. |  |
| Then we tried something a little different! After chatting with Dad about the hole for the canopy latch we discuss the idea of using a router for creating the slot in the skin. We dug out a new router bit (4mm) and set to work on the skin. |  |
| The result was REALLY good. We have the process for real fuse, although we need a slightly smaller bit. |  |
| This is the end product of the canopy hinge structure work I've been doing. The hinge points haven't been drilled yet, I'll wait until everything is cleco'd into the straight fuse. |  |
| This is the problem poser for the day. The 24A drawing contradicts it self. The mid fuse support is drawn as flange to the right (as shown) but this means the 90 degree angle isn't at the top and therefore the forward tip of the support is well below the top edge of the firewall. One option is the flanges should point to the left and the right angle will then be at the top and the heights should work, but this is markedly different from plan. An email to VANs was sent - I'll let you know. |  |
Thu 18 March 2004 | |
| Today was a particularly mixed day. I started by visiting a local upholster and discuss options for the seat cushions. Looks like a good solution. I then returned and did 'bits' for the day. Partly due to interruptions throughout the afternoon and partly just because I've been struggling to find things to focus on until the new fuselage arrives. I ended up going back to the old favourite of filing, edge smoothing and finishing of any parts that haven't already been done. |  |
Sat 20 March 2004 | |
| Then it was onto canopy frame brackets, lots of 100 (ish) degree angles needed. | 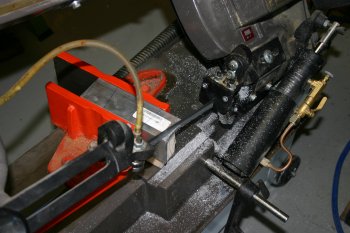 |
| Then I moved on to some of the misc angle brackets and upper aft channel for the canopy frame structure. Nothing difficult just working through the various parts needed. It all takes time and hopefully will make the actual final construction that be quicker. | 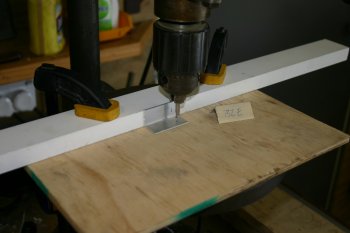 |
Sun 21 March 2004 | |
| Today Dad started be reworking some of yesterday's work. When cutting the large AL angle with the funny angles make sure you read the dimensions carefully......... | 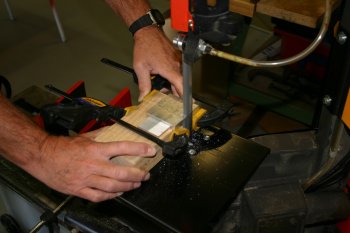 |
| Then is was the normal drilling of the reference locations. | 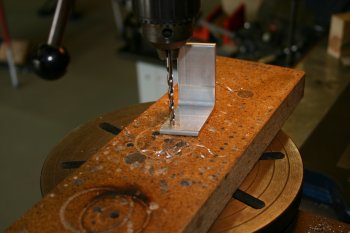 |
| And match drilling the LHS / RHS parts in one go. | 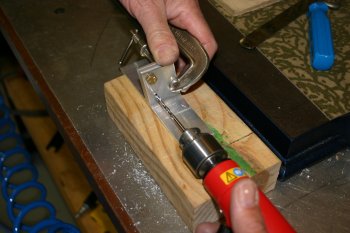 |
| More brackets - same deal. | 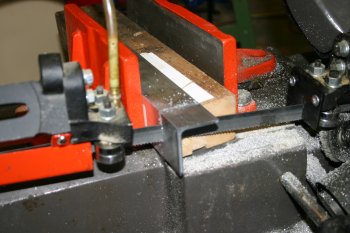 |
| And of course everything has to be filed, deburred, smoothed etc. | 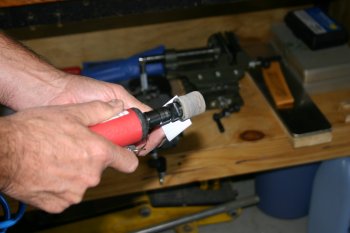 |
| Two more to add to the pile for priming. Dad also squashed and stretched some of the AL angle parts that I worked on yesterday and finished drilling them. | 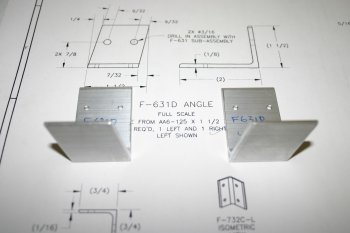 |
| Remember the problem with the forward fuselage support rib and the 'drooping front'. Well after various research by Gus @ VANs it transpires that there are two parts the F-643 and the F-643-1. The -1 is the new part and has the flanges pointing to the right (as per current drawings), the original has the flanges pointing to the left. Well I had the original part and the new drawings - hence the confusion. It was nice to know I wasn't doing anything completely stupid and this is only the second major error that I've found so far. After a bit of trimming and shaping the part now fits nicely and we move onto the next thing. | 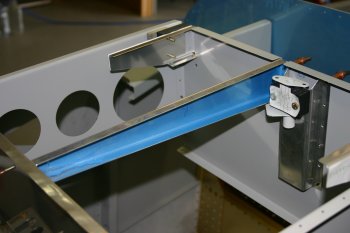 |
| I spent most of the rest of the day on the rear canopy frame. Firstly I wrapped up the edge cleaning and smoothing with the scotch brite. | 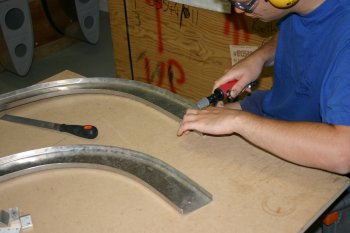 |
| And then started looking at the setup of a jig to hold the frame for layout and drilling. | 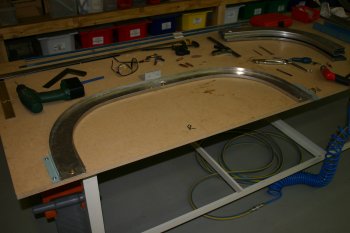 |
| I used three pieces of misc angle to set the top and two side limits of the frame. We took WAY too much time setting this all up and getting everything exactly right. But we continue to work on the principle of everything as precise as possible and hopefully it will all work out. | 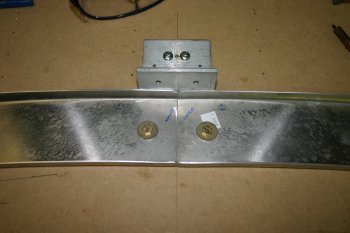 |
| Once the two sides were bolted down to the bench top (via the tooling holes) I marked a line on both flanges. | 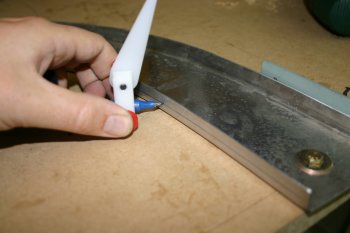 |
| Next up was the F-631E plate at the top centre, this was already prep'd so just a match drill and it was done. | 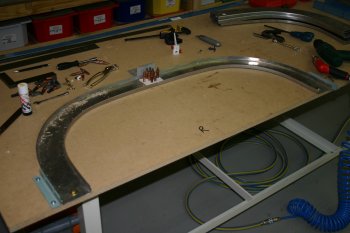 |
| To finish this evening I marked out the lower flanges with 1 1/4" spacing and pilot drilled them. | 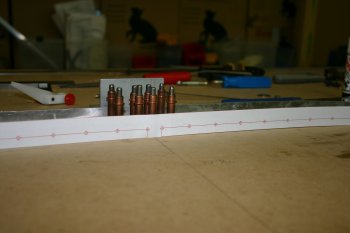 |
| The finished lower structure ready for match drilling to the braces, a job for tomorrow. | 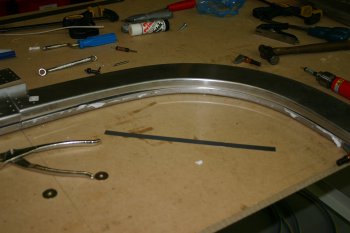 |
Mon 22 March 2004 | |
| Dad started by shaping the canopy frame ties. They need to be significantly bevelled to allow for the front & back frame to sit flat. | 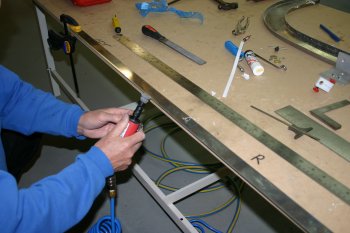 |
| Dad then moved on to a more edging and smoothing, all rather boring but needs to be done at some point. | 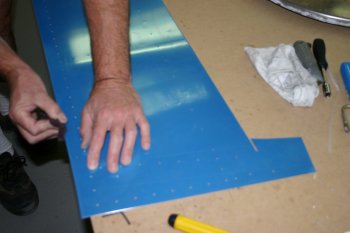 |
| I continued with the canopy frame. First up was drilling the lower brace to the two rigged aft halves. | 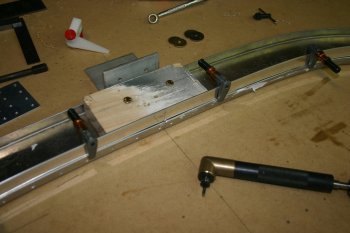 |
| I found the right-angled extension worked quite well, but the work needed clamping very tightly. | 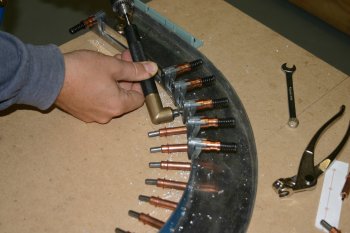 |
| The finished lower brace. | 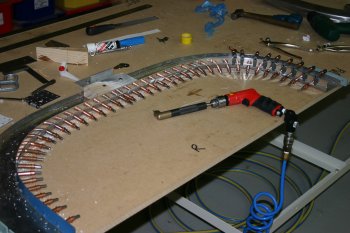 |
| Then onto the upper locations. I took Dan C advise and went with 1.25" spacing again. | 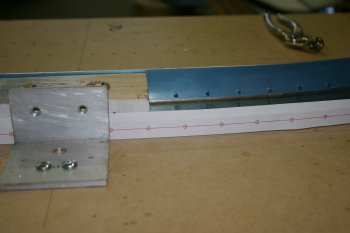 |
| However I decided not to drill it be free hand again (I wasn't very pleased with the aft hoops) so Dad made a drill jig. This worked really well at providing a constant 3/8" up from the front face. | 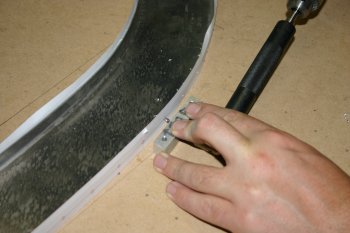 |
| Then the upper brace was drilled. I struggled to keep stop it riding up but lots of clamping and taking it slowly, it came out OK. | 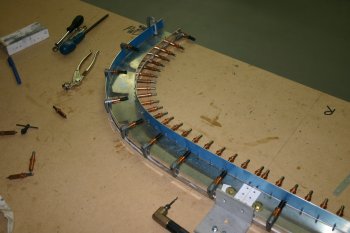 |
| The next step is joining the halves together. I started finding some spacers and blocks for setting the finished size, but decided it was too late to start making real 'decisions'. | 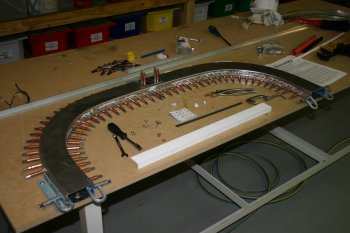 |
Tue 23 March 2004 | |
| I started the day shaping the braces more 'aggressively'. I got the vixen file out and went to work. The corners of the canopy frame have about a 1/16" radius so the material needs quite a bit of work. Finishing with the scotch brite wheel as per usual. (BTW: I didn't originally like the vixen file - it was too extreme, however after the initial new edge has been broken, using a light touch I'm starting to really like it as a tool.) | 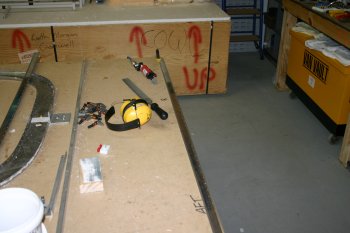 |
| Then I started to try and workout a way of providing support inside the channel before drilling the other side of the brace straps. | 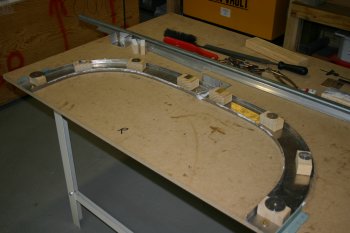 |
| After lots of permutations and experiments I ended up using the bend brake as a second flat surface to temporarily fix the low portions of the frame with a couple of #40 clecos. | 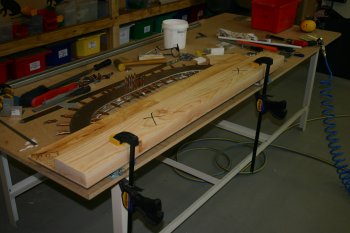 |
| This meant I could lift the whole structure and use C blocks to set a constant size frame whilst then drilling the second side with #30's. | 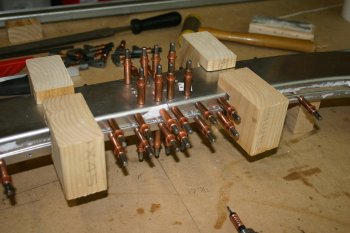 |
| The final step was to match drill the #40 locations with the whole structure still tied together. The end result was really good, both sides of the frame lay flat on the table and the frame is 1 1/2" all the way round. The only remaining concern at this point was the edge distance clearance on the internal braces. | 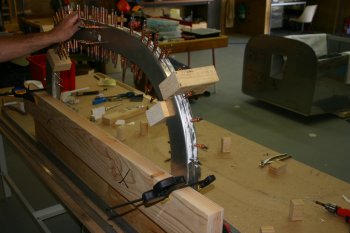 |
| However once opened up - the edge distances were shown to have come out well. Then it was the normal deburr / clean up routine. General advice would be make sure the radiusing of the brace straps is really good and everything should work out. Not sure if I would use a different clamping setup 'next' time - I was probably being overly cautious. PS: Make sure every thing is REALLY well labelled at this point, I had one slightly scary moment..... | 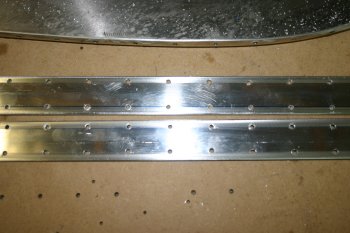 |
| Then counter sink the brace locations for AD426 / CS-4-4s. | 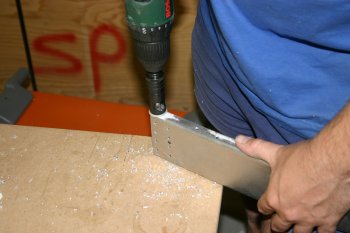 |
| Final bit of canopy frame is the rear bracket that mounts the brace to the rear bulkhead, this is one of those 88.XXX degree bends. | 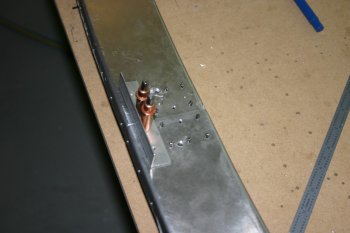 |
Thu 25 March 2004 | |
 | |
 | |
Mon 29 March 2004 | |
 | |
 | |
 | |
Tue 30 March 2004 | |
 | |
 | |
 | |
Thu 01 April 2004 | |
 | |
 | |
 | |
 | |
 | |
Fri 02 April 2004 | |
 | |
 | |
 | |
 | |
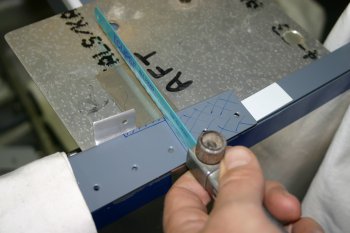 | |
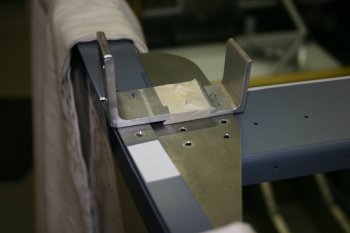 | |
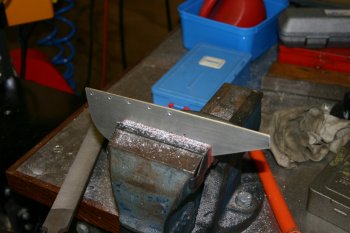 | |
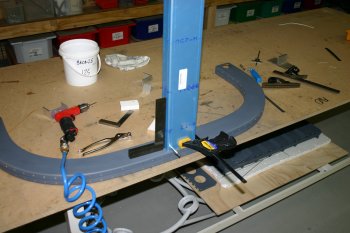
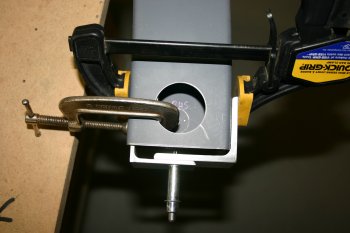
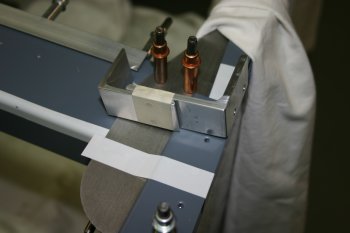
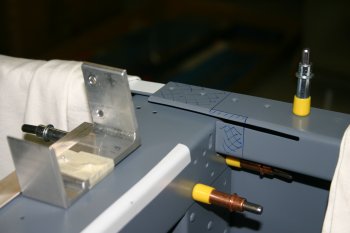
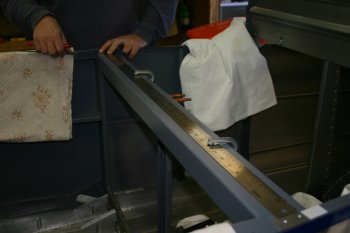
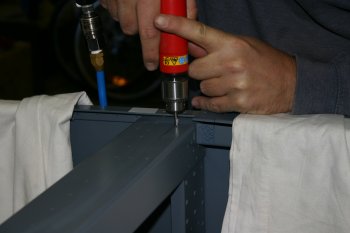
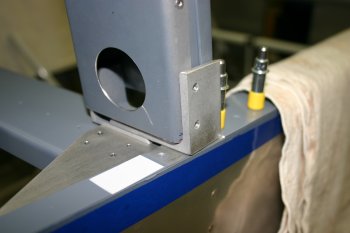
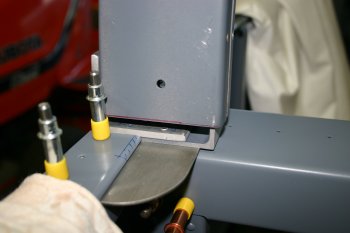
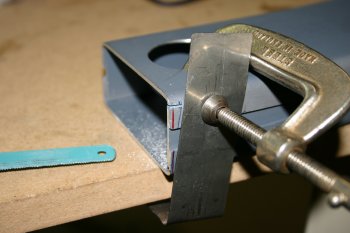
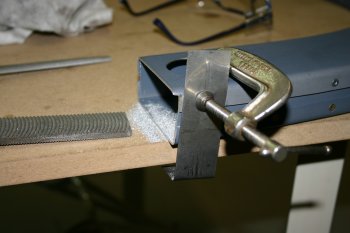
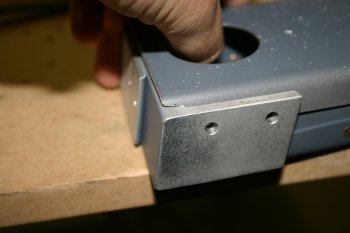
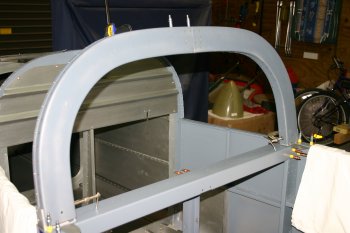
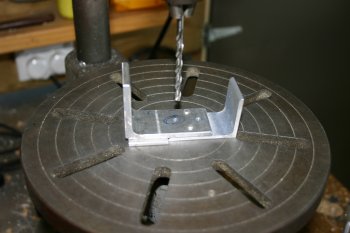
| Primed the overlaps and riveted the angles together. | 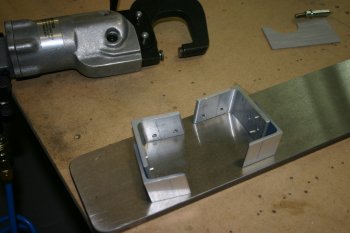 |
 | |
 | |
 | |
 | |
 | |
 | |
 | |
 | |
Sat 03 April 2004 | |
 | |
 | |
 | |
 | |
 | |
 | |
 | |
 | |
 | |
 | |
 | |
 | |
 | |
 | |
 | |
 | |
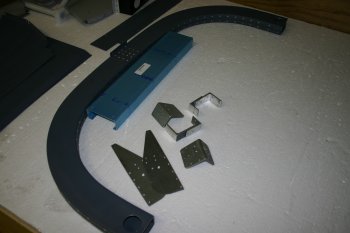 | |
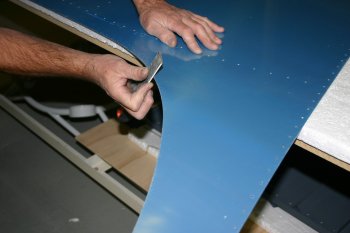 | |
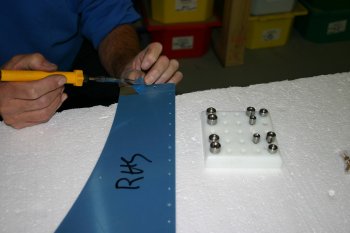 | |
Sun 04 April 2004 | |
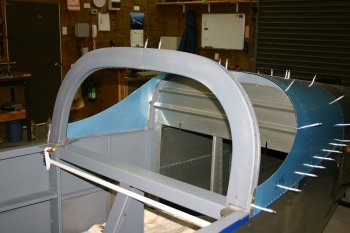 | |
Tue 06 April 2004 | |
 | |
 | |
 | |
 | |
 | |
 | |
 | |
 | |
 | |
 | |
Sat 04 December 2004 | |
| Whilst Dad was busy with other things first thing I re-visited the forward canopy frame | 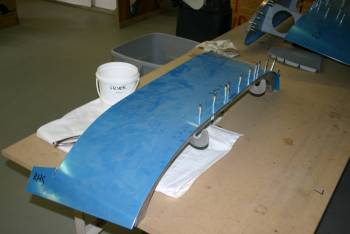 |
| One of the 'optional' modifications is the bracing structures to increase the rigidity of the tip-up frame particularly for wind protection when it is up. Basically it consists of three strengtheners which need bends being set on all the tabs. This is done with a simple wooden block and some care. | 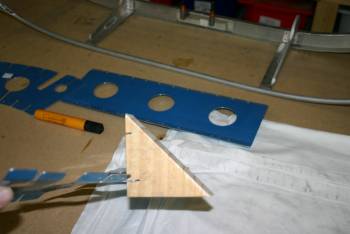 |
| The finished result ready for the next stage. One piece of advice is to ensure the edge clean up and debur is done before bending the tabs, just easier and simpler that way. | 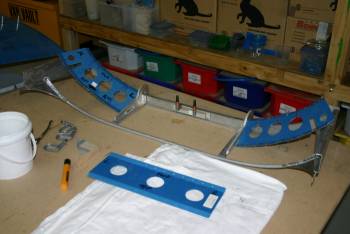 |
Thu 23 December 2004 | |
| I also continued work with the custom cover plates for the forward deck to provide better access to the instrument area. | 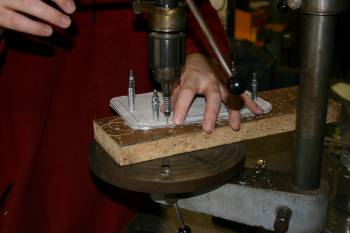 |
Wed 19 January 2005 | |
| Dad continued with the canopy latch system. The 'ball handle' has a taper slot which was a little problem to sort. Then drill and fix as instructed. | 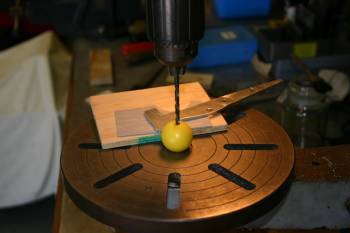 |
| I then went back to the canopy gooseneck system and finished drilling the 1/4" locations for the pins. Also did some clean up work on the P seal brackets - fiddly and boring! | 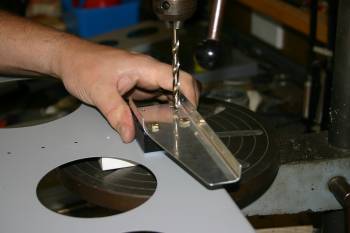 |
| Dad finished all the prep for the canopy latch along with a custom filer for the aft end. This provides a stop for the catch and hopefully might reduce the air / rain exposure a little also. | 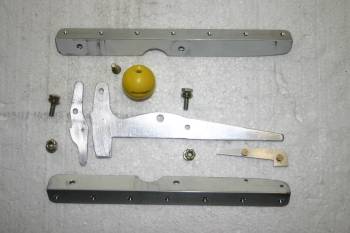 |
| To finish the day I sorted the conecting rod between the door latch and rear canopy latch weldment, just cut, drill and tap. | 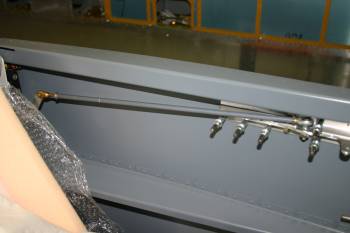 |
Thu 20 January 2005 | |
| I started with the canopy seal support. | 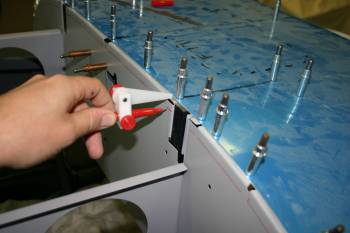 |
| I decided to drill in place and then open up on the bench. One rivet in the middle section is a bit of a problem as is clashes with the hat section but I think a AD426 will solve the problem. | 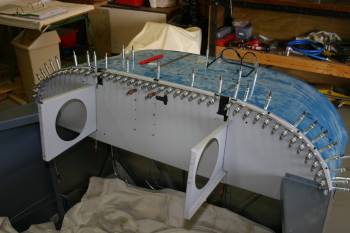 |
| Also sorted the snap-bush for the canopy handle. The bush needed a bit of internal filling to allow the shaft handle to go through. | 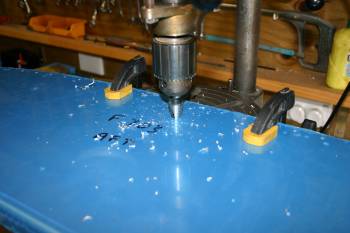 |
| Most of the rest of the day we spent sorting the slotting of the bars. This was one of those afternoon where we could have just used a hack-saw and a file and the slot would have been 'aceptable'. However we decided to try couple of other methods. The first try was a simple grinding wheel in the drill, however the slot wasn't smooth and it was difficult to control the height. | 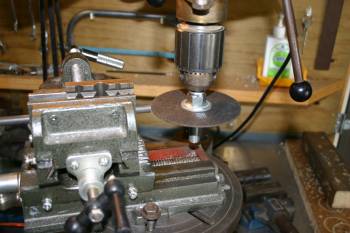 |
| We then changed to using the lathe. After some head scratching on how to mount the work, I'm now starting to understand a bit more on how to use the various curring tools. | 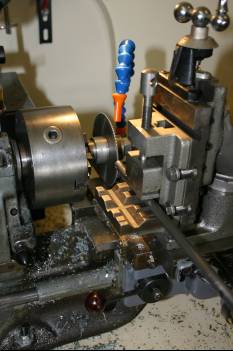 |
Fri 21 January 2005 | |
| First up I re-match drilled the inboard upper supports. The latch mechinism works fine however the panel bushing is too tight so a new solution will need to be found. | 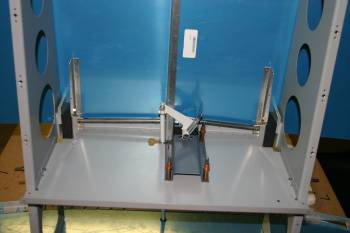 |
| Then the crank arm was opened up to 1/4". | 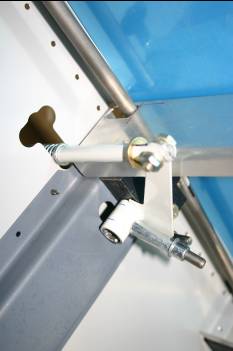 |
| I went back to the canopy frame structure. Lots of reading, lining up and trying to understand how it all goes together. | 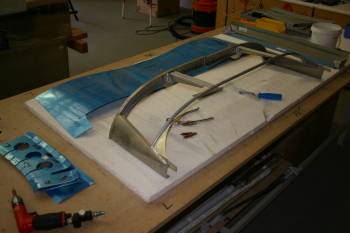 |
| Then dimpled and riveted the outer braces to the main panel / firewall supports. | 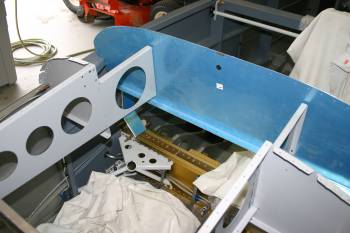 |
| To finish up the day we spent some time looking at the goose-neck hinges and skin alignment. With the AL blocks in the gooseneck hinges there is a 1/16" gap, without it everything can pull up really close. I guess some trimming is going to be needed. | 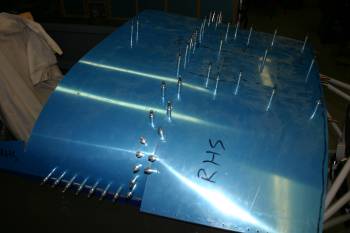 |
Sat 22 January 2005 | |
| Dad did some careful trimming of the longeron covers ready for the tip-up rear hoop. | 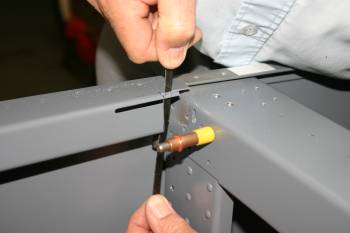 |
| And some more "weight reduction" - ie remove more of the steel excesses. | 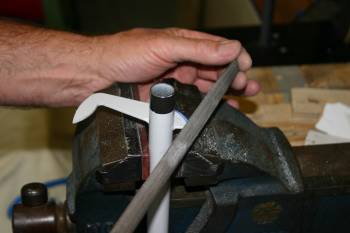 |
| I did some of the canopy frame / skin work and sorted a cover plate for the C-channel that goes between the roll-bar hoop and the rear bulkhead. | 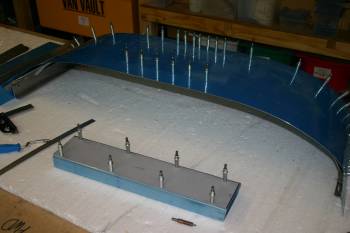 |
Mon 22 August 2005 | |
| To finish I remade the custom covers for the forward deck. There were too many nutplates / screws in the old one - halved the number. Lots of drilling, deburring etc. | 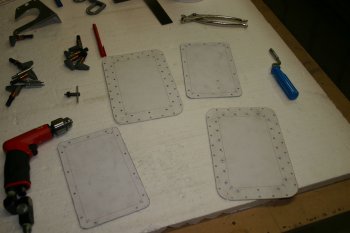 |
Wed 24 August 2005 | |
| I think de-rigged the panel / cockpit forward structure to rivet the weather seal support on the left and right ribs. | 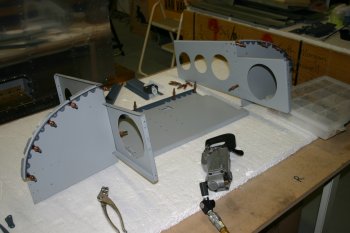 |
| After having some problems with the left side I decided a better approach was to do it in situ - this reduces the twisting / warping of the ribs. Also be aware - the highest / inboard rivet will bend the rib out of shape if you use a squeezer on it - don't ask how I know. | 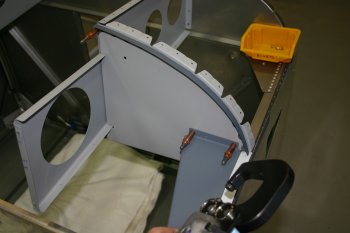 |
Thu 25 August 2005 | |
| This is the result of the bad rivet squeeze from yesterday - you can see the rib is deflected inboard. As this is where the pivot point for the tip-canopy goes it is going to be a problem. I therefore drilled out the rivets and tried to 'flatten' the rib. Then re-assembled, better but not perfect - we will see if it causes other problems. |  |
| Next up I decided to go ahead with riveting the top-hat section and the weather strip support on the mid section of the panel frame. No big problems just access and sequence details that needed to be thought through. I used the C-frame for most of the rivet setting which worked well. |  |
| Also riveted the mini-ribs to the end of the center panel. The mistake I made was not to shape the mid-panel where the bull-nosed pins go for the canopy hinge / release. I'll see how it goes. |  |
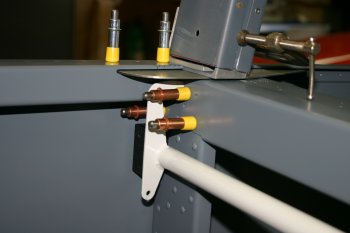
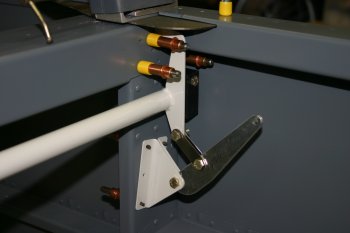
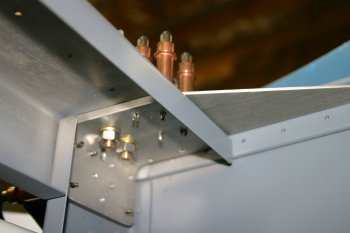
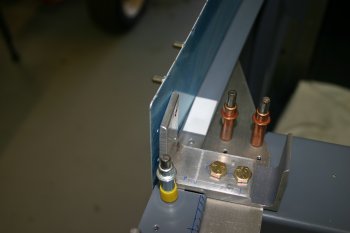
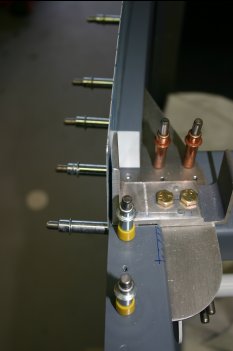
| This is the completed canopy release assembly (from the firewall looking back and up). I also made two mini spacers (the AL bit between the plastic bearing surfaces on each side) that doesn't restrict the position of the goose neck hinge whilst maintaining the spacing correctly. The LHS is VERY tight (see above entry for the reason). |  |
| I then went round cleco'ing the skins to review the alignment between the canopy frame part and the forward skin. |  |
| And this is the result, a 3/16" gap over the whole width - I'm not sure yet what it is meant to be - will need to re-review the plans - but seems a little generous to me and it is going to be difficult to change with the pre-punched components and the goose neck needing a central drilling. A job for tomorrow! |  |
Fri 26 August 2005 | |
| First up - re-cleco'd the skins onto the frames. Reduced the gap to the minimum amount - 20 thou and reviewed where the holes were going to come. Decided edge distance was too small and re-lined everything with minimal edge distance that I was happy with. | 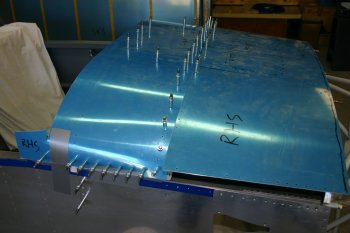 |
| Then drilled the pilot for the retaining pins. We used the bushing made for the elevator horn drilling - 1/4" O.D and #40 on the inside. | 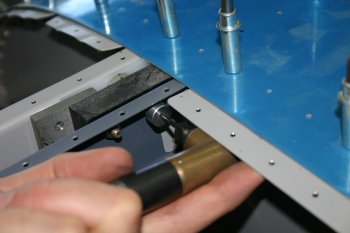 |
| This gave us two pilots to work from. Both were slight aft of the centre line of the goose neck. | 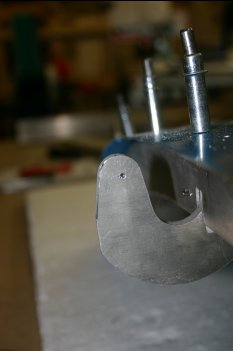 |
| Then we opened up to 27/32" by drill. It seems the material may be a little softer than some of the other AL in the project. The drill kept grabbing and was hard work. Finished the hole with a 3/8 reamer and then used the vice to squeeze the bushings into place. | 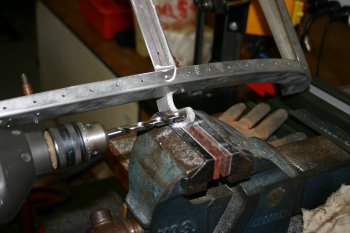 |
| Re-assembled the latch mechinism and trialed the action. Found a number of problems - firstly the LHS (right in the picture) was still too tight (see yesterday's entries about the bad rivet squeeze) - therefore I had to re-drill out for the second time the two upper AN426 rivets and re-set after bending the ribs further. Secondly the weather strip was too big in places and needed to be reduced two enable the frame to rotate cleanly. | 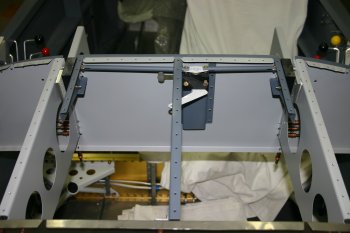 |
| After various tweaking - everything is working. Latch mechinism is still difficult to use for mounting - but removing is nice easy! Finished the day re-clecoing the skins on and checking clearances - probably ended up with about 40 thou across the whole width. | 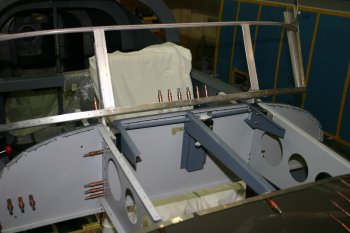 |
Sat 27 August 2005 | |
| The next stage for the canopy frame construction needs spacers for the side supports and the rear hoop. I used thick MDF board and cut multiple blocks against a jig. I used Dan's recommended 27/32" blocks rather than 7/8". These were then duct taped to the hoop halves. | 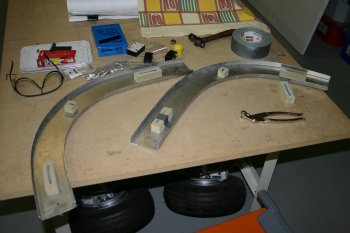 |
| The side supports I used pieces of 1/8" hard board. | 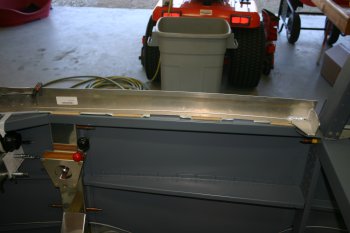 |
| Next it was sorting the rear hoop. The initial layout seemed pretty good, but I realised the skin to roll bar brackets hadn't been completed. | 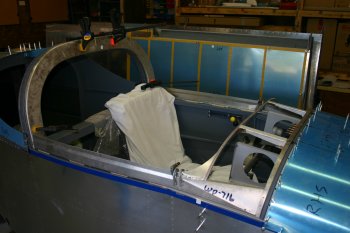 |
| The gap seems fine although the some fluting and straightening is still needed. So it was off with the roll bar and de-rigging the brackets. | 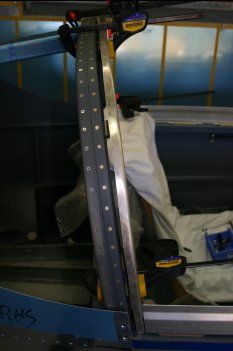 |
| The counter sinking of both the #10 and #8 skin dimples ended up nearly the same size. Then it was just re-assembly work, the afternoon was cut short with other events. | 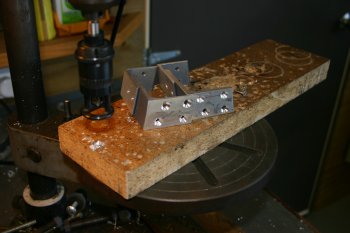 |
Sun 28 August 2005 | |
| Then it was putting the rollbar back together and re-jigging it including all the bolts and screws. | 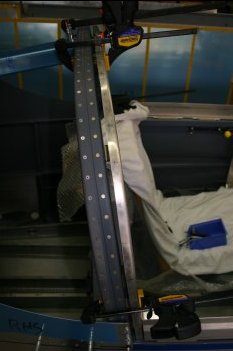 |
| The front attach plated between the hinged center and side rails have one location that is very close to the skin rivet. It looks like we will be able to use a -4 instead of a -3 and everything should work out. | 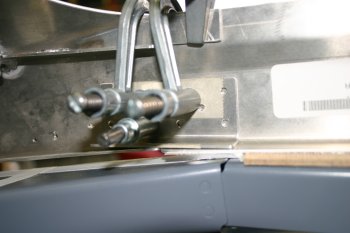 |
| I drilled the aft holes for the forward attach plate as per instructions (yes - I'm following the instructions again!) | 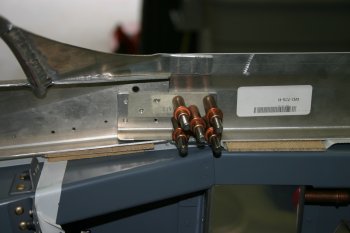 |
| The 1/8" spacer worked fine, lots of adjusting and checking / re-checking of the side rail and getting everything lined up. | 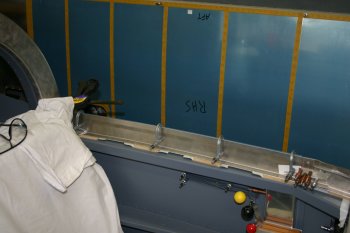 |
| I started getting the enternal alignment via cleco'ing a 'scrap' skin to the side rail. | 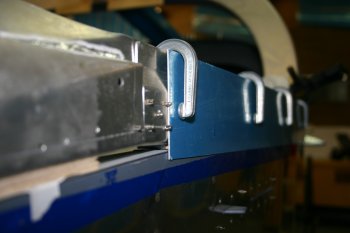 |
| But changed to duct taping the scrap to the fuse and then cleco'ing the rails to it. | 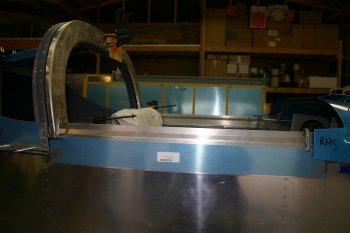 |
| Then it was drilling the rear of the rail into the hoop rib. If I was doing it again I would bring the outer hole inboard by 1/8" to help with spacing / clearance against the web. | 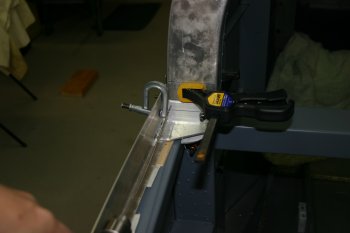 |
| After both rear sections were completed, the foreward plates could be drilled. One thing to watch is the lower/aft hole on the hinged section is very close to the aft most skin rivet location. I will probably just open it up to an AD4. | 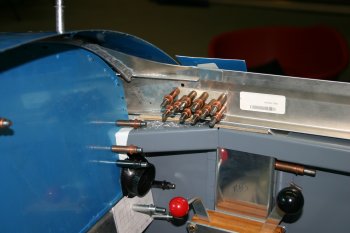 |
| The fruits of todays work - lots more match drilling and finishing to do but the basic structure is complete. | 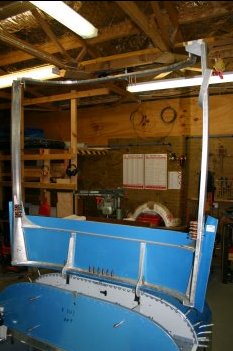 |
Mon 29 August 2005 | |
| Then it was back to the canopy frame. This is one of the two wedges that go below the C-613 brace between the canopy fwd frame and side rails. | 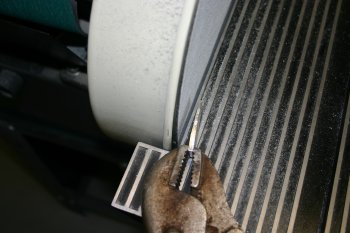 |
| I drilled the rear rib / rail locations out to #30s and did some finishing / edge tidying. | 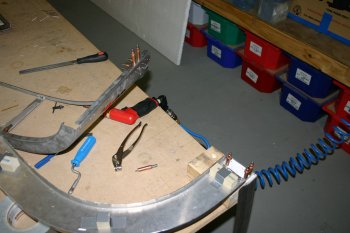 |
| Then re-installed the frame / rails and ribs. | 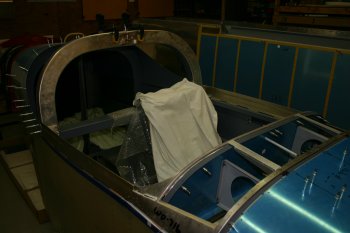 |
Wed 31 August 2005 | |
| I sorted the forward end of the rear brace. I'm leaving the angle supports to roll bar locations until I've sorted the custom lower skin of the C channel. The plan is to use the void in the C chanel for a baggage down light and possible Video / Camera mount. | 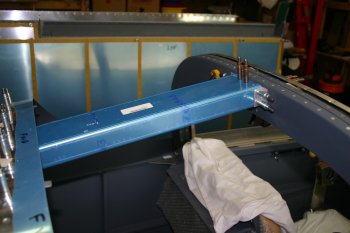 |
Wed 07 September 2005 | |
| Another area that I needed to sort was the C section behind the roll bar. I want to put a cover on the lower surface. | 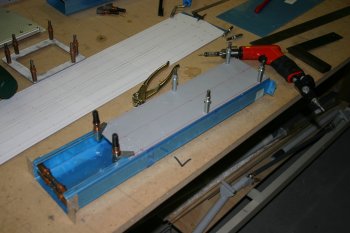 |
| The finished product. The forward section will get a mini-cover and probably a baggage down light. | 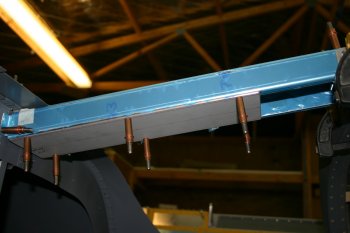 |
| Also laid out the side rails for the canopy. | 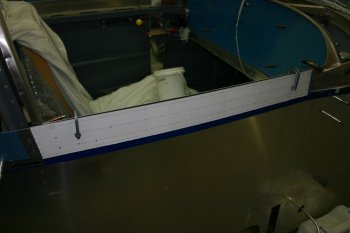 |
Thu 08 September 2005 | |
| First part of the day was bring Dad back up to speed with the current status of things. Then I went on to drill some of the side skirt / rails for the canopy. At this point only #41 drills used and I've kept the overhang at point. |  |
Fri 23 September 2005 | |
| Dad spent a gentle day doing some lathe work. This is a 'super-dimple' - 2" wide. | 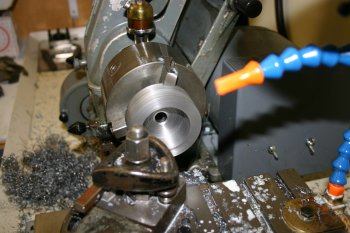 |
| The first cut caused a bit of deformation of the surface - so a little tool trimming was needed. | 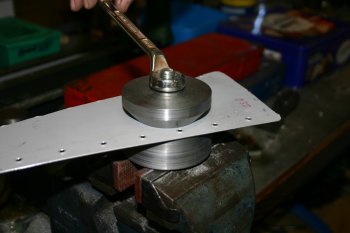 |
| The revised version - seemed to work fine. | 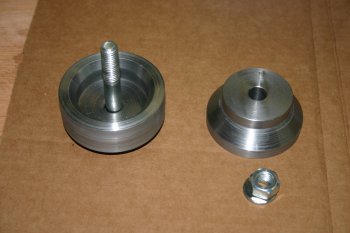 |
| Then went down the canopy stiffeners with some neat dimples. | 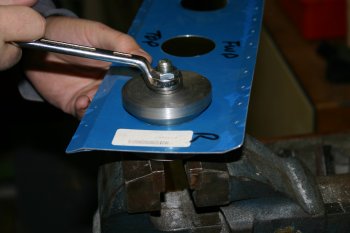 |
Tue 04 October 2005 | |
| I started the day with some more 'super-dimples'. This is one of the canopy frame reinforcements - the system worked well after I sorted a scrap tie for the front cut edge. | 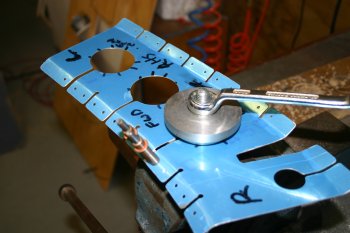 |
| Then I went on to mounting the forward edge of the braces. The centre section is easy. | 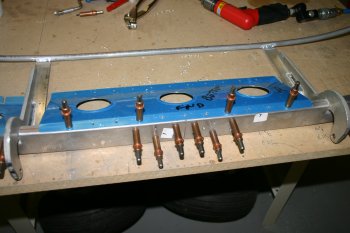 |
| However the outboard braces are a little more interesting. The general approach was to sort the two end locations, then work the very middle and then work out from there. Some trimming of the ends and inter-space was needed, but generally it was pretty good out of the box. I didn't drill the skin locaitons at this point in time. | 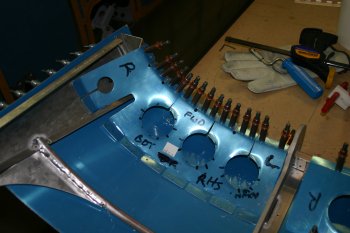 |
| Then it was more cleaning, deburring, edging and prep'ing. The weather today was too windy for spraying so we just continued building the pile of parts. | 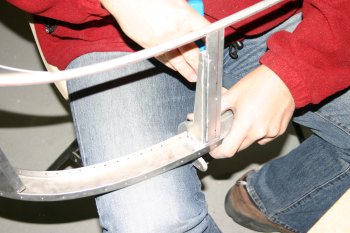 |
Fri 07 October 2005 | |
| Also did some initial rivetting for the C chanel and canopy front frame. Good to be putting a view parts together. | 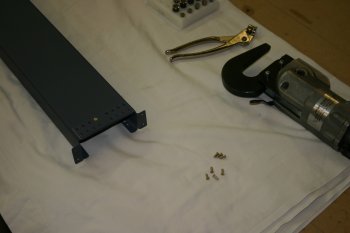 |
Fri 14 October 2005 | |
| Something that has been outstanding for a few weeks is the trimming of the canopy rear hoops. | 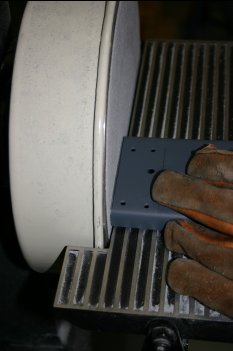 |
| The finished result - much better - everything now lays flat. | 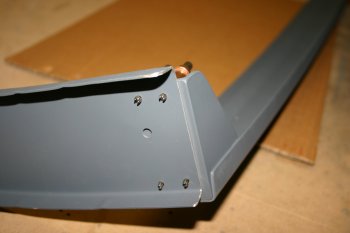 |
Sat 15 October 2005 | |
| Dad started by riveting the rear canopy frame hoops to the side rails. |  |
| and then went onto finishing the forward locations on the side rails. The canopy frame is now fairly solid apart from the centre rear plate which is done after the canopy cut / fit. |  |
Sun 30 October 2005 | |
| I continued with the canopy frame. The braces were re-cleco'd and I drilled the skin locations to #41. | 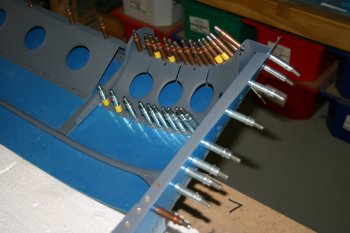 |
| Then it was re-aligning the canopy frame back on the fuselage. The 'floppy' rear center structure makes it hard to get good alignment and a new temporary wooden plate was made which works well. | 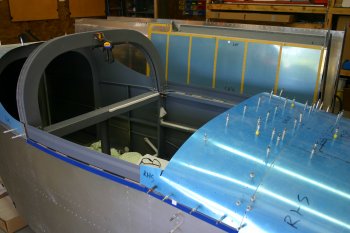 |
| The forward gap between the upper skin and the canopy skin is very tight. This is good from a sealing perspective / rain handling - however the canopy needs to be able to be opened to get IN the aircraft! Current plan is to continue as needed and trim the canopy skin later once everything is riveted together. | 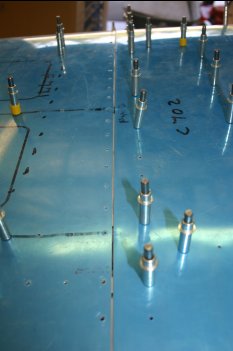 |
| The remainder of the afternoon was spent making ties and drilling them to the outboard braces. Fiddly, simple stuff. | 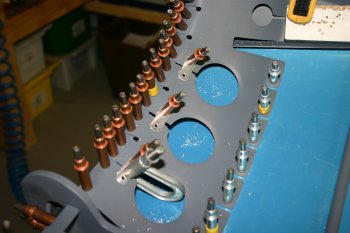 |
Mon 31 October 2005 | |
| The first major part of the day was spent clearing and cleaning the shed. We re-organised so that the main work bench was next to the door so that getting the canopy out into the sun for warming would be easy. Also we had to rationalise the storage for all the other parts to make space for the canopy plexiglass bubble. Then it was down with the bubble - lots of sand / dust from the 2 years storage. | 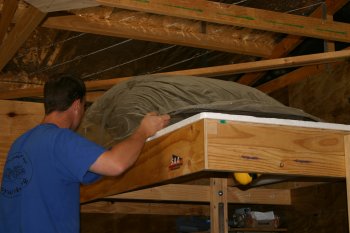 |
| Then it was setting the fuselage up for measuring the canopy fit. We started like this although I'm expecting to remove the rear upper fuselage skin (F-704) to make fitting a bit easier. The canopy frame is clamped in and aligned carefully. | 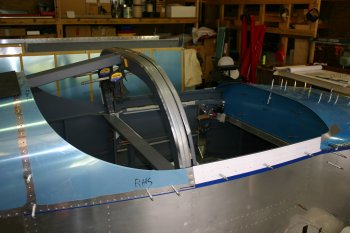 |
| The duct take to hold the sides in whilst being stored worked really well - I would recommend the same again. | 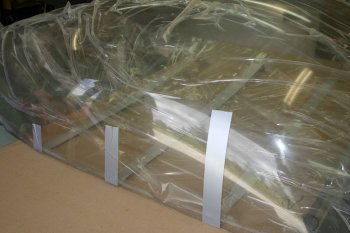 |
| This is the first rough line for the front cut. After more research on the various websites and studing the plans the key seems to be the front edge alignment. Everything else comes from that. The black is just forward of where the mould starts. I'm sleeping on it but this will be close to the first cut. | 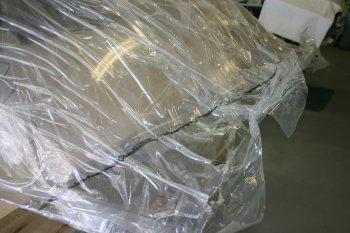 |
| We also tried to work out the centre location at the front. Not simple. I think we have got close but will have to wait until it is on the fuse to be able to really tell. | 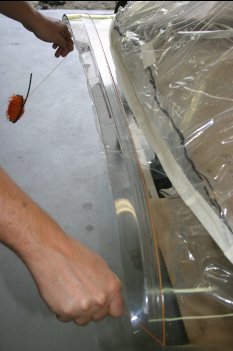 |
Tue 01 November 2005 | |
| We continued with the canopy layout / marking. Using a couple of side rails to help hold the long sides helped keep the shape. | 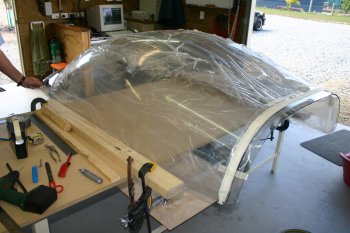 |
| I decided to get a little more ambitious than usual as the experience of plexiglass cutting for the nav-lights lens means that I would rather make few cuts closer to the right location from the start. The plan is to cut back to just infront of the duck lip along the front curve. | 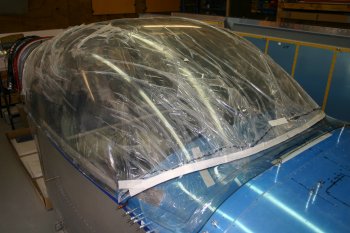 |
| And on the rear a simple trim of the mould holding. More careful masking and alignment. The process is to fold back the plastic protective cover and then tape back down with masking tape - the idea being that after the cut the plastic is still 'attached' and the dust is on the outside. | 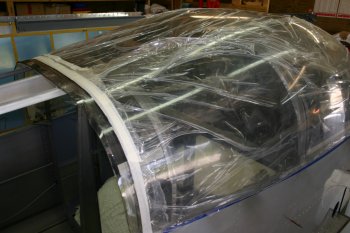 |
| I also made two templates for the rear .025 support strip. Hopefully a single 'washer' for each side. | 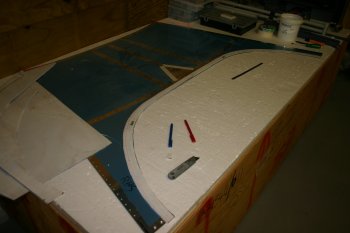 |
Wed 02 November 2005 | |
| First up was get the canopy out in the sun to absorb the heat. We want 25C ish ambient temp to help prevent cracking / handling issues with the plexiglass. | 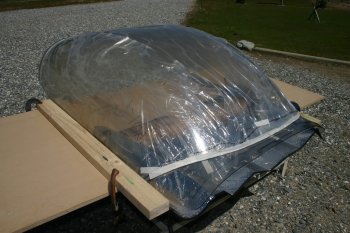 |
| By about 2pm the sun had done its thing and the canopy was warm to touch. After more thought I decided to go for a 'bigger' initial cut and see how it panned out. Note: here I didn't have a glove on the left hand - BAD idea.... | 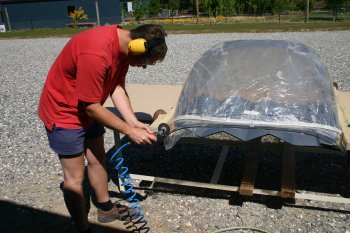 |
| With a glove (the hot plexi-chippings don't hurt this way) I worked around the front section. I took a couple of passes and generally moved the cutting towards myself. The hand combination was steadied by the outer edge. Worked well. | 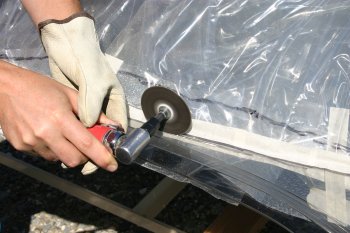 |
| The result - a quick sandpaper around the top and bottom edges and ready for the next stage. | 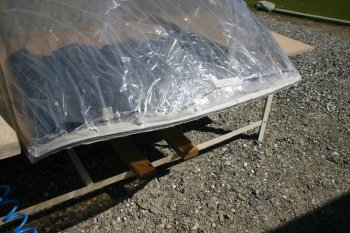 |
| This worked EXTREMELY well, the canopy fitted almost all the way around the front edge first time. Next we put the rear upper fuselage skin on and roughed a line for the rear window. | 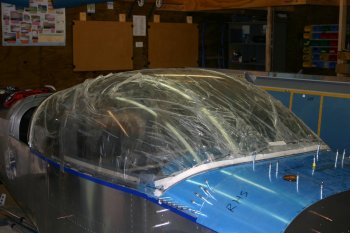 |
| This allowed us to calculate and mark a conservative rear cut line that was more than the trim I was expecting (and marked) yesterday. The marking is a slow process of pealing the protective cover back, re-taping, re-marking and then repeating for the other side. | 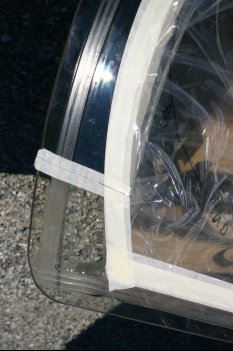 |
| This is the underside marked up for the side and rear edges, before the second cut. | 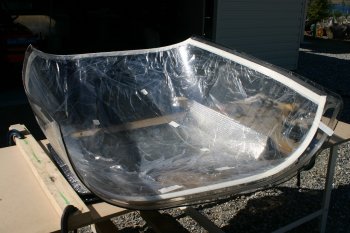 |
| Post second cut the whole canopy 'fits'. | 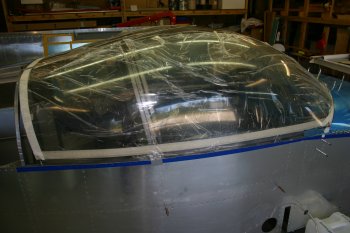 |
| The front is slightly forward of its final location (about 1/2") and is fitting the contour of the forward deck really nicely. | 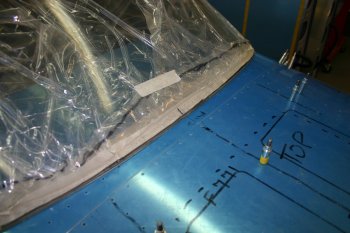 |
| The rear is slight aft of its final location (extra 3/8"). | 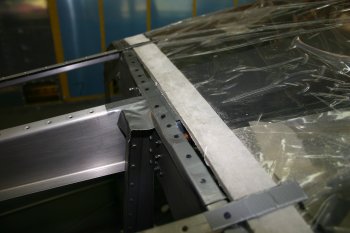 |
| and the canopy is resting on the sides of the roll bar and about 1/4" - 1/2" clear in the centre - generally very good. | 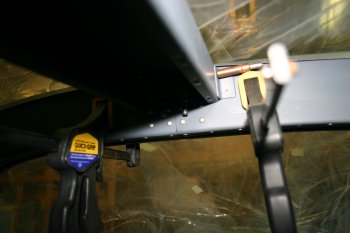 |
| Now at this point we had to pinch ourselves. Most builders seem to take a long time to get things, after much - we must need to do more type thoughts I decided we really were ready to mark the cut for the canopy split. More protective film splitting, masking and taping. | 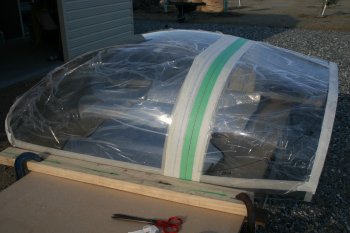 |
| Then it is the same deal on the under side. | 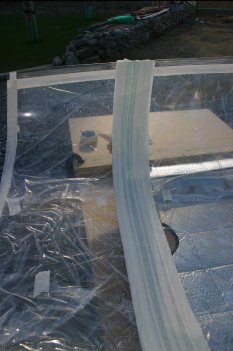 |
| The gap between the green masking tape is the cut line and is eyeballed to be roughly a cutting disk width. | 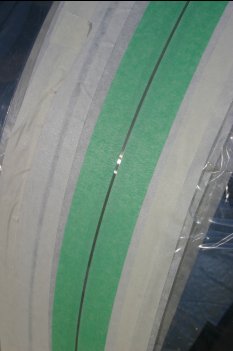 |
| Now at this point we could have continued and made the 3rd cut for the day - the canopy split, but the temperature was cooling down quickly and it was past 6pm (our pseudo cut off for 'big' decisions). Therefore we decided discretion was the best option and we will sleep on it and do it tomorrow if the weather is good. All in all a very good day - canopy split is another big milestone and it is now close. Still lots to do on the project but I think light is beginning to appear at the end of the process. Electrics / avionics is the BIG piece left, but lots of other stuff to do also. | |
Thu 03 November 2005 | |
| Then with the rain stopped and the sun out the canopy cut was back on the agenda. After 30 mins or so it was beginning to feel warm to touch again. | 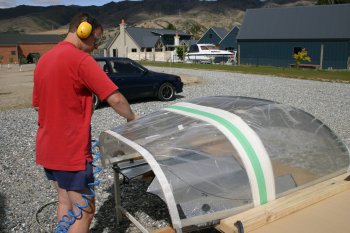 |
| I decided to go with the cut the two ends and then go back for the middle. | 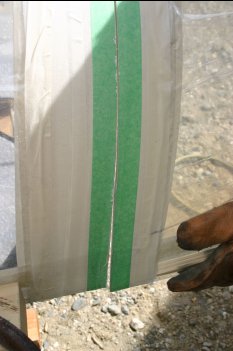 |
| The side blocks and gaffer tape held everything and Dad supported it around where I was cutting. | 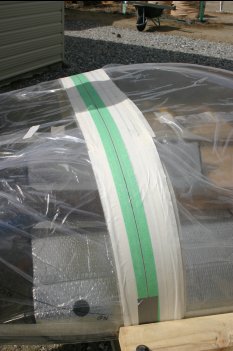 |
| The result - no cracks - some edging done and then tried on the fuselage. | 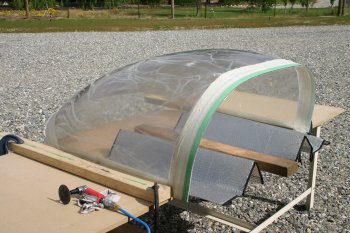 |
| The front looks fine (maybe a little generous). The rear window is tight. | 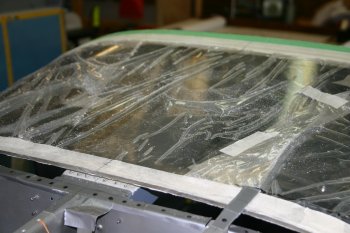 |
| This is part of the problem - the rear window 'dips' about 1/4" between the front and back edges, where as the fuselage is about 1/16" maximum. Our next step was to trim the 'moulding' grips on the sides which allowed the rear window to become significantly more flexible. By then the temps were dropping so we called it a day and will re-visit when possible. The weather isn't looking so good for the next few days. All in all a big milestone today - canopy split - I would say I'm currently 75% happy with it, in a perfect world it should probably have been 3/16" further forward to balance the 'spare' material on the front / aft sections. But I think it will be fine - we will see. | 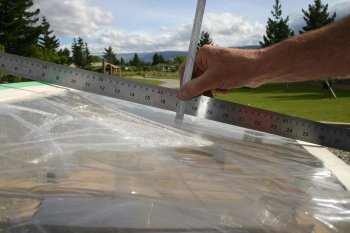 |
Fri 04 November 2005 | |
| The weather was poor (cool and windy) so some thinking about the rear window, but no actual trimming / work. | 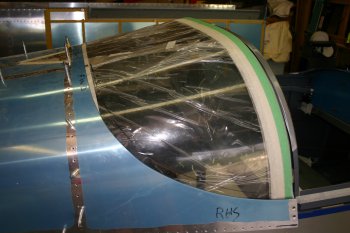 |
Sat 05 November 2005 | |
| The morning was cool and windy, but the temps went up well this afternoon so it was back to canopy work. I re-jigged the bench to be able to hold both 'halves'. | 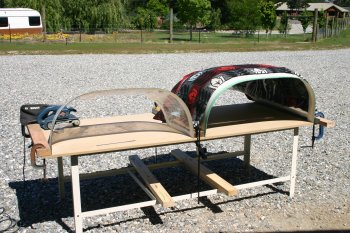 |
| Knelling at the PlexiGlass gods.... The belt sander was used to get a straight edge for the forward line on the rear window. | 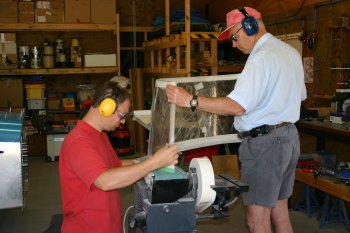 |
| The rear was trimmed slightly and the corners trimmed to allow the window to sit properly against the skin. | 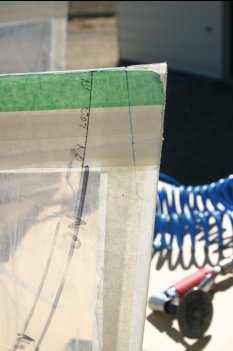 |
| I also pilot drilled the 2 1/2" spacing around the edge of the rear skin. I went with #40's to start with and we will probably go straight through skin and plexi in one go with a plexi-drill bit. Dad completed some trimming and shaping the rear baggage bulkhead and the J stiffeners that run along the top of the skin. | 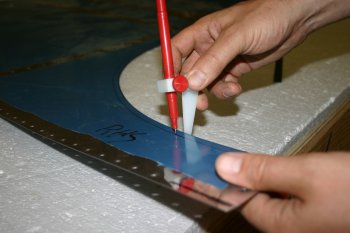 |
Sun 06 November 2005 | |
| One of our concerns is the amount of 'curve' in the upper rear section of the window. If the front and back locations are pulled down everything looks OK, however if we can remove any of the pressure it would be good. Our guess is the plexi will relax over time in the sun, but that isn't going to help in the sort term. | 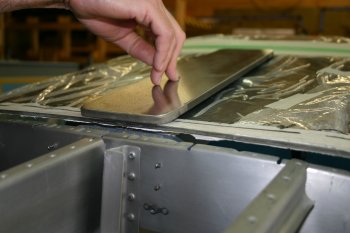 |
| I removed more of the protective plastic and re-masked closer to the skin line ready for marking. | 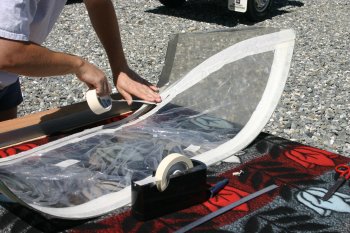 |
| Then with the skin on and window in we remarked the skin line. | 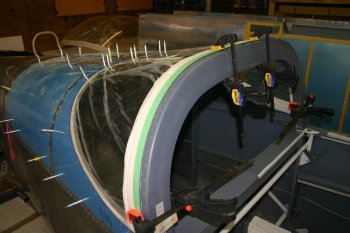 |
| Over lunch we let everything heat up and kept some pressure on the areas we wanted to 'flatten'. Probably no different, but doesn't hurt and makes us feel slightly better..... | 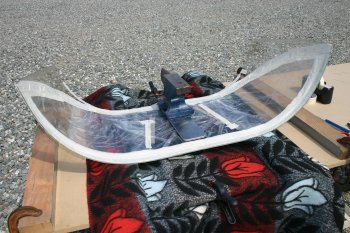 |
| Then marked a line 3/4" back from the skin line. Slightly larger than 'plans' but I would rather keep a bit of extra edge distance and material at this point. Not easy to mark, and harder than the main canopy split to cut. Very complex / compunded curves, trying to get it smooth and even was hard. The belt sander worked well again for cleaning up / smoothing the edge and then the funny plastics scraper to the 90 degree corners off. Quite a bit of work, but came out good. | 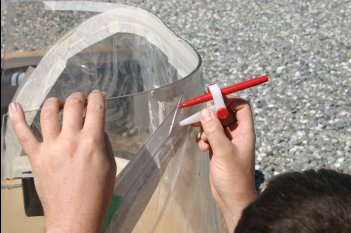 |
| The trimmed window back in the fuselage. All looks good and we marked two reference locations at the centre rear location. Things were starting to cool so we decided to stop before any drilling - tomorrow is looking good weather wise. No point in pushing our luck. | 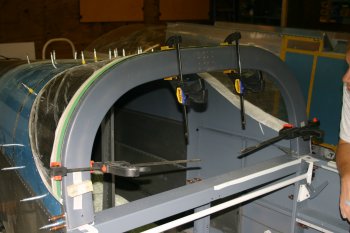 |
Mon 07 November 2005 | |
| I started by 'smoothing' the rivets on the outer of the roll bar. Most were pretty good, just a few pop-rivets that didn't go down properly. The scotchbrite wheel soon rectified the problems. I would advise others to make the roll bar countersinking slightly generous. This will prevent any rubbing on the window plexi and the rivet heads. | 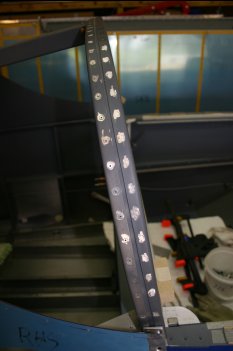 |
| To assist with keeping everything tight and preventing movement I drilled and pulled the pop-rivets on the angle brackets between the roll bar and C chanel. | 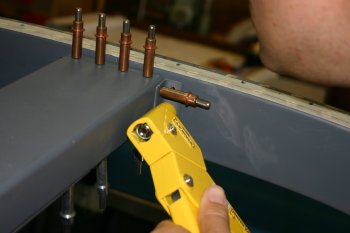 |
| Then it was back to the rear window. An almost perfect day, warm, sunny and very calm. The shed was getting up to about 28C and outside in the sun I would estimate the plexi was over 30C. All the prep yesterday meant the first step was to install / position the window and then drill the rear locations. | 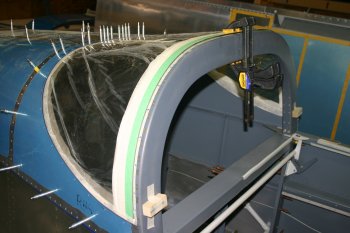 |
| As we didn't have a 'small (less than #30)' plexibit we couldn't drill and cleco the forward locations. Therefore we worked around the rear skin locations with a 1/8" plexi drill and clamped the forward edge. | 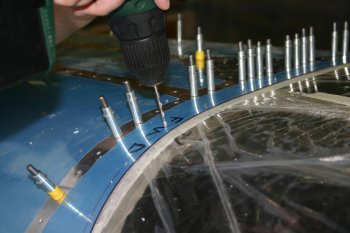 |
| This was then removed for carefull de-burring and clean up. | 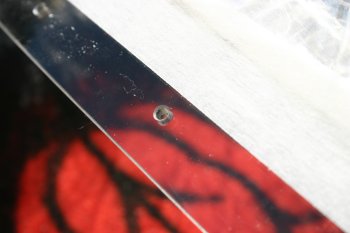 |
| The window was then put back onto the fuselage, the front locations marked and then removed for drilling to 1/8". This meant the locations were then clear to use a normal #36 drill for the rollbar drilling ready for tapping for #6 screws. Everything seems to be pulliing down well and the forward edge will only need a small amount of trimming / shaping. | 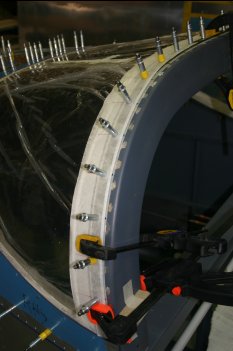 |
Tue 08 November 2005 | |
| Mean while I started making the spacer washer for the rear window. This will provide the inside part of the AL / plexi-glass / AL sandwich | 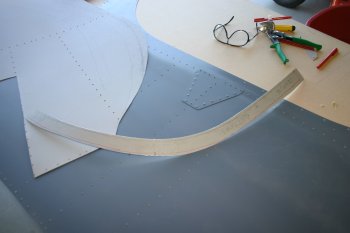 |
| Then with the temps getting warm again, I used the cut-off wheel to remove the side mouldings on the forward canopy. Interestingly the LHS has significantly less 'spare' material than the right. I don't think it will be an issue but I'm glad we didn't get over ambitious. | 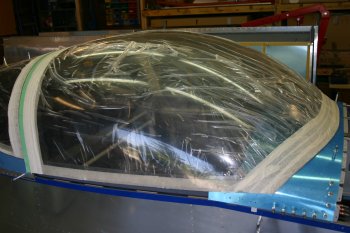 |
| After remarking the front edge to a 'second cut' we let the sun warm everything and used first the cut-off wheel for a rough cut. | 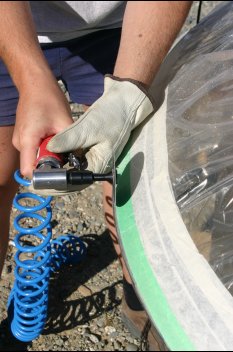 |
| and then the hand held belt sander to get an accurate / smooth line. | 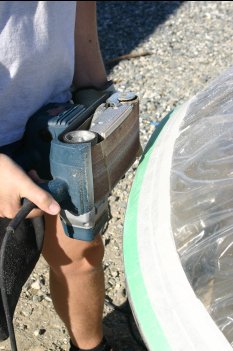 |
| This worked really well, you can see here we have left the edge of the plexi square to the skin, not the plexi surface. This seems to provide a better shape to the canopy foredeck. Our current thinking is to use a bead of fibreglass flox along the front and then blend the shape for a nice smooth finish. | 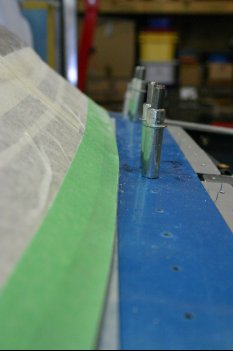 |
Wed 09 November 2005 | |
| Today however was good and warm (30C in the shed, warmer outside - not bad for the first week in Nov), so I continued with the backing strips for the rear window. | 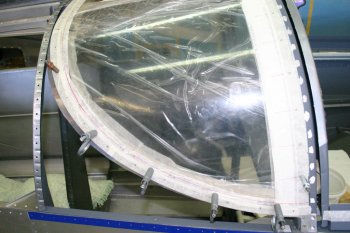 |
| The shape of the strips isn't quite as obvious as first apears. The 1/8" thickness of the plexi-glass makes the shape harder. I ended up making an 'oversize' strip which I then trimmed progressively back. | 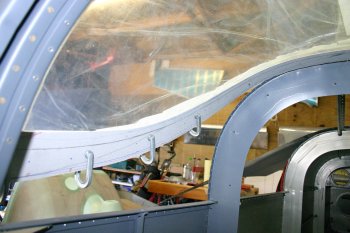 |
| This is the RHS after drilling (I used #36 again). | 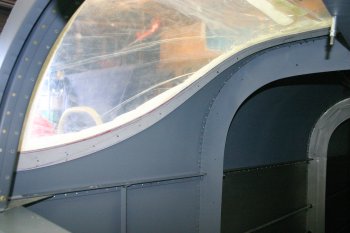 |
| Then using washers / spacers I roughed a 'upper' edge for trimming. | 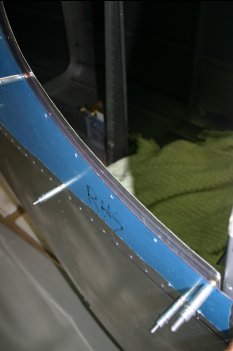 |
| The LHS was easier with a template available. | 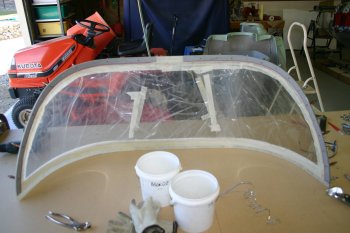 |
| After lots of trimming, sanding, scotchbriting both sides were completed and ready for priming / spraying. You can see the difference in shape between the skin edge and spreader. | 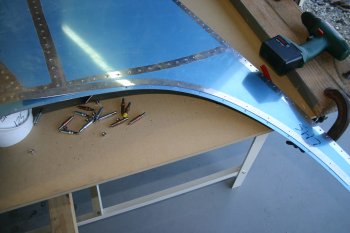 |
Sun 20 November 2005 | |
| First up we spent some time working out the shape / lines for the front canopy. The weather isn't great so no trimming / real work on it, and the rest of the week is looking cool and windy also. | 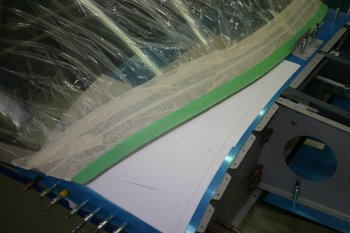 |
| We were struggling a bit for what to do next, but decided that some experimenting / learning about fibre glass and how to use it would be good. | 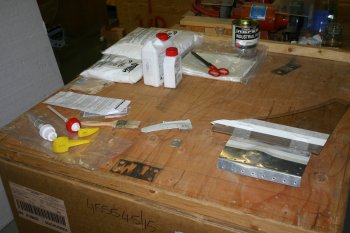 |
| Therefore we made some 'sample projects' some with plexi-glass, some fibre-glass / AL parts | 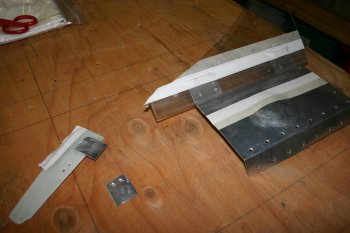 |
| We are sticking with the West Epoxy system, 1L of resin, a large bag of micro-balloons, a small one of silca plus some 6oz cloth. The pumps fit straight onto the bottles - this makes the 5:1 measuring so easy. | 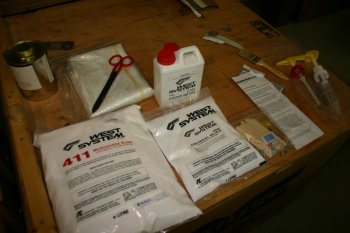 |
| We started with some silica filling and then cloth and top surfaces with micro-balloons. | 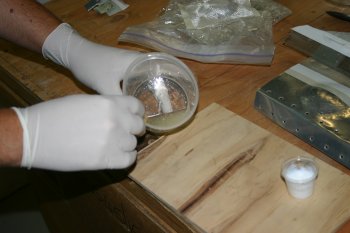 |
| The net result of the experiment - we will leave it to set and look at the results tomorrow. | 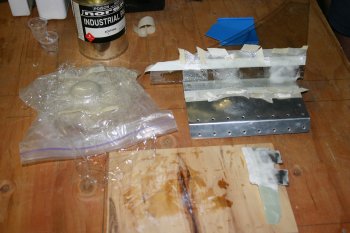 |
Sun 27 November 2005 | |
| After lunch the temps were getting back to 26C, so we returned to the canopy. We are struggling somewhat working out the 'best' lines for the front outboard corners. | 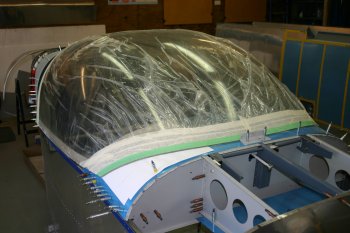 |
| One option is for a 'corner' which I've seen others have but we decided to try and get something a little more rounded. | 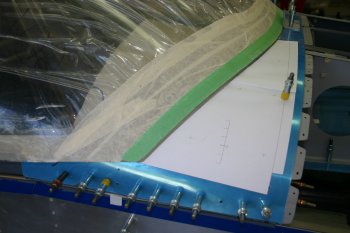 |
| Another little trim - this is a very iterative process - trim / sand / edge - test fit - repeat..... | 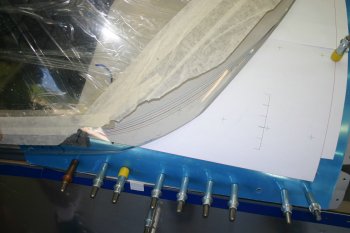 |
| We also trimmed the canopy sides again - getting closer to the side rail locations. | 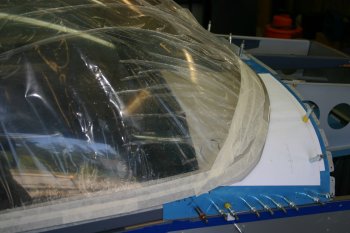 |
| After initial trimming with the cut-off wheel, we've found the handheld belt sander works very well for shaping. It is quite heavy after a while but provides a smooth finish and just the edges need running down with a piece of sandpaper. The next stage is going to be clamping the canopy to its frame and trimming the side rails to fit. Then the front can be have the final fitting. | 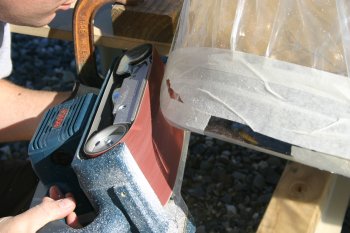 |
Mon 28 November 2005 | |
| With the temps getting back toward 28C we returned to the front canopy. First up was marking of the side rail locations. | 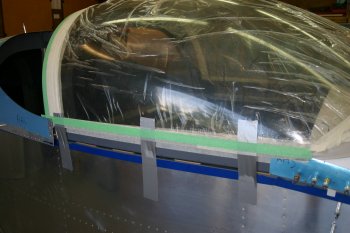 |
| Then lots of trimming and sanding, fitting, re-testing then more of the above..... Also removed the forward skin which helps the front drop a little more. More trimming at the front (and probably sides) will be needed but the rear parts needs fixing first. | 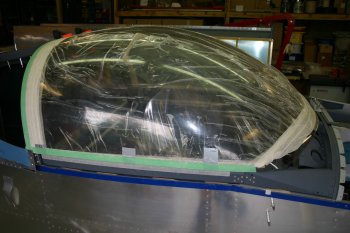 |
| This was our first take at pulling the rear ribs up to the canopy plexi - not bad - with a 5/16" ish gap between the two rear ribs - a little more than we want but not the end of the world. | 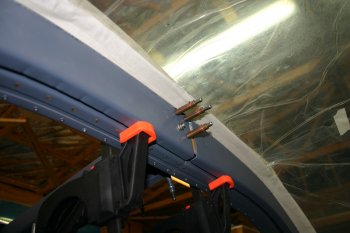 |
Tue 29 November 2005 | |
| Then returning to the canopy, this was the view of the upper rear gap between the plexi and rear ribs. | 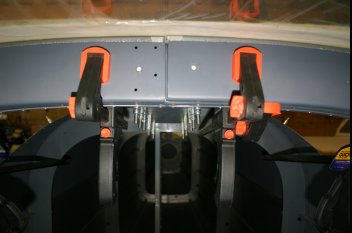 |
| At this point I decided it would be easier to work / review from within the canopy.... not a great photo! | 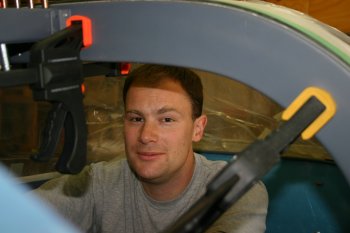 |
| After various discussions, clamping and alignments we made a new temporary C-704 plate. At the moment only #41 locations on the LHS rib, but that can be opened up later. | 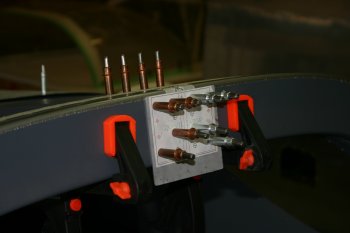 |
| Also smoothed the forward tabs in preparation for future trimming of the plexi. | 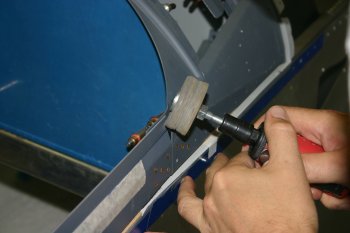 |
| Finishing up we re-marked the line for the forward canopy mounts. The current plan is to drill the canopy, mark the frame and then drill / fill in the gaps. | 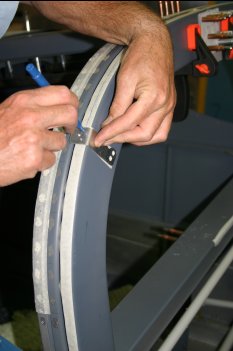 |
Sat 03 December 2005 | |
| I spent the first part of the day removing and re-doing the protective masking on the rear of the forward canopy. | 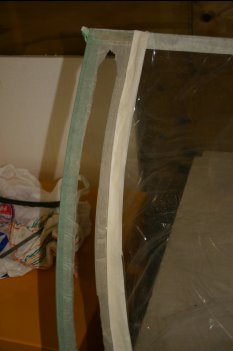 |
| Then we drilled two locations on the canopy. | 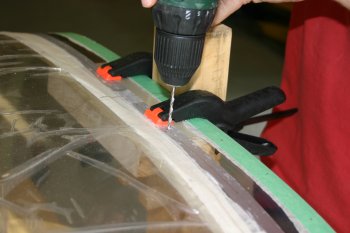 |
| This was then through drilled onto the canopy ribs. This fixes the rear location of the canopy and the front is against a stop. | 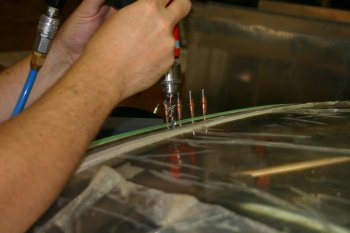 |
| The main remaining problem for the forward canopy fitting is the transition between the side ribs and the forward canopy frame. For the rest of the afternoon we trimmed / fitted / refitted and trimmed a bit more, slow steady progress. | 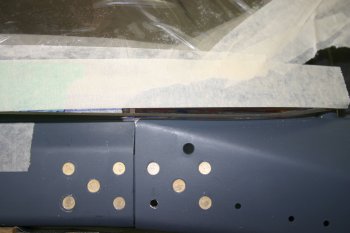 |
| The next stage is to try re-fitting the forward canopy skin. This has some 'cut-outs' / ears for the canopy - but are woefully small. I re-sized as shown which will hopefully provide more of a route for the plexi. | 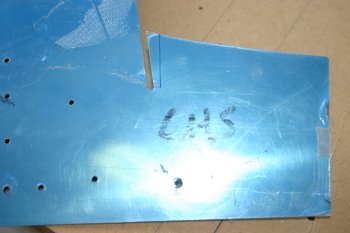 |
Sun 04 December 2005 | |
| Continuing with the canopy we trimmed some more of the front corners. | 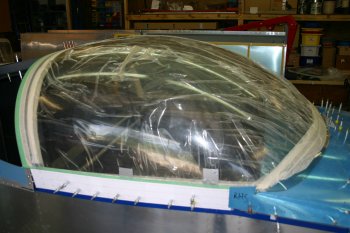 |
| The ear relief is still a problem and we decided to enlarge the opening a little. | 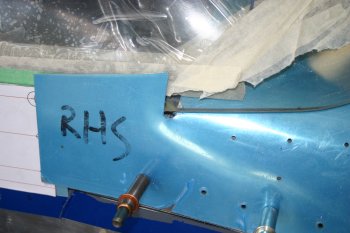 |
| Before fixing on a shape we completed the canopy skin drilling. There weren't many locations but some of the outboard rivets hadn't been match drilled. | 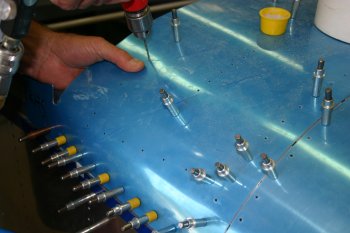 |
| Then we opened a 1/2" whole forward of the existing gap. | 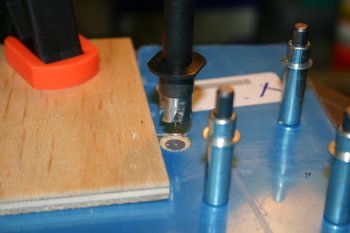 |
Mon 05 December 2005 | |
| Another day - more canopy sanding / shaping. It seems to take forever - and we aren't even sure where we are heading! | 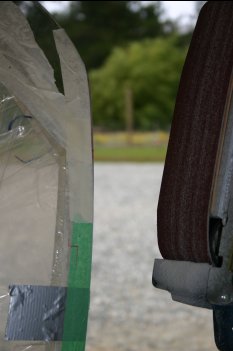 |
| The front corners seem very difficult to get symmetrical. Some CAD templates help but the thickness of the plexi and the strange angles make it very difficult. | 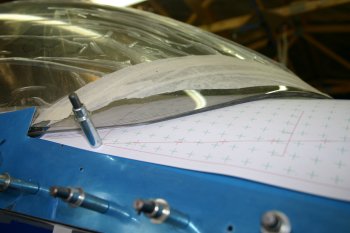 |
| More fitting / trimming / refitting.... it is starting to get there. | 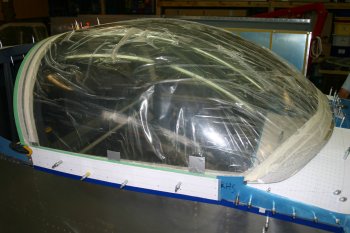 |
| One punch item was the canopy side / front tabs - just gentle squeezing, plus a bit of scotch brite wheel. | 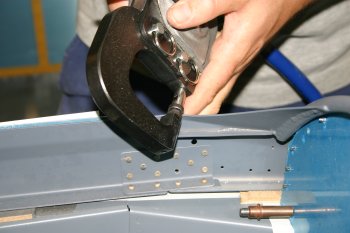 |
| The skin ear / canopy plexi still needs to be enlarged. We thought about this for a while as it might weaken the cockpit dash but in the end the plexi rubbing / sitting on a single edge of AL just wasn't an option. | 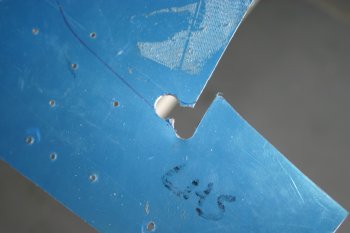 |
| This was the revised relief - better but still probably needs some additional work. | 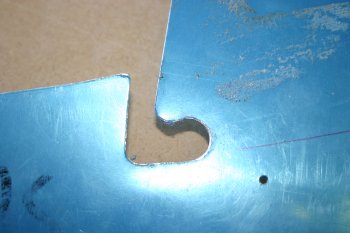 |
| The temp dropped reasonable quickly today so rather than handling the plexi lots we sorted the side skirts / side rail fixings. The side skins also work well holding the plexi in shape. | 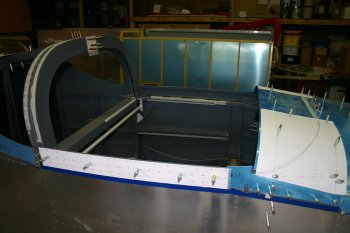 |
| One last fitting for the day - more trimming is still needed..... | 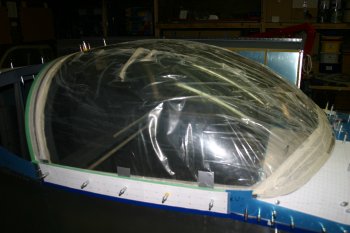 |
| This is the main area (and has been for a while), just slow and steady progress. | 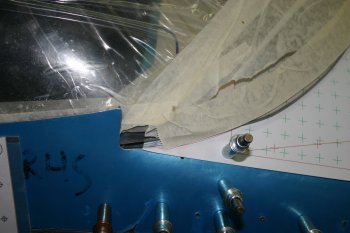 |
Wed 07 December 2005 | |
| Today was warm first thing. By "smoko" (morning tea) the temps were already in the mid 20's (degree C) and climbing. We therefore set to work on the canopy again. First task was some shaping / trimming of the front corners. We also removed about 1/16" from the sides to help it seat properly on the rails. Everything on the plexi has to be de-burred / edged before handling / moved to help reduce the risks of cracking - not a problem just slows the process a little. The band sander was working hard - but working well. | 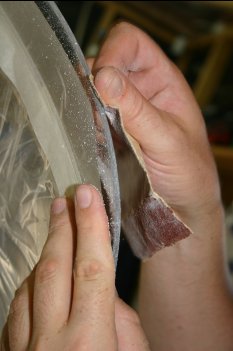 |
| Also decided the ear cut-outs needed to be bigger. Another Rotor-broach application - this tool in particular continues to impress - it is a bit $$ but you can see the 'half moon' piece that is removed without issue - very clever. Then it was cleanup / deburring as usual. | 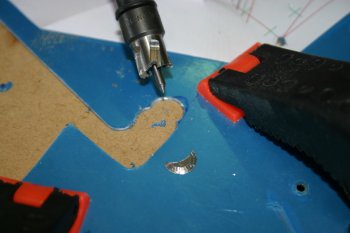 |
| Then it was taping the canopy down tight and rechecking everything. | 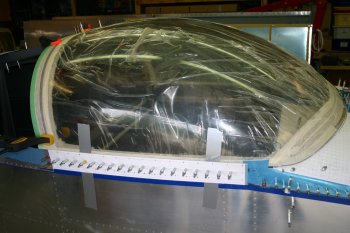 |
| The front profile looks 'OK' - it is very difficult to get it symmetrical (lots of funny compound curves in different directions) but good enough for the moment. | 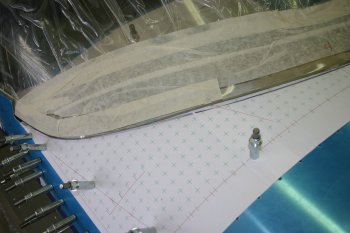 |
| The sides were gaffer taped and then the sideskins were cleco'd on to help hold everything tight. | 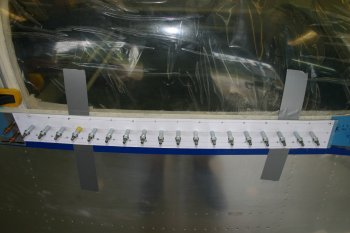 |
| The back was clamped all over the place, both canopy to ribs, canopy to roll bar, roll bar to ribs. Also side rails to longerons to hold everything in a 'set place'. | 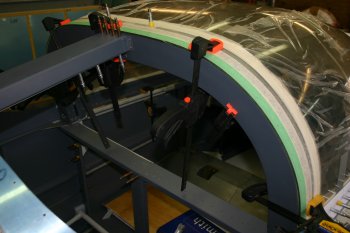 |
| Even the front has a temporary clamp. | 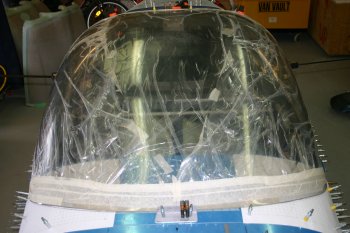 |
| Then it was commitment time - we drilled 4 locations trough the side skirts (as a template) through the plexi and just marked to the side rails. | 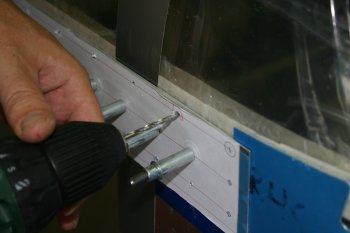 |
| Then the rear ribs were marked for all the screw locations. | 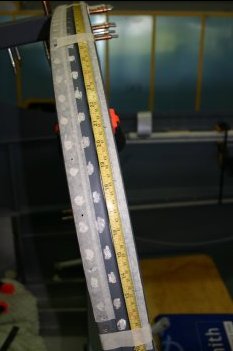 |
| This was then transferred through the plexi onto the '3M scotch tape' which is clear enough to be able to make out the marks whilst still protecting the plexi. | 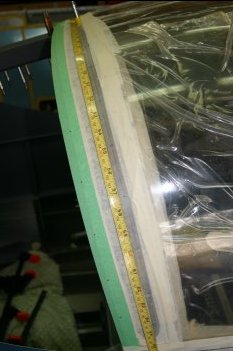 |
| Then the rear locations were drilled off the fuselage - this means the plexi drill can go through the whole way and not have to touch the AL. | 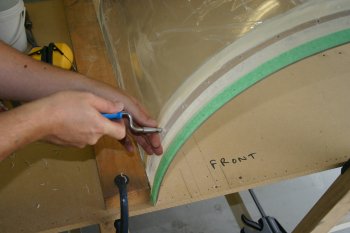 |
| Then with everything mounted back up and clamped down, the rear rib locations were drilled with a #31 drill - this goes through the 1/8" plexi hole cleanly and provides a silver cleco location. We started in the center and worked both sides out and down in turn. | 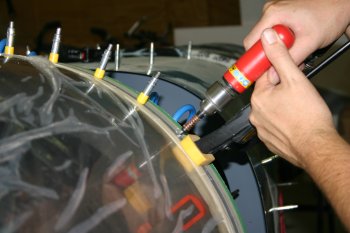 |
| The side rails were next - same principle - side skin for template locations, through the plexi, mark the side rail only. | 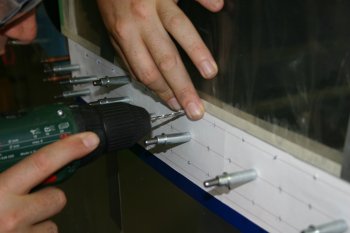 |
| Then the side rails could be drilled out with the canopy off, we also finished drilling the canopy locations. Then lots of deburring / smoothing everything - particularly important for the plexi work. All in all a good day, so far the canopy seems to be progressing in the right direction. Slow progress, and I know we are being (overly?) cautious but I would rather take our time on this bit. It is another example of where having an experienced voice would be helpful - you USA guys with dozens of builders at an airport really are very fortunate. | 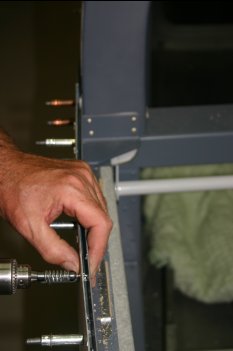 |
Fri 09 December 2005 | |
| Then with the temps coming up nicely (28C) we returned to the canopy. | 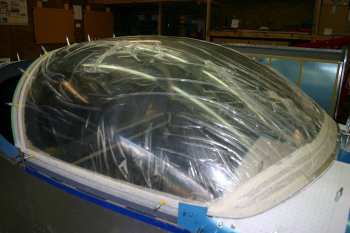 |
| Only 8 extra locations to deal with - 2 per side rail and 2 lower rib points. | 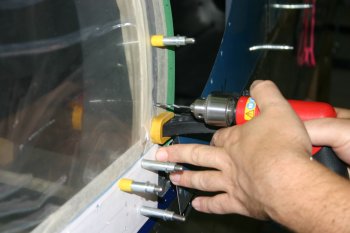 |
| With all the canopy locations drilled next it is countersinking for the skin dimples / #6 screws. The instructions say use the 1/8" plexi bit and then the #30 piloted countersink - after a bit of thought I had some concerns as a number #30 is 0.003" bigger than 1/8" - therefore forcing the pilot into the plexi really doesn't sound like a good plan. | 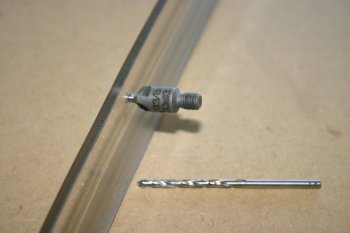 |
| After some testing - this was proved correct. I drilled 8x 1/8" locations on a piece of scrap plexi, 2 had cracks after using the #30 piloted countersink. | 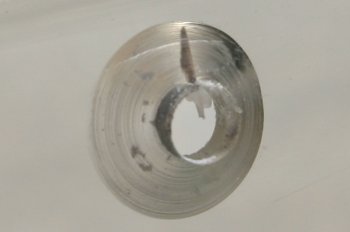 |
| After further testing, the best solution we could find was to use a 6 fluted countersink to help start the process and then the piloted #40 countersink with the small microstop. Today we worked just around the rear of the rear canopy section. | 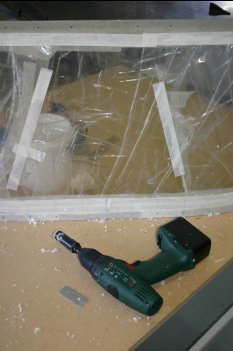 |
| The 5/32" plexi drill was the final step plus deburring countersink afterwards. | 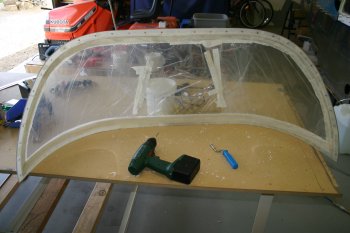 |
Sat 10 December 2005 | |
| Late start with other commitments. Temps were OK to start with so I worked along the countersinking of the side rails. Slow careful work. | 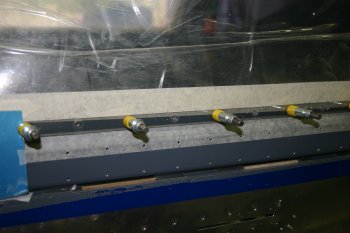 |
Sun 11 December 2005 | |
| Then temps coming up - I continued the countersink of the side rails. | 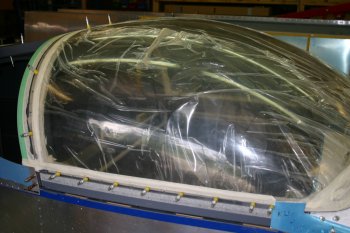 |
| Next was all the rear canopy locations. These are very visible countersinks with just the screw head to fill them, so I took my time. | 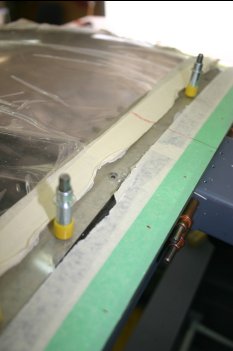 |
Mon 12 December 2005 | |
| The temps were up early today so continuing with the canopy work we started on the rear lugs. After lots of measuring and checking I piloted the lower 2 locations on the frame, The LHS for some reason was about 1/16" inboard of the drawing locations. | 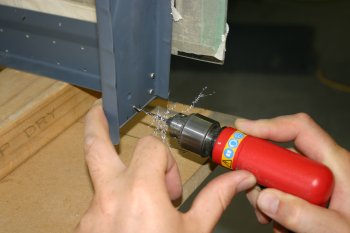 |
| The lugs were drilled on the pillar drill and mounted. Basically we got it right - the only problem was the RHS longeron plate needed a bit of extra trimming to allow the lug to drop in vertically. This was a big relief - I'm not sure why, but I've been quite concerned about getting these right, but so far so good. | 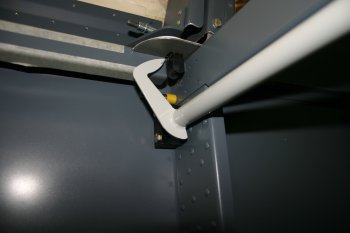 |
| Dad used the air file to remove the offending problem area - a bit of duct tape was used to protect the top coat already there. | 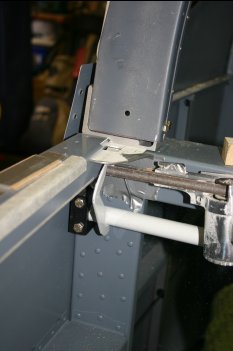 |
| Whilst the canopy was off its frame I opened all the holes to 5/32" and sorted the forward two dimple countersinks. | 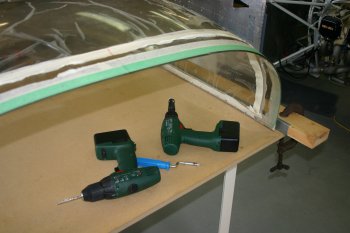 |
| This is the net result, the #6 screws lay nice and flush with the plexi surface. I think this is the forward canopy fully drilled and so far no cracks! Still some shaping / edge finishing but the base of the canopy work I think is complete. Obviously the fibreglass work is still todo which will be quite a few hours! | 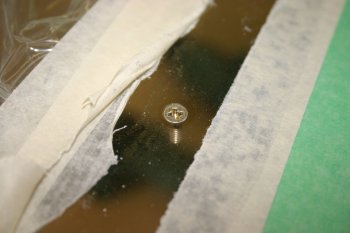 |
Tue 13 December 2005 | |
| The canopy frame rear ribs have a tie plate that I re-ordered from VANs. The stock rivet layout clashes with the rib tooling holes so I re-did the layout. I'm also considering using the current front plate as a cover / support for the V shaped gap between the ribs. | 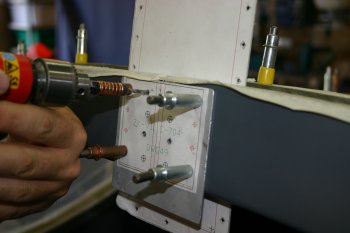 |
| Weather here was about as good as you can get, 25C by mid morning, light 8 knot breeze, clear skies and sunshine. The shed warmed up quickly so we returned to the canopy work. First up was the final countersinking on the rear window front edge. Again nice and slow, the #40 piloted bit worked well into the #36 locations. | 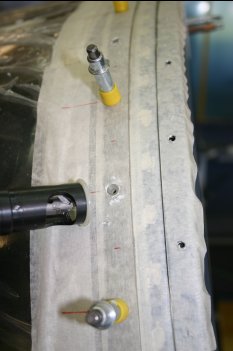 |
| Next was finishing work on the edges of the plexi. Up to this point we have just deburred and used a rough 100 grit finish, now with most of the shaping complete it is time to refine / polish them. I started on the rear edge of the rear window whilst Dad did the sides of the forward canopy. After trying 100 / 240 grit paper by hand, I moved to the air powered palm sander. This worked well, 800 grit was finished by hand and a nice smooth, nick / scratch free edge is the result. | 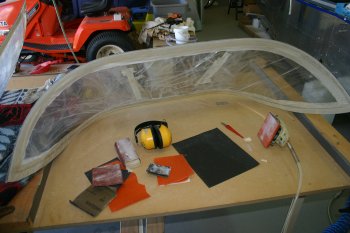 |
| We want to get the forward edge of the rear window really straight for the canopy join. The clecos alone weren't really holding the window down tight enough so we tapped just 6 locations on the roll bar. | 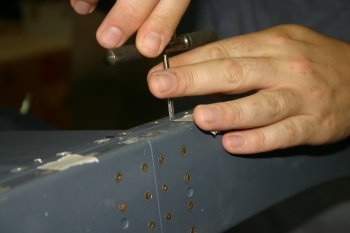 |
| After tightening the window up 'loosely' we remarked a set distance back and then used the normal green tape marking technique. | 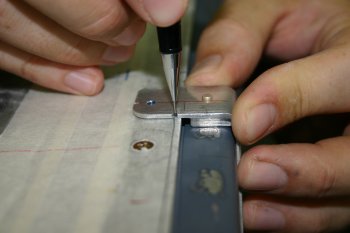 |
| The main band sander plus lots of palm sander work got us close to the line and we progressively polished the edge via 120, 240, 400 and 800 wet and dry. | 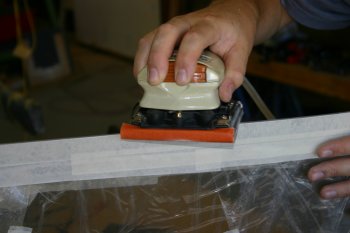 |
| Difficult to see from the photo but the result is pretty good. I still might get some fine grit / polishing paste, but functionally this is fine. | 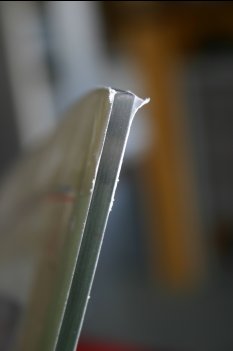 |
| Final step for the day was remounting the rear window and prepping for the forward canopy. Hopefully if the weather holds for a couple of days we can finish the cutting / shaping / edging of all the canopy components. | 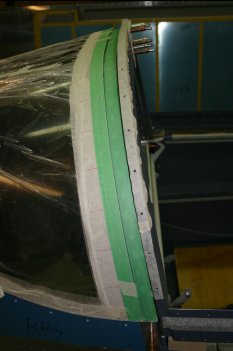 |
Wed 14 December 2005 | |
| I wanted to continue with the canopy frame work but needed to get everything tightly aligned. I therefore decided to use 6 #6 screws on the rear rib lightly. This enabled the tie plate to be drilled out to #30s, including the outboard locations. | 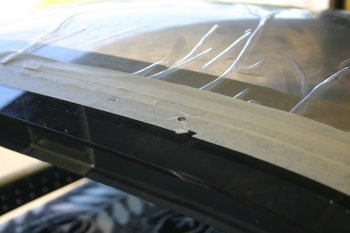 |
| With everything locked, I also drilled the canopy handle mounting block and tidied / edged the forward plate. I think we will probably keep it, it provides a better aesthetic finish and beefs up the center structure as a side benefit. | 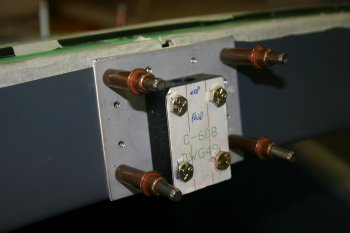 |
| Also drilled and tapped the two strut mounting blocks. I'm not sure how / if we will use these yet but didn't take long anyhow. | 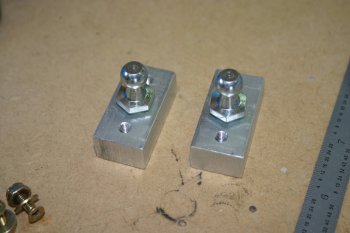 |
| The temps were in the low 30s (C) and continuing with the forward canopy. Using the palm sander I bevelled the front edge - this should help smooth the fibreglass filling / profiling. | 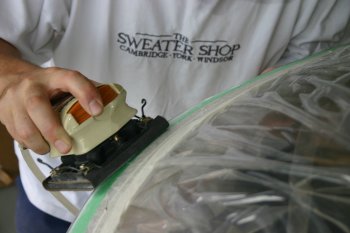 |
| The end of the afternoon was spent reviewing the canopy lift struts and canopy alignment / rear edge location. The standard strut configuration seems to result is a 'small' opening, one suggestion from other local builders is to switch the pivot points and use a longer / stronger strut. This is also meant to help reduce the final '2" inch' drop as the canopy closes. No decisions made yet, just researching and testing mock-up solutions. | 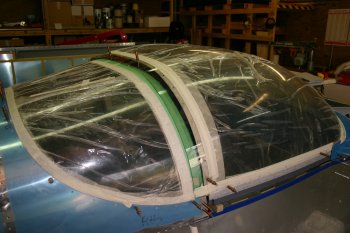 |
| This is the rear edge - just under an 1" to remove. We will probably wait until the forward skins are complete and the plexi is mounted on the frame before cutting. It should be good and solid and make working with it simpler. | 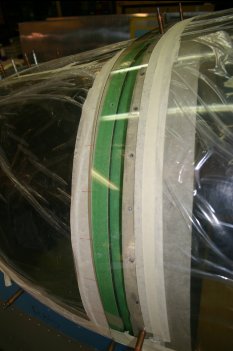 |
Thu 15 December 2005 | |
| We continued with the canopy struts. After much consideration we have decided to go with stock VANs design and see what the canopy lift / support is like. It will be fairly easy IF we want to do something like this long term. For reference - the struts are 30" extended and about 19" compressed, the idea is it provides more support during the last 2" of closing. On the down side it is slightly heavier and 'non-stock'. |  |
| The alignment, tapping and drilling of the supports took the rest of the afternoon. |  |
Fri 16 December 2005 | |
| The standard gas struts from VANs. The instructions say a critical distance of 9 11/16" - the struts only go to 9 1/2" minimum - not sure why / what is the best solution, but I don't want to stress the canopy / mounting locations too much so I'll probably just work with 9 1/2". | 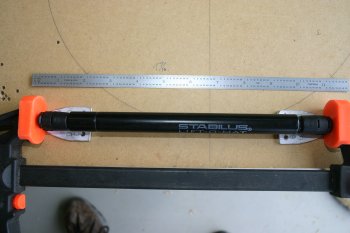 |
| Sorted the VANs configuration mounts on the side rails - no big problems, just checking the measurements and drilling. Getting the nuts on the back, under the longeron cover is a PITA but possible - just take your time. | 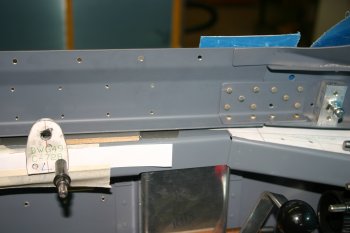 |
| I started to re-cleco the canopy frame structure back together using as many clecos as I could find. It is amazing how much things 'move' as everything is tightened up with the increasing number of clecos. Then the skin was matchdrilled to #40s and aft edge to #30s. | 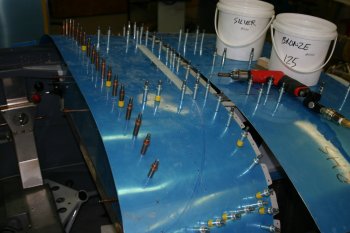 |
| And here is the VANs version of the lift struts in action. | 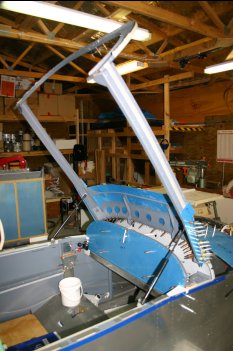 |
| you can see the struts are much smaller (lighter). | 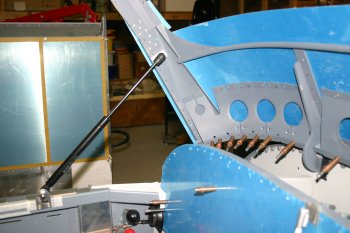 |
| This however is the problem, as the canopy comes down, at this point the struts are going 'over center', from here down to the fully down position there is ZERO support, therefore it is down to the pilot to 'cushion' the drop. | 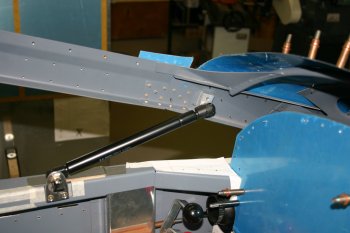 |
| This shows the size of the drop - significant. Even without the canopy bubble on, it has to be carefully lowered. | 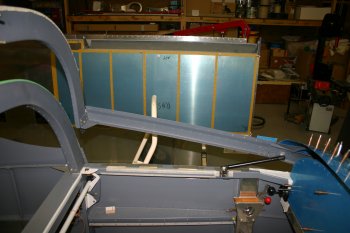 |
| To be honest, in review - I don't like it much! The current plan however is to continue as per VANs design and wait until the canopy frame / plexi is all together and forward skin is riveted onto the fuselage (which will provide more support / less flexing) and then review the options for struts. I will be putting stiffener plates in the forward mounting locations for the alternative configuration (see yesterday) and then it should be a fairly simple change if we decide to go that way (probable). | 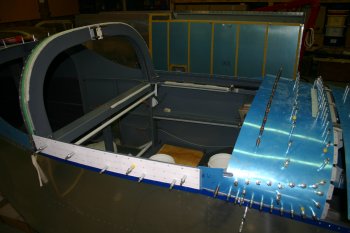 |
| Got tired of the canopy lugs pointing the in the 'wrong' direction so drilled the two upper locations to #40. I can cheat the alignment slightly later if needed. | 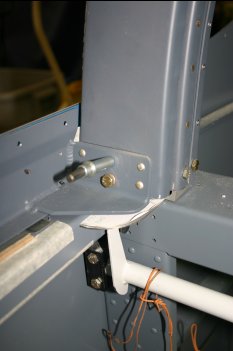 |
| Also to assist with the canopy frame testing I re-cleco'd the front skin, but 'one hole forward' to prevent the two skins clashing. Tomorrow is deburring / countersinking / dimpling the canopy frame - boring but need to be done. | 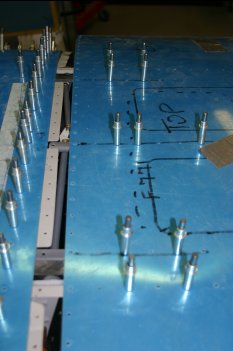 |
Sat 17 December 2005 | |
| Today was spent finishing the canopy frame drilling. First up was the rear join plate. | 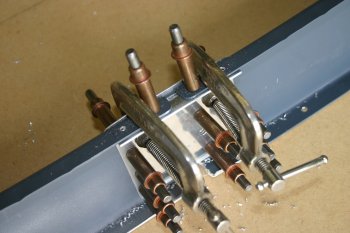 |
| I then moved onto the side rails. These locations need to be countersunk for the #40 dimples on the side skins. The mistake I made was the microstop was setup for #6 dimples not #40 dimples. I focused on the bad 'chattering' of the countersink, rather than the wrong size! | 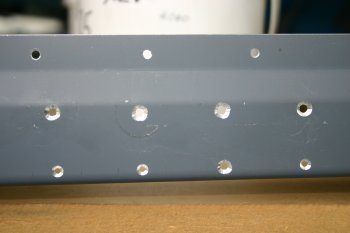 |
| After cursing and kicking myself for such a stupid mistake I continued with the others with a correct setting. After a bit of thought, I think the simplest recovery will be to use some fibreglass resin / silca mix on the 4 locations and redrill / rivet after setting. It is mainly cosmetic so I don't think it will be a big problem - just a stupid mistake. | 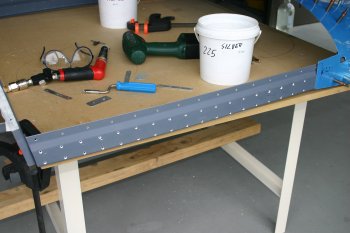 |
| Also sorted the AD4 rivets for the canopy frame / side rail tabs. | 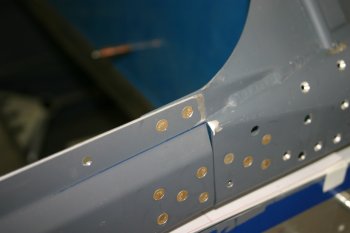 |
| The forward canopy skin needs trimming for the side rails - snips for the first cut. The upper lines will probably need trimming also - but I'll wait until everything is re-cleco'd up. | 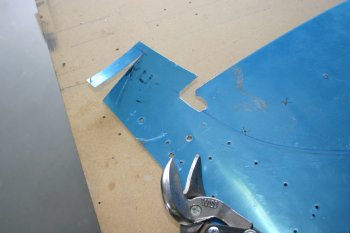 |
| Then it was skin prep work. The side skins and forward skin was deburred (both sides), dimpled and have a turn of the countersink. Repetitive process - but not hard. | 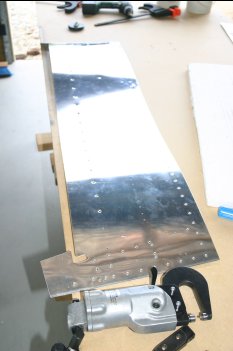 |
| The canopy skin also needed some C-frame work which Dad leant a hand with. | 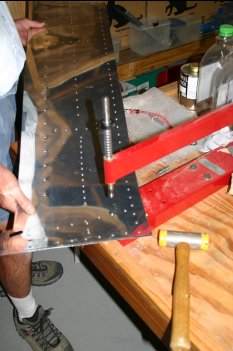 |
| The final drill / prep work was the canopy frame tube. I started using a microstopped piloted #30 countersink, but the holes generated were awful and I'm concerned will be too big for the CS4-4 pop-rivets - I just decided to stop for today and revisit tomorrow. | 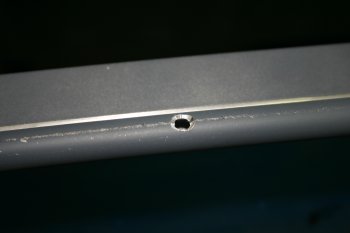 |
Sun 18 December 2005 | |
| Why is it after I have a problem - then I find the same information on Dan's site! Anyway, the dimpled canopy skin / countersinking the aft tube is a BAD idea. I 'flattened' the dimples as best I could and re-cleco'd the skin to the frame. Then countersinked through the whole structure for the flush blind rivets. | 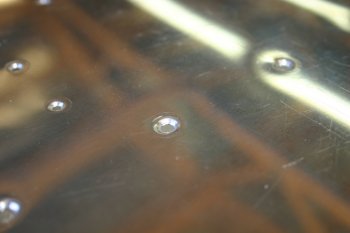 |
| The canopy forward skin lifts at the rear edge - I then realised there should be rivets here! The obvious option would have been to extend the two aft most AD4s through the skin, and now space for additional AD3s is a problem. | 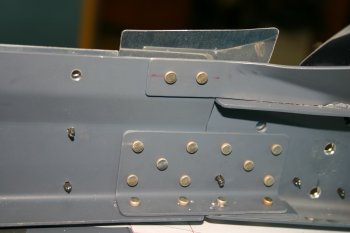 |
| This is the other side - you can see with the space we are working with. | 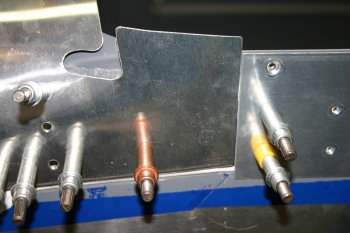 |
| I ended up going back and drilling the upper / rear rivet out, back drilled the skin, dimpled and re-countersunk the frame. | 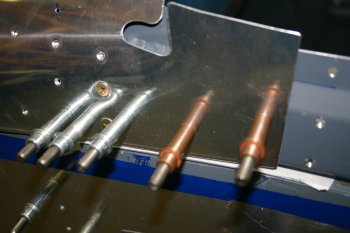 |
| Then it was prep for spraying, also spent some time and care masking the outer surfaces. | 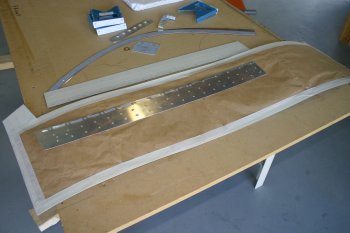 |
| Then it was the normal scuffing, cleaning and Allsol. | 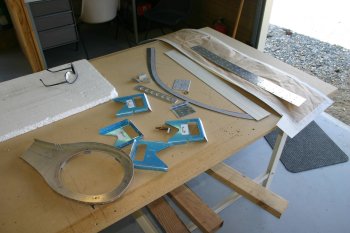 |
| Just as I ready, the wind came up so I adjourned for the day and helped Dad with other stuff. | 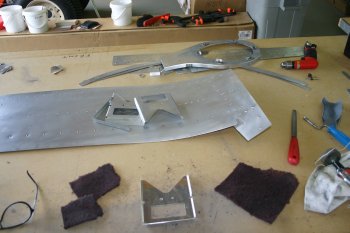 |
Mon 19 December 2005 | |
| Later start with some youngest education on the project first, then the wind dropped so we went into spraying mode.... De-oxidine etch and wash then wipe and dry in the sun. | 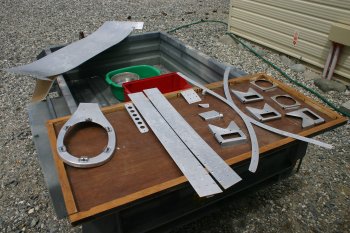 |
| Then priming and some top coat for the underside of the canopy forward skin. The primer work I'm reasonable happy with now, but the top-coat still need a little refining. Generally not enough paint which is good for weight but doesn't provide a smooth finish. | 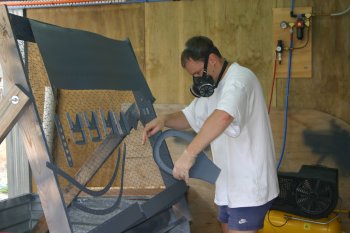 |
| The rear splice plate was riveted on. | 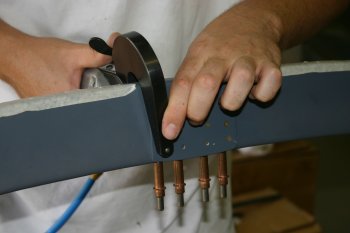 |
| However, the canopy frame didn't 'fit' as well as previously. It seems to be about 1/16" too wide at the lugs. Not a big issue and like a lot of the final fitting work for the canopy I'm going to finish putting the plexi onto the frame and fibreglass has been completed at the front. | 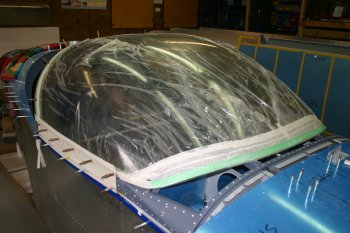 |
Tue 20 December 2005 | |
| The canopy frame needed a little primer touch up and then partial top-coating. This is for the areas that will become inaccessible after riveting the skin / stiffeners. | 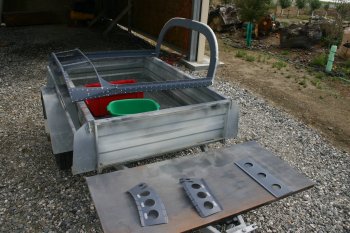 |
| The top coat went on much better today - more paint, less air pressure - not perfect but getting a smooth layer rather than a rough surface. | 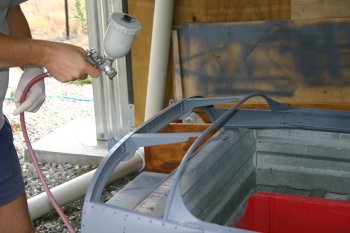 |
| Dad knocked up 4 spacers - 2x 1/8" and 2x 1/16". | 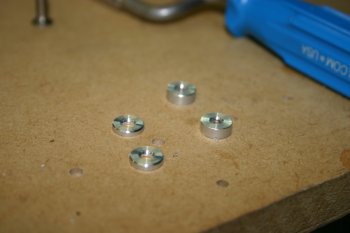 |
| These are used to provide support between the skin and the rear tube part of the frame. | 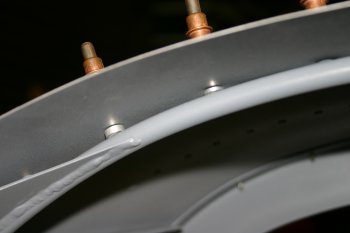 |
| Then it was riveting. We started at the front middle and worked evenly outward, also doing the aft pop rivets as we progressed. | 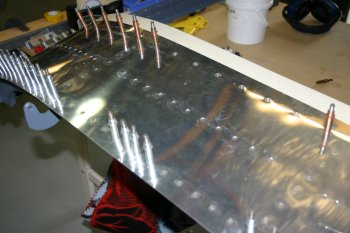 |
| We put the frame back on the fuselage and squeezed the skin aft most locations. | 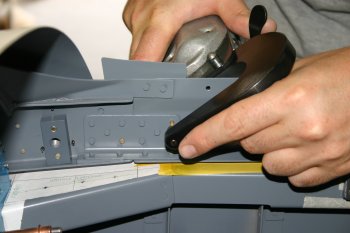 |
| The finished result - a few tricky rivets but first stage complete. Stiffeners cleco'd in and can be shot / bucked tomorrow first thing. | 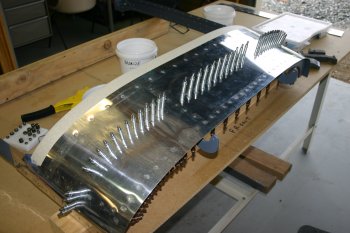 |
Wed 21 December 2005 | |
| I continued solo riveting / bucking this morning sorting the canopy braces. One or two tricky ones side locations which required a second attempt. | 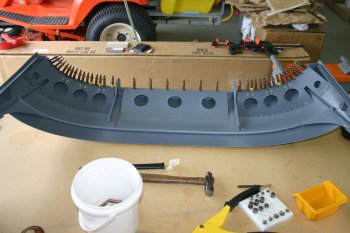 |
| Then back on the fuselage and plexi on with clecos. | 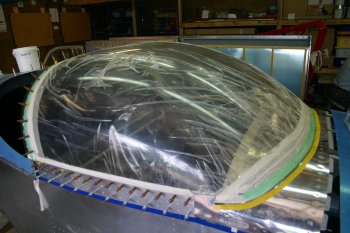 |
| This provided alignment and I marked the forward edge. This will be used to mark the edge for the black internal surface. Difficult to see from the photo, there is a small gap (1/16") around various parts of the forward edge - won't be a problem with the fibreglass but not ideal. | 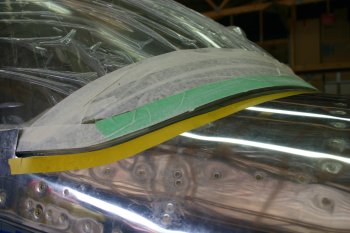 |
| Also put the VANs struts back in - one change from the drawing was the addition of a washer between the ball lug and the taped stock. Otherwise the stud would protrude into the frame. | 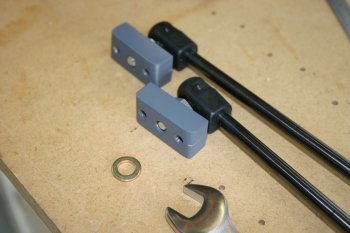 |
| A photo for the hell of it - with the canopy in the 'up' position. | 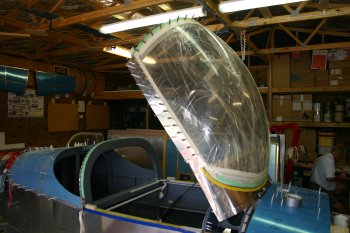 |
Sun 08 January 2006 | |
| Half day today with other domestic things first thing. With the temperatures back up in the high 20's we returned to the canopy. One observation was the rear edge of the canopy has moved about 3/16" forward - the only thing I can put this down to is the gas struts. However this does reinforce our plan to complete the canopy frame, sort the struts, fix the forward skin - THEN worry about trimming fore and aft edges. | 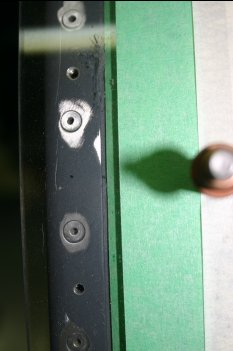 |
| The two remaining issues before we can rivet / top coat the canopy frame are: the lower forward edge of side skirts and the 'ears' on the forward skin. The side skirts are just cosmetic - easily fixed. | 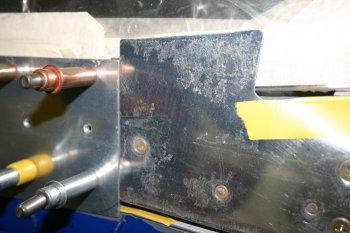 |
| The 'ears' are more of a challenge. In particular the LHS bends out at the top. | 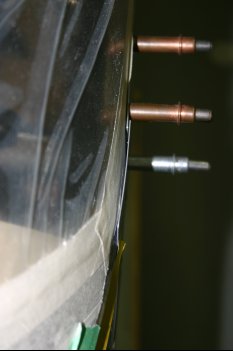 |
| The final decision was - remove the whole ear. The forward skin was cut just below where the plexi comes to, the whole area will be glassed in by the end. | 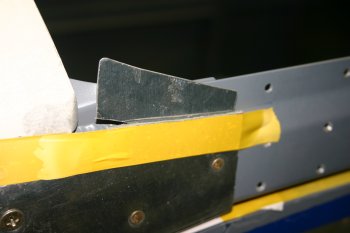 |
| With some flox mixed, I filled the problem countersinks on the RHS side skirt and bedded the skin onto it. Once the resin has cured I'll re-drill / countersink and then we can rivet it. | 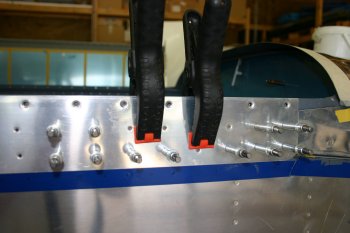 |
Mon 09 January 2006 | |
| To finish the evening, I completed the riveting of the side skirts. | 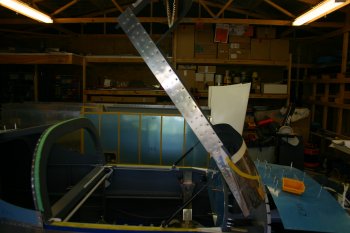 |
Tue 10 January 2006 | |
| With the weather improving and almost no wind I masked up the canopy frame with masking tape. | 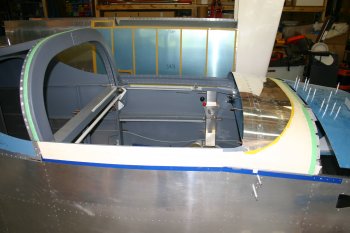 |
| We lightly scuffed the frame with 400 grit paper. | 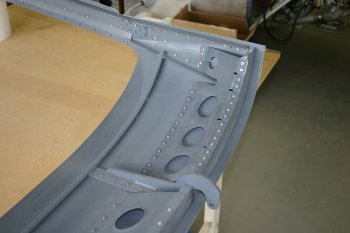 |
| And then de-oxidine and left to dry. Drying the frame completely was tricky, compressed air to help drive out water was useful as per usual. | 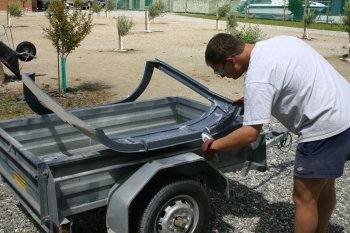 |
| Then it was prime anything that hadn't already been primed, followed by top coat. | 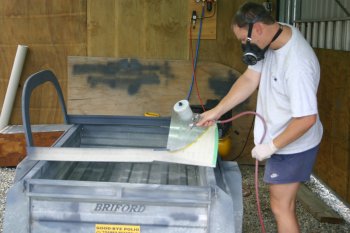 |
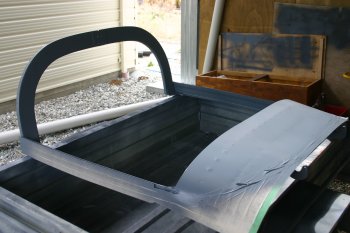
| Rather frustratingly I had problems with the top coat, it was patchy and difficult to work with. The problem seemed to be the flow of paint, I ended up with some light orange peel on the rear of the frame hoops and very light (/ rough surface) in the rear corners. We will review tomorrow once I've had a sleep. The cause was two fold, firstly somewhere we ended up with some contaiments in the mixing process - however these were traped by the mini-filter. The bigger problem was the top air vent had become blocked and we think that was the cause of the drop in supply flow. Someting learned for the cleaning process - just rather frustrating that it happened now on a visible bit. | 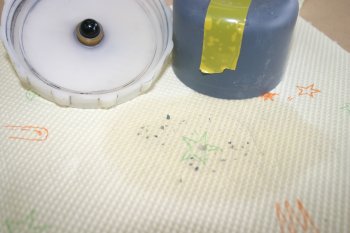 |
 | |
Thu 12 January 2006 | |
| Then with the weather improving, we took some 800 grit wet and dry paper to take some of the 'roughness' off and provide a key for the new top coat. | 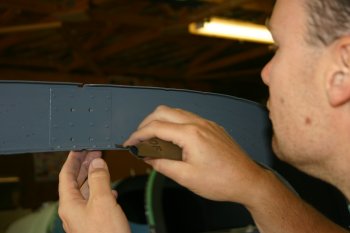 |
| Then a good wash and leave to dry in the sunshine for a couple of hours. | 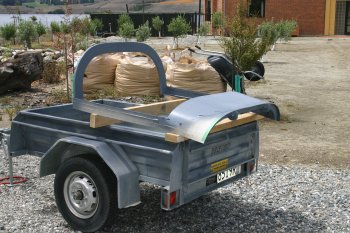 |
| The spraying went pretty well, a couple of potential runs, the most noticeable on the rear upper RHS hoop. I'll wait for it to dry and go back fresh to it, a bit of wet & dry might be enough. | 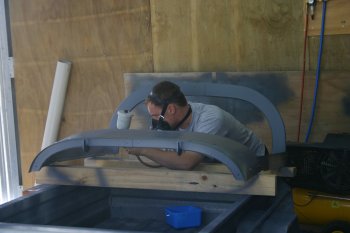 |
Sat 14 January 2006 | |
| Then the wind dropped completely, so I switched modes and got ready for spraying. | 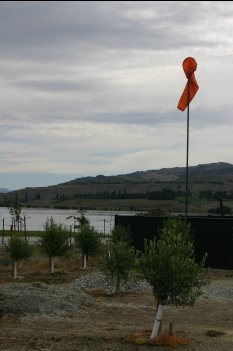 |
| The only remaining spraying for the canopy frame before the plexi can be installed is the forward deck. I masked up with sheets and gently rubbed the previous grey top coat down a little. | 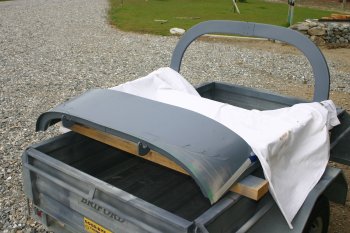 |
| All the top coat paint we are using is Acrylic based and mixed 1:1.5 solvent for spraying. | 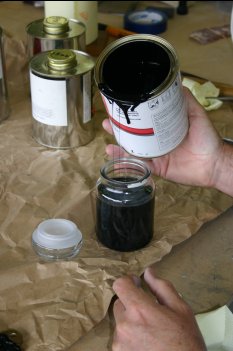 |
| The result of all the masking, the actual spraying was about 3 minutes duration..... | 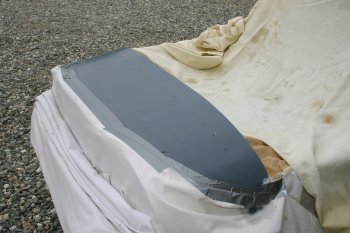 |
| The result after removing the masking - all looking good so far. | 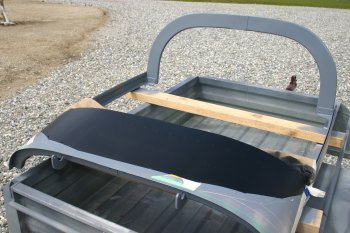 |
Sun 15 January 2006 | |
| I started by finishing some light sanding on the canopy side rails to remove a little over spray that had crept under the masking. | 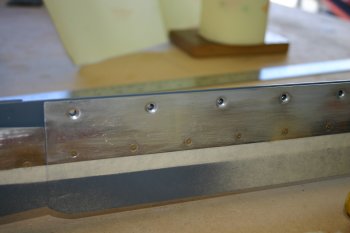 |
| The black paint finish has come out really well - first bit of painting that I've been pleased with! It is actually quite matt and doesn't reflect much at all. It does get hot quickly though..... | 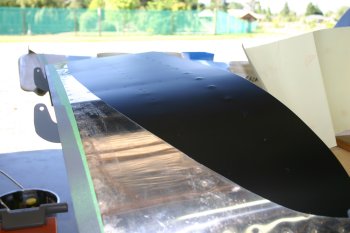 |
Sun 22 January 2006 | |
| When we got home the temperature was well up (28C) so we decided to go for the canopy installation. First up we removed more of the masking tape around the edges and cleaned the surface with kerosene. |  |
| The actual canopy installation into the side rails / skins was easier than I expected. |  |
| Then we worked around the rear hoop first and then back to front on the side rails, doing 3 locations on each side and then switching sides. You may notice the masking tape / tinnerman washers on the rear locations, these are temporary - we are planning on replacing these screws with stainless steel ones. |  |
| The current situation, the next step is to start looking at the fibreglass fairing that goes around the front edge. |  |
Mon 23 January 2006 | |
| We installed the canopy frame and starting looking at the lines for the fibreglass work. One thing we tried was lighting the inside of the cockpit and using the forward canopy skin to get an upper line for the glass. This worked well for the middle 2/3rds but the outer edges didn't really make it. | 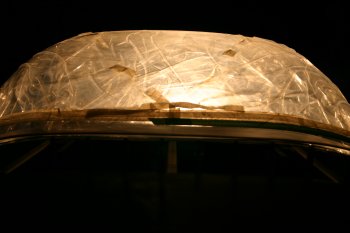 |
| This was the 'best guess', but it is difficult to balance the two sides. | 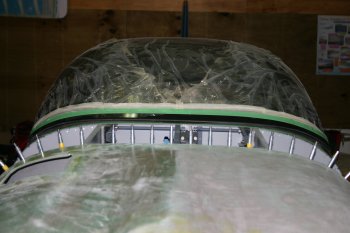 |
| This is the RHS. | 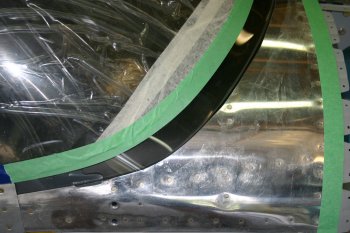 |
| This is the LHS - is it the same profile? Well after measurements the LHS is about 1/2" higher! | 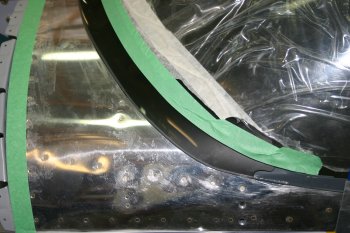 |
| After lots of measurements and re-laying of masking tape, this is the best I can come up with. Tomorrow I'll recheck before we start scuffing / prepping for the resin / fibreglass. | 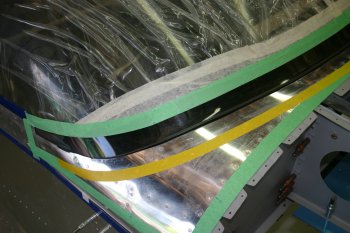 |
| Also sorted the forward line, this is approximately 2 1/4" down from the fibreglass upper edge. | 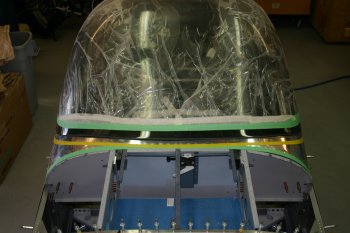 |
Tue 24 January 2006 | |
| After Dad had reviewed the lines, we modified the lower / forward profile slightly. Then I started layering some electrical tape on the masking edge, this will be used to sand back to whilst protecting the plexi. | 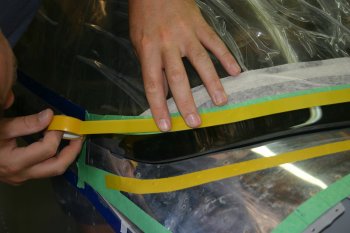 |
| Also started to think about the fibreglass lay-ups and how we want to do the forward corners. We might end up going significantly further forward than the current yellow tape / line. | 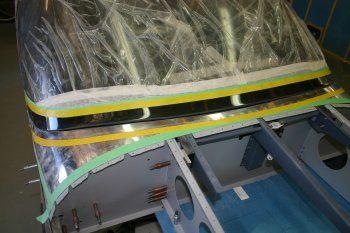 |
Thu 26 January 2006 | |
| Back on the project today and back to the canopy fibreglassing. We started by removing some more of the 'lip' on the forward edge of the plexi - this should help the flow of the glass ply lay up. | 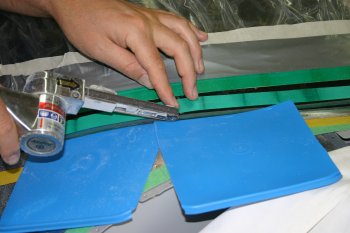 |
| Then it was a good scuff with 280 grit paper for the plexi and AL skin. | 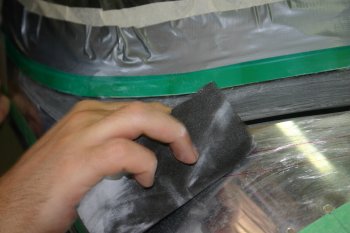 |
| Clean down was just air and damp cloth. | 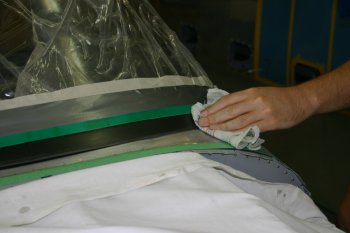 |
| Then we made some paper templates on baking sheet for the 'first' and 'last' versions. | 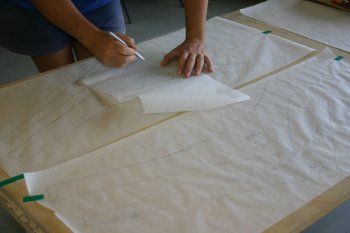 |
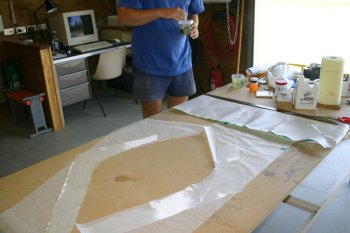 | |
| Then lots of masking, again we used green masking plus a couple of layers of electrical tape. | 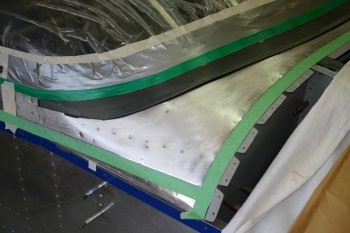 |
| Then a really stiff mix of silca (5 shots to 2 pumps of resin) I filled the lower gap between the plexi and skin. | 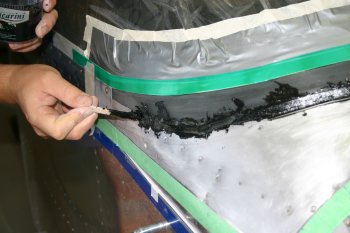 |
| Then the forward surface was roughly smoothed. I also brushed some resin / black paste on the forward plexi - next time I'm not sure if I would do this, I think the colour may have seeped slightly - but I won't curse and swear until I know...... | 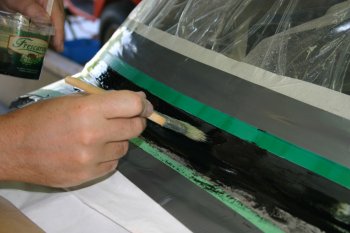 |
| I pasted some 6oz cloth up with resin and Dad cut it into strips. It was then slid off the backing and laid onto the work area. | 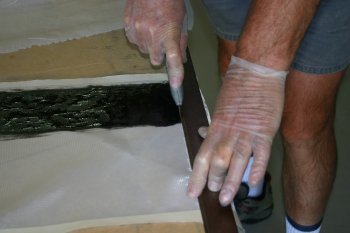 |
| The first few layers were thin 1/2" / 1" strips and progressively got bigger and wider. | 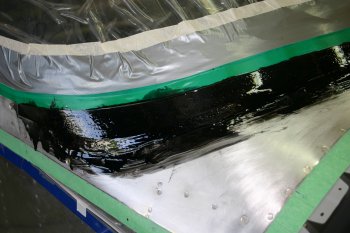 |
| About 6 layers in total were put on and then a final 2oz wide strip. | 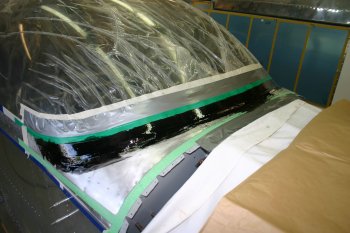 |
| The finishing was done with peel-ply - first time I've really used this, but in theory it should help smooth the final surface and reduce / remove excess resin. | 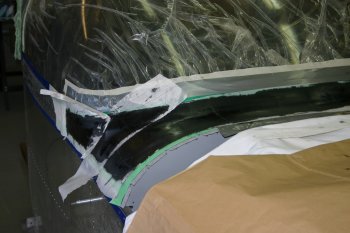 |
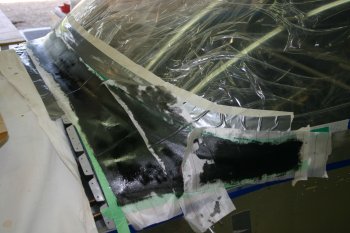 | |
| This is the finished result at the front - not perfect, but a good first stab. More filler and lots of sanding will be needed to get a finished transition from skin to plexi. | 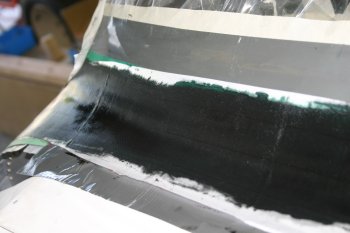 |
Fri 27 January 2006 | |
| Short version - sanded, tried, failed, went for pizza & beer. Longer version... I started by removing the peel-ply - this worked really well and the shape looked better than I expected. | 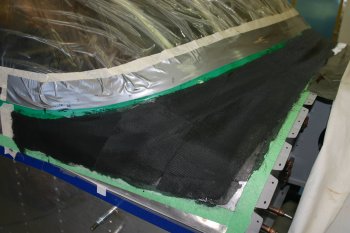 |
| The front outboard corners will need the most work but that should be fine. | 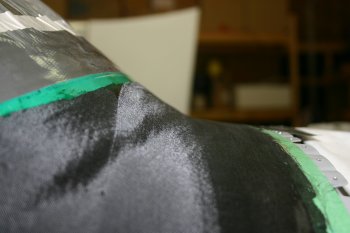 |
| This is the result of the peel-ply where is worked really well - smooth and easy to sand and prep further. | 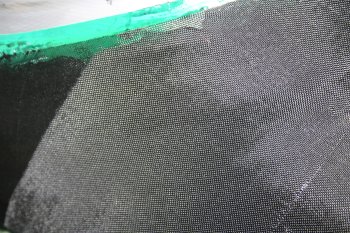 |
| This is not quite as good - I didn't squeegy enough of the resin through and ridges were still left - this results in a resin ridge which then needs to be sanded down / out. | 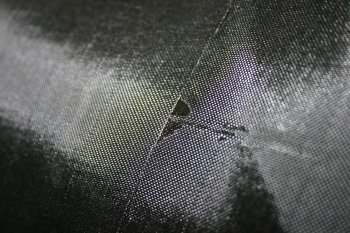 |
| The next 4 hours of so was spent sanding down the ridges to smooth the contours and rough the surface for the next step. Hard slow work, and the temps were getting into the mid 30C's. | 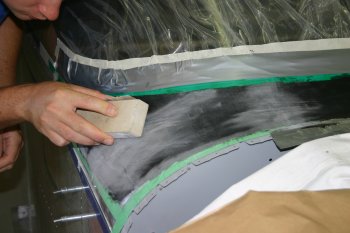 |
| To try and reduce the 'joins' between the peel-ply, Dad cut a single piece cover for the next session, along with a 'final' piece of 2oz cloth that covers most of the section (just the rear ears missing) | 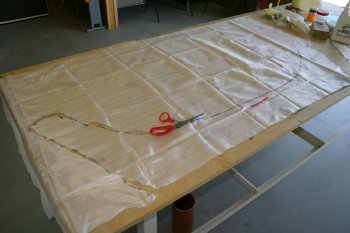 |
| Further sanding of the edges back to the electrical tape to get the right shape worked well, just slow and hot.... | 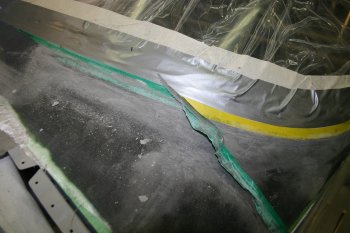 |
| To try and reduce the 'ridges' on the peel-ply, Dad ironed it - worked well. | 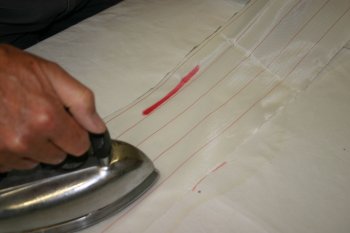 |
| More sanding and shaping - everything coming together well. | 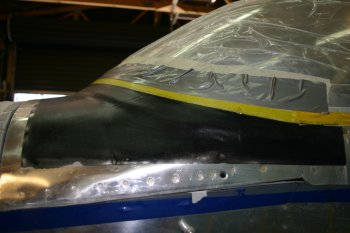 |
| Then re-applied a new layer of electrical tape / masking tape. | 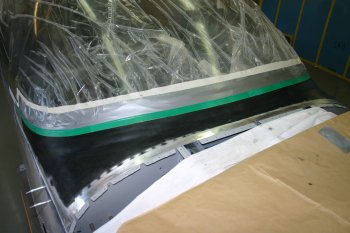 |
| And trimmed / shaped the peel-ply and 2oz ply. | 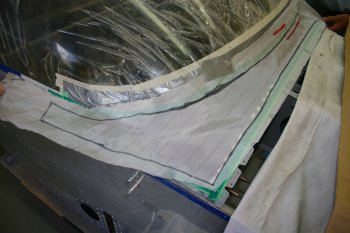 |
| We then tried another fibreglass session, I added a little neat resin to the work area and prep'ed some more flox, however the flox was too stiff and setting quickly. | 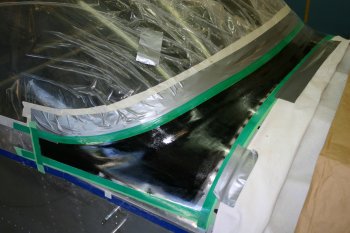 |
| We ended up aborting the glass session - the pot of resin was too hot to hold (estimate of around 60-70C). Obviously the resin was reacting very quickly and the exothermic heat (we assume) was making it too difficult to use and the flox was slipping off the wet resin. We wiped everything down and quit for the day. I'm not sure WHY we had so much of a problem - I can only assume it was to do with the ambient temperature (mid 30C's / mid 90F's) - next time we will do fibreglass in the morning when it is cooler! |  |
Sat 28 January 2006 | |
| A quick rub down and roughening of the resin surface ready for the final glass ply. | 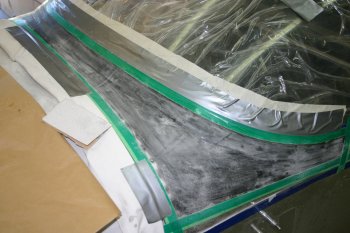 |
| The flox to help build up the transition between the plexi and skin surfaces - fairly stiff but still workable. | 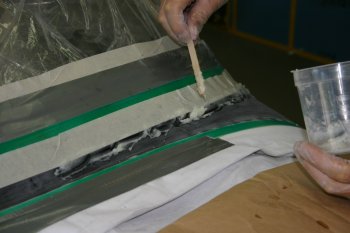 |
| I used a piece of masking tape to edge the upper line - worked well, removed before glass ply was positioned. | 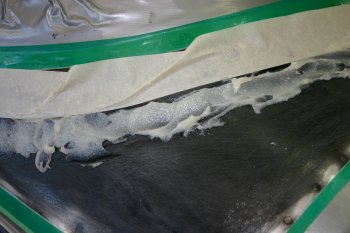 |
| Plastic ice-cream container lids seem to make the best squeegy's at the moment. | 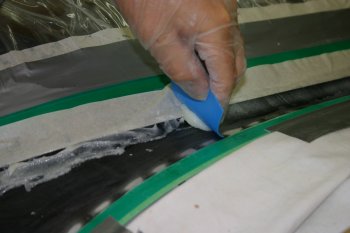 |
| The flox profile before tape removal and glass ply - you can see the central transition in particular is much smoother. | 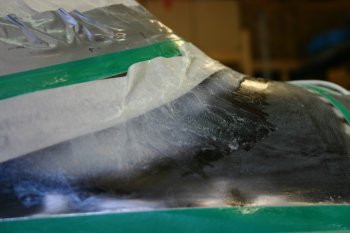 |
| The 2oz ply went on well and brushing on the clear resin allowed everything to seat and the green electrical tape comes through clearly. | 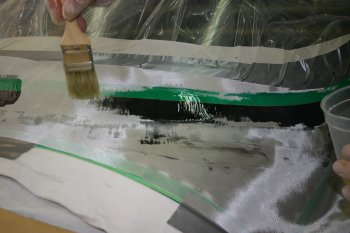 |
| Generally the upper line was sorted first and then the forward edge. The flox resin area was left until last. | 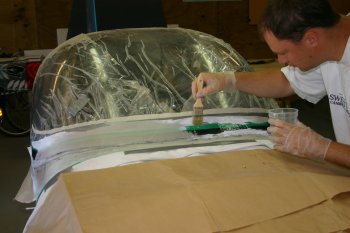 |
| The final product, after more brushing and squeegy the ply down. | 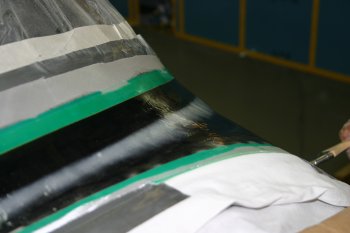 |
| and the peel-ply added and brushed down with more resin. I just managed to get the glass and peel-ply to fit over the whole surface (including the tail ears) which was a bonus. | 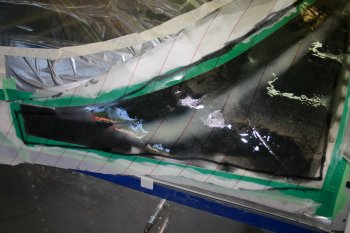 |
| The new lines - everything was setting pretty quickly today as the temps rose progressively through the day, high of 36C in the shed. | 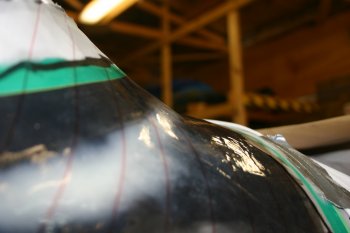 |
 | |
| We did some misc bits for a couple of hours and had a visitors to show round, before I decided the peel-ply was set enough and probably should be removed. It all removed cleanly, but we had to be careful around the edges to prevent it pulling the glass off the skin. | 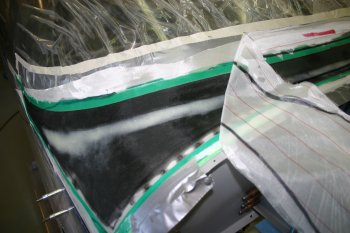 |
| The remainder of the resin was used to fill the glass work on the canopy fairing. | 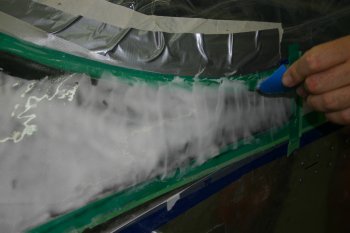 |
| This is going to need a lot more work, but the first layer can cure over night, an hopefully tomorrow afternoon I can start shaping it a bit. | 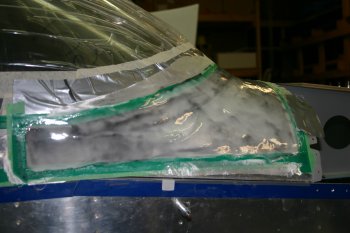 |
Sun 29 January 2006 | |
| Next was the start of the long process of sanding and shaping the canopy fibreglass. | 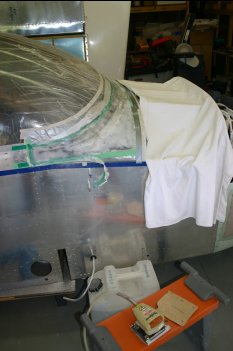 |
| Working around the front and outboard edges with the palm sander and by hand with 80 grit removing the material on the electrical tape, then the tape itself. This gets the basic shape and the edges can be feathered down further as needed. Slow, repetitive progress. | 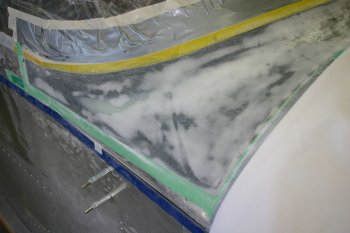 |
Mon 30 January 2006 | |
| Then it was back to sanding - more slow iterative work. Managed to the whole basic shape complete to the green masking tape. | 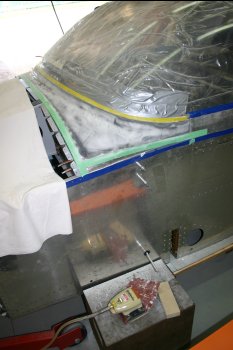 |
| Some parts of the resin / filler seem to be setting slightly quicker than others, the RHS in particular seems to be rock hard already, so I continued with the delicate sanding down to the green masking tape on the plexi. The challenge is to remove / feather the fibreglass well enough that the green tape isn't trapped under the glass, but not going through the masking tape which would mark the plexi.... Careful balance needed. | 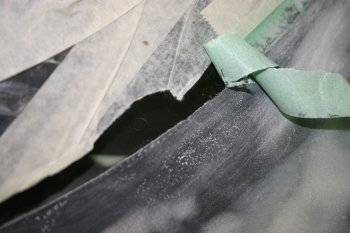 |
Tue 31 January 2006 | |
| Back to more sanding on the forward canopy - oh yah! Now nearly 2/3rd of the upper (plexi) edge done. | 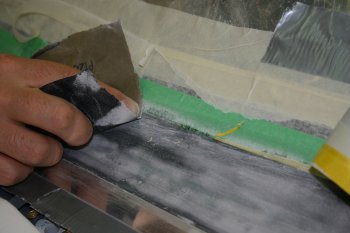 |
Wed 01 February 2006 | |
| The VANs strut mounts were drilled out and re-attached so the canopy could be put back on the fuselage for some alignment checks / panel layout. | 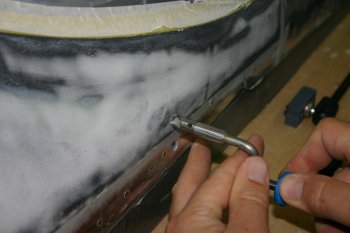 |
| Of course it wouldn't be the same if there wasn't some canopy sanding somewhere in the day! I manage to finish the upper edge, so the initial sanding is now complete, next is re-masking and then more microballoon filler. | 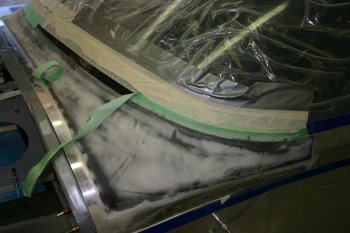 |
Thu 02 February 2006 | |
| With the temps back up in the high 20Cs we did the rear canopy screws. These have been changed to plain bright stainless #6 screws. I was hoping to use blacked stainless but I seem unable to get 100degree counter sunk black stainless screws, so - move on - fit for flight..... | 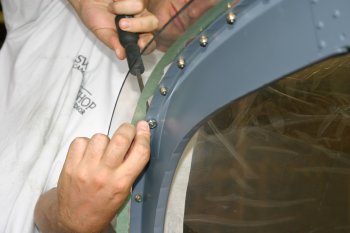 |
Mon 27 February 2006 | |
| Dad had a gentle day, sorting various bits including the roll bar brackets rudder cables etc. | 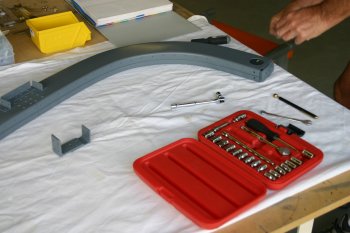 |
Wed 01 March 2006 | |
| And we riveted the C channel onto the rollbar. This was a BAD idea for us, it restrict the options for installation. | 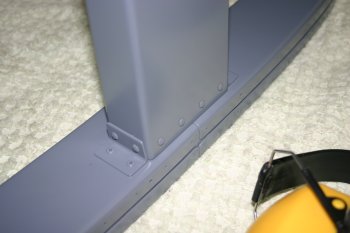 |
Sun 05 March 2006 | |
| The forward locations on the rear skin need to be shot/bucked BEFORE the tip-up angle brackets are added to the under side of the rear cross member. Hopefully we have got the order right - time will tell. | 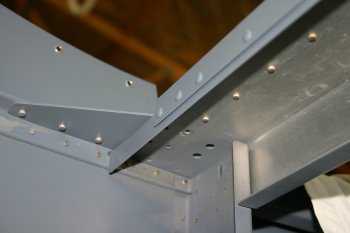 |
| Then we hoped to fit the canopy roll bar and support installed. The problem however is the upper C channel - we shouldn't have rivetted it to the roll bar. Not sure how we are going to get out of this mess. One item to sort is a little interference between the rollbar brackets and the seat back jams. | 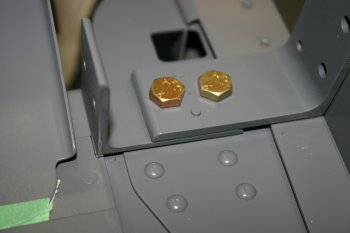 |
Mon 06 March 2006 | |
| First up I sorted the trimming of the seat braces. This was a little difficult because of the finished paint work. I used a piece of thin stainless steel sheet as a protector, drilled the corner and edge locations and then used a conical rotary burr. The finishing was with a safe edge file. All in all about as good as I could have hoped for. | 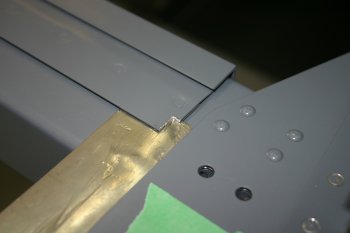 |
| The roll bar frame with C channel still attached then slipped in comparatively easily. | 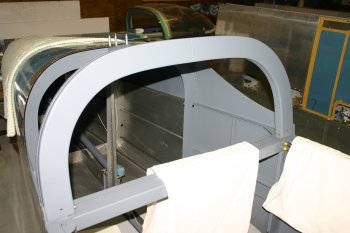 |
| The relief seemed to make all the difference and allows the brackets to slide back. | 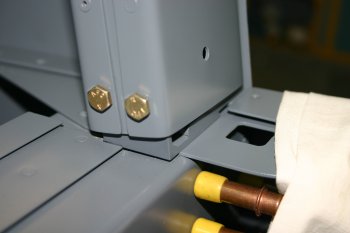 |
Fri 10 March 2006 | |
| I spent a large chunk of the afternoon looking at the installation of a simple cam lock for the canopy locking mechinism. This is the locked / closed position. | 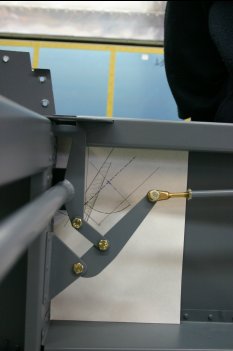 |
| and this the open / unlocked. The key is to find a location for the 3/4" skin hole where the two lock positions don't interfere with mechinism. | 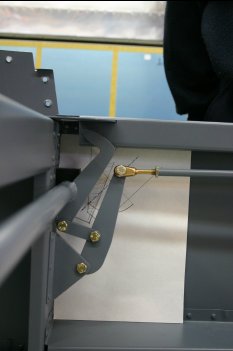 |
| With a stiffener bracket and a 3/16" spacer the solution is getting there. The final spacer bush for the cam arm can be sorted later, I need to do a little more and then it is ready for spraying. We have a number of bits ready for paint, but the weather is helping just at the moment. | 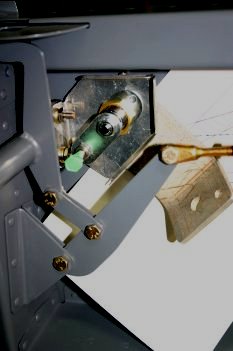 |
Sun 12 March 2006 | |
| Then the roll bar could be installed and the rear locations riveted (for the second time). | 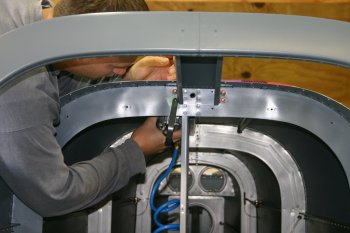 |
| Slowly it is starting to look more complete! | 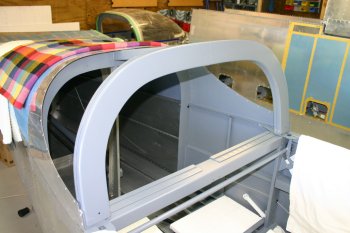 |
Tue 02 May 2006 | |
| Back to real project today, although I'm not 100% health wise. Looking at the goose neck hinge for the canopy again I'm coming to the conclusion that trimming will be needed and the current plan is not to use the canopy release, still to be confirmed | 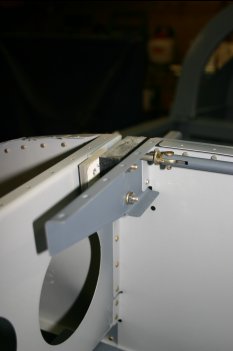 |
| Canopy went back on cleanly, the forward blended glass looks better than I remember. | 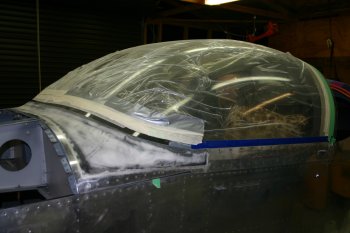 |
Sun 21 January 2007 | |
 | |
 | |
Mon 22 January 2007 | |
 | |
Sun 28 January 2007 | |
 | |
 | |
Thu 01 February 2007 | |
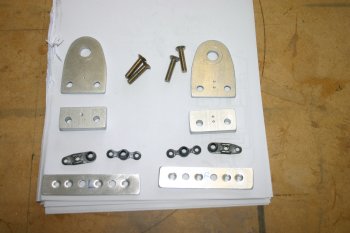 | |
Tue 06 March 2007 | |
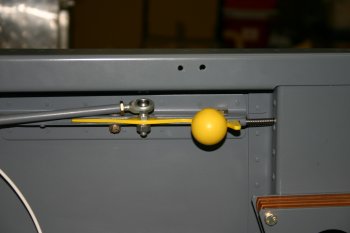 | |
Wed 07 March 2007 | |
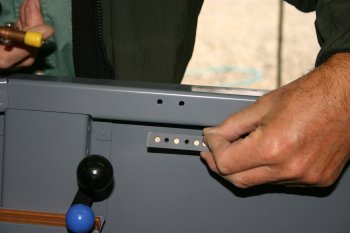 | |
Thu 22 March 2007 | |
| Dad spent a couple of hours working on a spring system for the canopy latch, this will hopefully provide a solution to locking the handle in the 90 degree positions. | 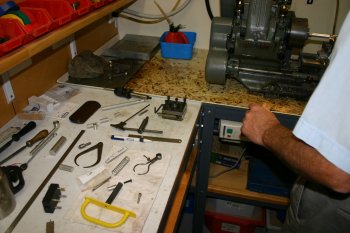 |
| The first step of the solution. For the actual clocking we have a few ideas, but will wait until things are mounted up. | 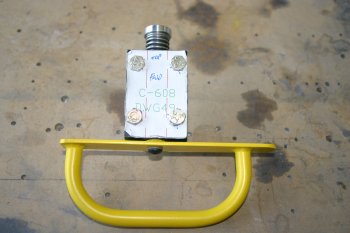 |
| I went round and tapped the #6 roll bar locations. | 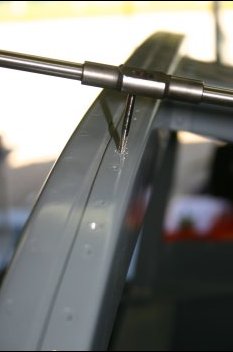 |
| The rear plexi window needed quite a bit of cleaning up from the sticky masking tape. Kerosene worked well again but took quite a while to do carefully. | 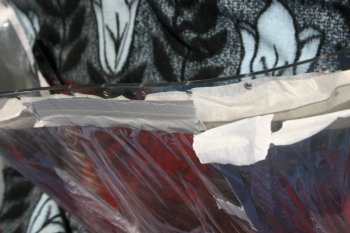 |
| Warm soapy water and then rinsing removed the remaining sticky residue from the plexi. Cleco - just loves to 'help' as much as possible. | 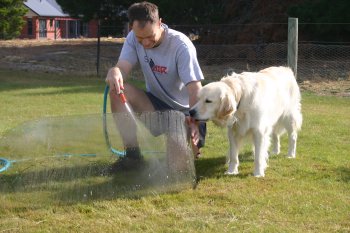 |
| The actual insertion of the plexi under the rear skin was something that both Dad and I feared would be really difficult and problamatic. However, in the actual event it slipped in very smoothly. Then it was a simple case of working out from the upper center locations out evenly to the sides. | 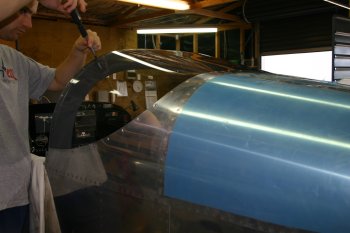 |
| The 'optional' inside doubler strips worked really well and provides a neat finished surface. | 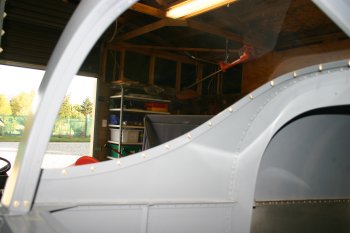 |
Wed 28 November 2007 | |
 | |
 | |
 | |
 | |
Thu 29 November 2007 | |
 | |
 | |
 | |
Fri 30 November 2007 | |
 | |
| Home | Carl Morgan | Previous|Next|Latest |