Wed 25 February 2004 |
| First up was the rib / spar drilling. Angle drill needed. | 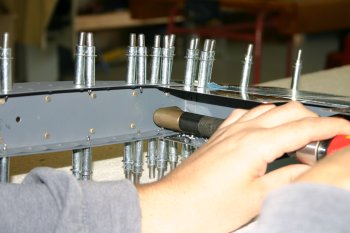
|
| Ended up fine. I suspect the rivets may set a little strangely but that is another day. We are waiting on the Pro-Seal so that the elevators and rudder can be completed (see below for today's developments). | 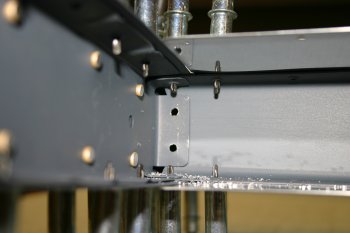
|
| Finished off looking at the step mount. The biggest problem seems to be the aft edge of the steel plat sticks out a long way. Current options are try to shape it by bending or just remove the problem part by generous trimming. The plans call for a little trimming but it will need more if no bend is included. We will wait for the 'good' fuselage before any permanent bends are made. | 
|
| Then we moved onto the bending of the trim tab and elevator tabs. This is an area where I understand most first time builders struggle a little to get a good finish that they are happy with. We are no different and after spending most of today on the trim tab we have learnt a little more but are still fairly confused!
The first task is to make a wood 'wedge' to act as support for the bending process. Yesterday I came across a AutoCAD DWG of the trim tab section on one of the Yahoo groups, I butchered this to give me a template for the wedge. The critical piece of information (that isn't stated on the planes) is the inner acute angle of the trailing edge is about 16 degrees. This is needed for the elevator tabs and the corresponding trim tab. The inboard trim tab angle is more complex (more later). I marked up the wedge and cut on the radial arm saw. | 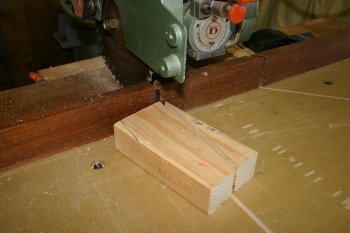
|
| One of the techniques suggested in the instructions is to use a low powered setting on a flush head rivet gun. I'm sure if you are good at controlling the head it might work. I couldn't get repeatable results on the test pieces so I'm not keen unless really necessary. My strong advice - before doing the real thing - have a practice on some scrap. | 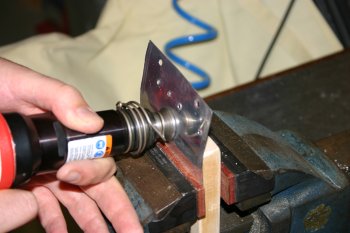
|
| The next step is to crimp the trim tab. The bending brake came back out and was setup. The problem with the trim tab is because it is so small it is very difficult to get an even bend. We were partially successful but I could still see the locations of the hinges if I tried hard enough. Next time, I would probably do smaller amount at a time and move the work along the bending line of the brake. | 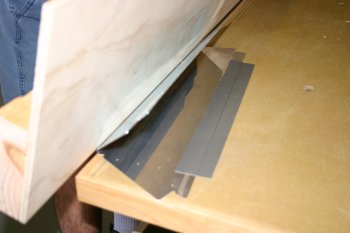
|
| Then it is onto the wedge. We started with the outboard end (smaller) and set it up on the edge of a small bench. | 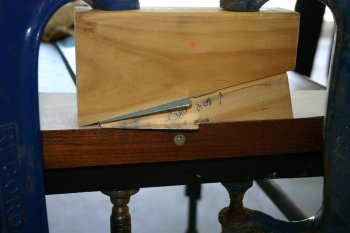
|
| After bending the lower skin with a wooden block and then a flat metal drift to finish it, the conclusion was we were slightly too far into to trim tab material and the wedge shouldn't have been radiused along the bend line.
We then flipped the skin over and did the upper skin against a 'cut edge', this worked better although the tip is still not that great. | 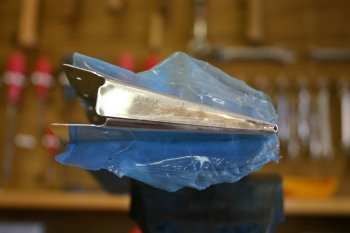
|
| For the inboard end we tried (multiple) different clamping solutions, this was one along the way. Not a good option (not firm enough). | 
|
| This was the 'final' solution that seem to work OK. The main face of the tab to be bent was on the upper side with the wedge locked into the skin (upper left dark G clamp / wood) with the matching upper clamped downwards (blue G clamp) and a bracing support locked into the back of the wedge (upper right G clamp) to prevent the skin & wedge moving. This seemed to hold the whole shebang tight and enabled the bending process to be worked on. | 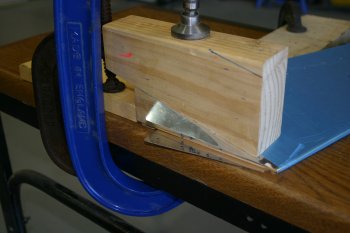
|
| The lower skin bend was OK I aligned the wedge with the outside of the skin forward 'flange' (the bit that attaches the trim hinge) and worked down it with a wooden block and then a large bucking bar (gently). | 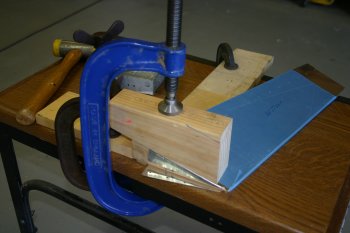
|
| Then it is flip over and re-configure for the top skin. Same bending process again. | 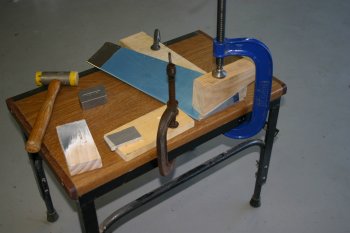
|
| The end result is OK. Not great but probably usable. My problem is that the wedge upper support slipped down during one of the clamping process of the inboard end which ended up deforming the trailing skin shape slightly (difficult to see in the photo - but the bends in the reflection give it away). | 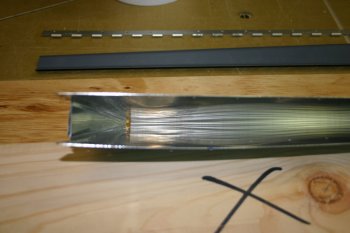
|
| This is the external view of the same problem. Other than that the two end tabs 'meet' but bind and don't sit completely flush and the tip of the outboard end has bowed slightly. That is all the bad news - the good news was I have been warned about the trim tab being difficult so I ordered an extra skin in March last year :-). So today I've been 'practicing' on the spare, tomorrow (or Friday) I'll have to do it for real on the one that is internally primed. | 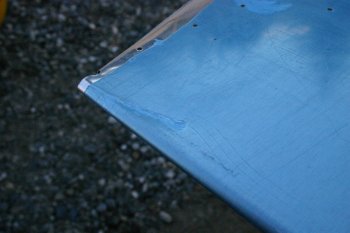
|
| Logistics - Well I got a response from Aircraft Spruce today to say that the Pitot tube (AN5814-12) I ordered (and was damaged on delivery) has now gone end of life and they are unable to get a new one. I'm not sure of the best way forward. I really like the idea of a heated static source along with heated dynamic and I was under the impression that the 5814 was used in other production aircraft. The other issue is I've paid GST on the original goods coming into the country and now I have no goods and have still paid for the government duty! I'm sure I'll be able to get it back - just hassle that I don't need. I've obviously committed to the Gretz mount (I've got the holes in the wing to prove it) so my options are slightly limited. More thought needed..... | |
| A large chunk of the lunchtime / afternoon was taken up trying to sort the Pro-Seal order from Auckland. This product seems to be in scarce supply within the country and I was told it was going to cost me NZ$290 + shipping (~US$203) for a pint tin. This is a product that retails from Spruce at US$58. I really object to paying that sort of extortionate prices, and this is when I need it as a sealant compound to reduce flutter and vibration - it isn't even sealing the fuel tanks!!
After some telephone calls back and forth, I agreed that I would source it in otherways, but it now looks like I should have a delivery by next Wednesday for ~NZ$90 which is much more reasonable. I don't think it is the local reseller, I think the problems are coming from the suppliers but I rather lost it this afternoon! I've also made a list of lots of 'bits' that are needed so hopefully they will all be available together. | |


