


 |
 |
 |
| Home | Research | Delivery | Empennage | Wings | Fuselage | Finish | Engine | Electrical | GRTDecode | Previous|Next|Latest |
| Engine | Firewall Forward | Engine Build 1 | Engine Build 2 | FADEC | Baffles | Plenum | Cowling | |
Firewall Forward | |
Fri 12 March 2004 | |
| Then I was looking around for a little sub-assembly to work on. The next on the list was the battery box / contactors. I've chosen to go with the PC680 battery from the start, although if we go with dual battery & dual alternator I'll need to find some more space for the second power source. | 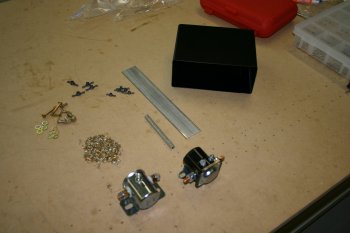 |
| Some bits that need fabricating from sheet material. | 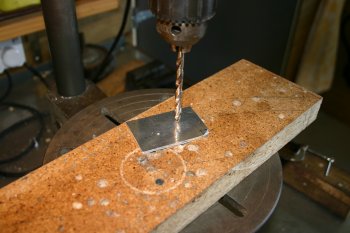 |
| The battery box conveniently mounts on three existing rivets. Just drill them out and the lining up is done. Early finish for socialising with the locals. | 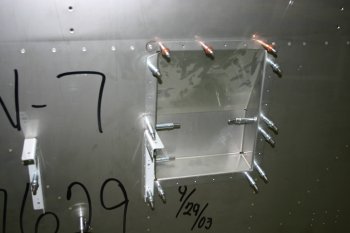 |
Sat 13 March 2004 | |
| Dad started the day drilling out the motor mount. | 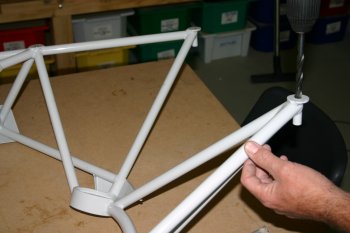 |
| And drilled the upper mount points on the fuselage. The stainless steel is very tough, we ended up drilling the #12 from front to aft, then 1/4" then final drilling to 3/8". | 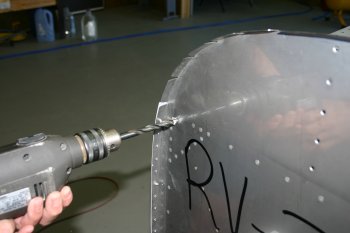 |
| Only the upper AN6 bolts were used but this should help give us a better understanding of the overall firewall forward layout. | 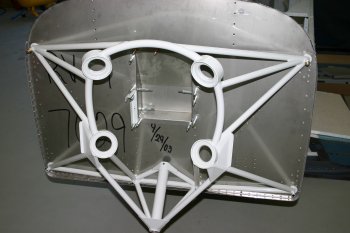 |
| I laid out the battery holder for drilling. I started using the pillar drill with the pilot drill. The problem was the 'structure' was too springy and the drilling wasn't accurate enough. | 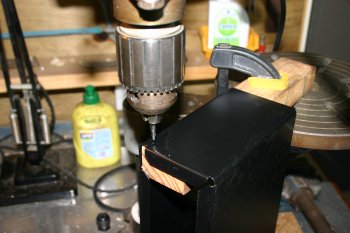 |
| I ended up cleco'ing the side brackets to the bench and match drilling from there. | 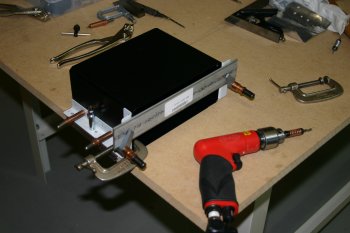 |
| Something that I didn't see from the drawings initially is the AN426 (counter sunk) rivets do not require the battery box to be machine counter sunk. Although it is steel, it will dimple OK with the pneumatic squeezer (trust me). I needed a combination of the 4" yoke and the longeron yoke. | 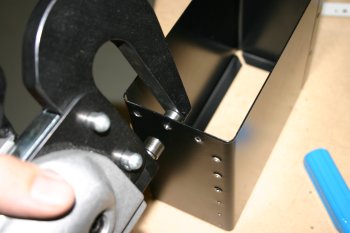 |
| The steel angle brackets are thicker however so they have to be counter sunk. | 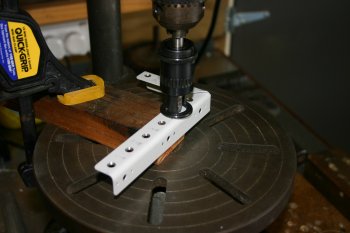 |
| The next stage is the lightening holes. The hole saw worked slowly for the first one, but is quite blunt, so the obvious decision was to wait until Monday and get a new one. | 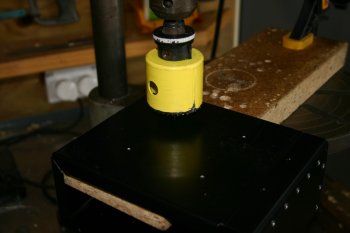 |
Mon 15 March 2004 | |
| Dad managed to get a new 2" hole saw today so I finished the evening lightening the battery box and deburring etc. Not sure what I'm going to use for metal protection, it needs to be fairly high-temp paint to deal with the cowling / engine area. | 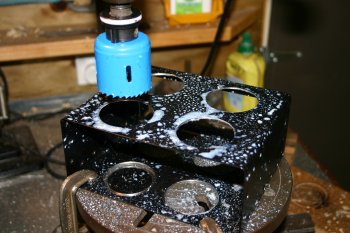 |
Tue 16 March 2004 | |
| I started the day finishing the battery box. The AD 426 rivets went in fine, although I used -5 rather than the -4 call outs. I found the holes in countersunk brackets were slightly enlarged so the extra rivet material helped. | 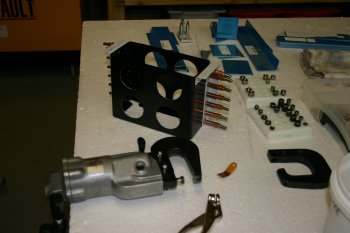 |
| Once the main box was riveted together the top brace could be finished. 6 lightening holes were marked out. | 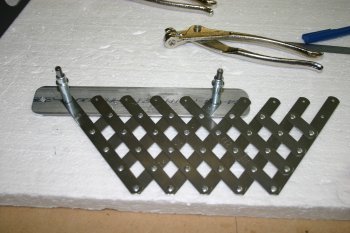 |
| And the rotorbroach drills made a really neat job of the holes. Although these are quite expensive they are useful as they can also be used in hand held drills (not something you would want to try with a hole saw / fly cutter - unless there is no other option). | 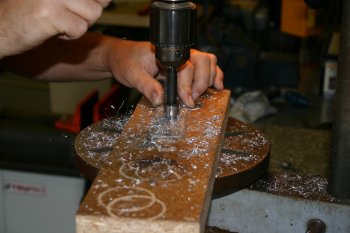 |
| The finished battery box, I then cleco'd it back onto the firewall just to keep it out of the way. | 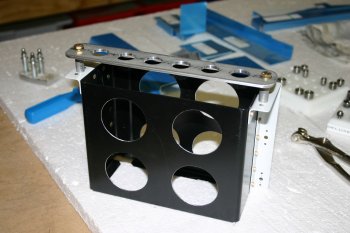 |
Mon 29 March 2004 | |
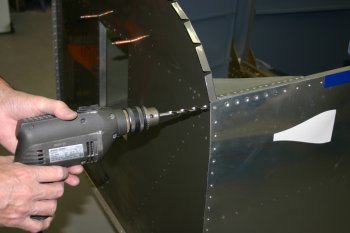 | |
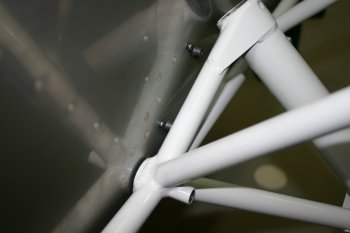 | |
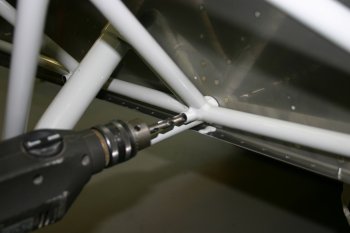 | |
Tue 30 March 2004 | |
 | |
 | |
 | |
 | |
 | |
Wed 31 August 2005 | |
| The end of the day was spent unpacking and sorting firewall forward components. I seem to be missing / will need to get some pipe / manifold connectors. The Oil presure sensor is too large and I'm not sure which parameters any EIS will need specifically. Lots more research to do. | 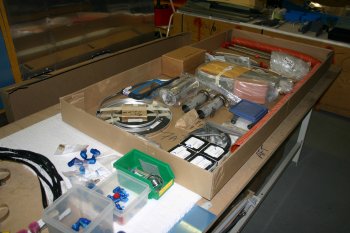 |
| Also it apears the #3 exhaust pipe has been damaged at some point which will need some re-forming. | 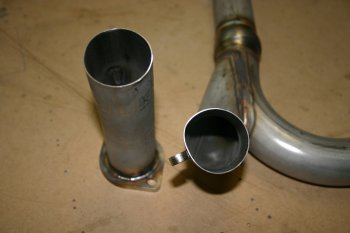 |
Fri 09 September 2005 | |
| Next I started looking at the filter air box (FAB). Mainly just deburring / understanding as the lower cowl is needed before much alignment can be completed. | 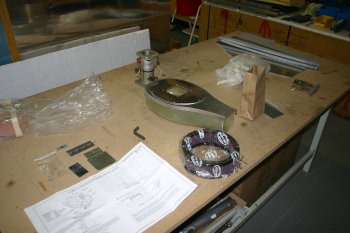 |
Sun 11 September 2005 | |
| I started with the VANs 60 Amp alternator. First problem is we don't seem to have any instruction on the mounting of it. After re-reading the preview plan instructions it mentioned having to push out the bushing. Things then started to make a little more sense. | 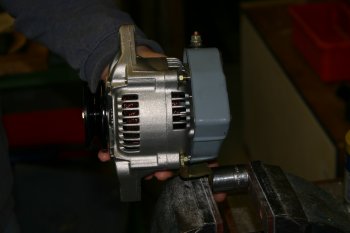 |
| After various rounding / cleaning etc, this is the alternator - it doesn't look like the adjustable arm is going to be long enough and the 'joggle' of the 1/4" bar is going to be interesting. Time to call it a day and worry about it tomorrow. | 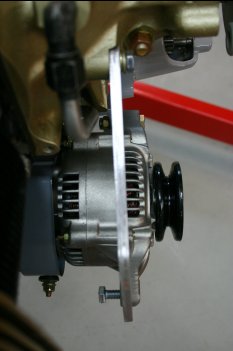 |
Mon 12 September 2005 | |
| First up for me was the alternator support. It needs a joggle of about 3/8" - I over cooked it, but corrected the bar without too much difficulty | 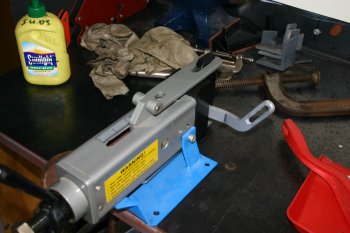 |
| The alignment of the support now looks great, however the rotatation isn't enough to be useful. A couple of options exisit - trim the AL mount or the steel bracket. I suspect it is the bracket that needs 'tweaking' but I'll check before destroying anything. | 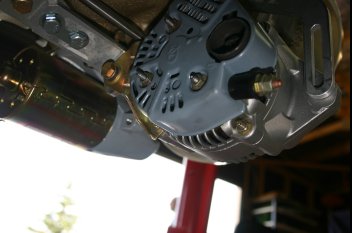 |
| You can see how the governor arm rotates outwards and the need for the cut out in the firewall. | 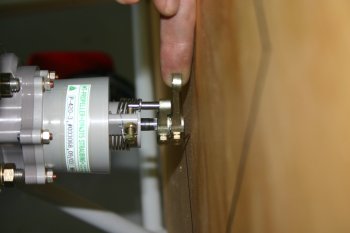 |
| I sorted the exhausts, the #3 'dent' I worked out with a piece of turned steel stock and used it as a plug to re-shape the offending item. The mounting was pretty simple, only finger tight at this point but good for laying out all the components. | 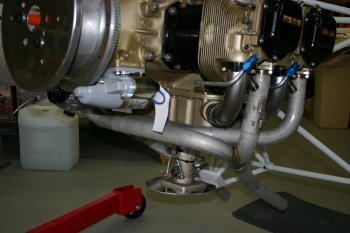 |
| Then cleaned up the various parts for the heat exchanger muff - lots of sharp S/S bits, just takes time. I installed / tested it on the RHS pipe, not sure if it will stay there long term (might move to the front cross pipe) but OK for the moment. | 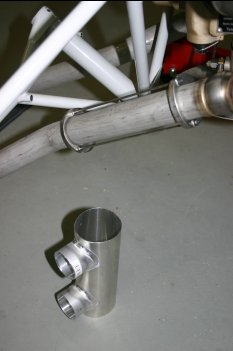 |
Tue 13 September 2005 | |
| After an email with VANs I confirmed the alternator bracket just needed to be 'tweaked' | 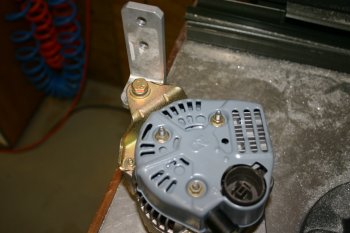 |
| The final result after trimming and smoothing. | 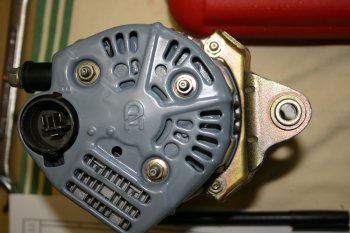 |
| The mounting bracket also needed key slotting the two aft most locations to get all the bolts to fit the engine casting. | 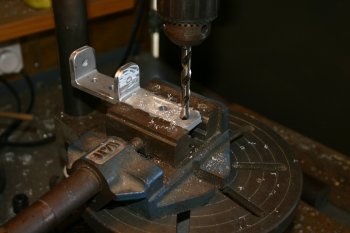 |
| The final result, all looks good, the only potenial problem could be the oil line / alternator clearance if the belt is too small. | 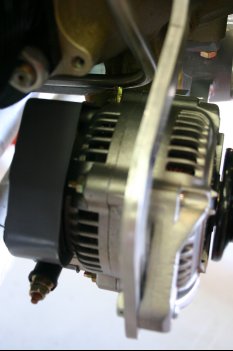 |
| Dad mean time spent some time on the governor mount. This is the stock part from VANs for a single control. | 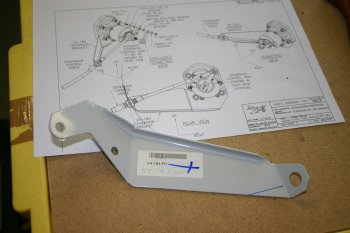 |
| Mounting was simple enough, just undo the lower nuts and insert the bracket. | 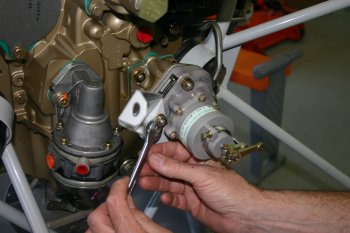 |
| After various discussions, the result was a little steel bracket with a angled upper segment. | 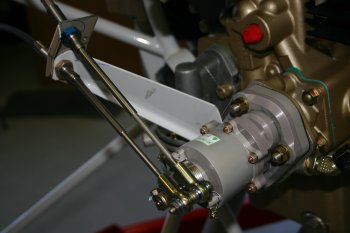 |
| This works OK, but the alignment of the bulkhead / arm movement isn't that great. | 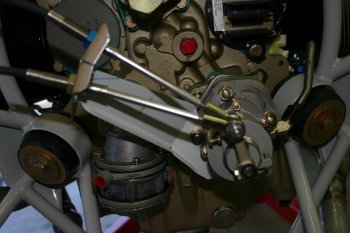 |
| The 'new' option that is going to be based on a simpler solution. | 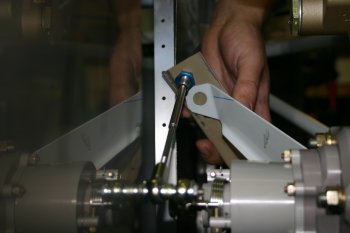 |
Wed 14 September 2005 | |
| Dad continued with the governor bracket for the P2 control. This was the next generation - better but still some strange angles. | 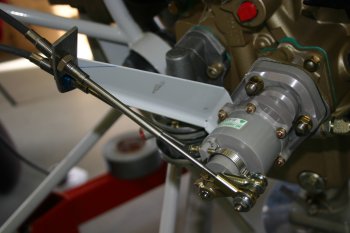 |
| After more thought / prototyping - a wider piece of stock was selected and piloted. | 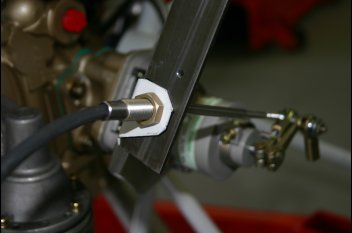 |
| This was then bent and twisted slightly and the second location drilled. After shaping this is the result. It works really well and keeps the cables and actuation well clear of the firewall. Sorry no 'finished' photo..... | 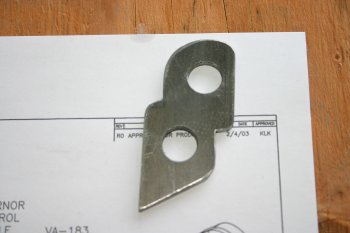 |
| The last step was to stop the new bracket rotating on the VANs supplied bracket - rather than welding which would have damaged the powder coating, a small grub screw was drilled and tapped. Nothing structural, just a keeper screw. | 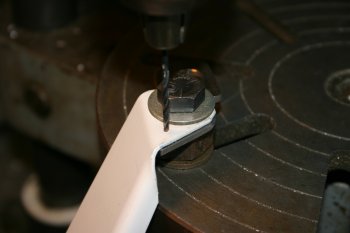 |
| Dad continued with making holes in our mock firewall - this is in preparation for trying to sort the ECU / battery box layout. | 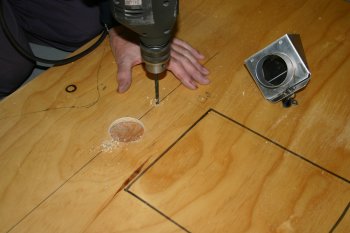 |
Thu 15 September 2005 | |
| Dad spent most of the day looking at the firewall and the various locations of parts. | 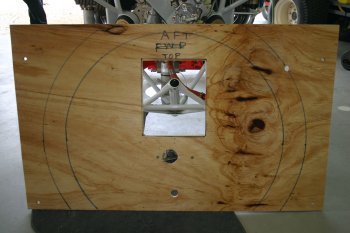 |
| First up was the fuel pump fittings, normal sort of deal - EZ-turn and torquing. | 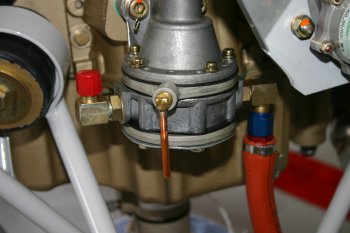 |
| Then after lots of thought and measuring the fuel bulkhead fitting was drilled. We managed to get it just within the carb fuel pump facet that was installed as part of the quickbuild fuselage. Hopefully this will work well. | 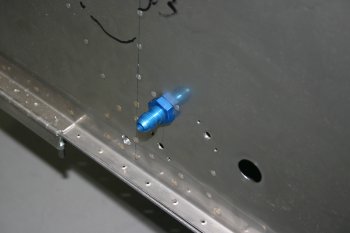 |
Mon 19 September 2005 | |
| Dad continued with the throttle bracket mock up. This is just AL but the final version will have to be from steel or stainless steel | 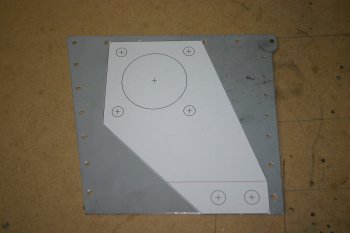 |
| Normal deal, scrap, CAD drawing, shape, drill, de-burr. | 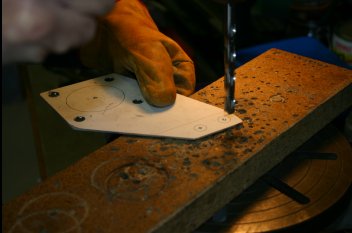 |
| Bend - precision stuff - with a big hammer. | 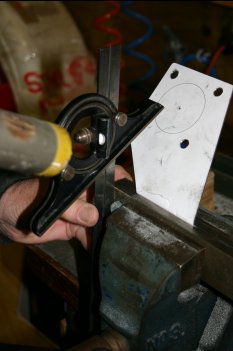 |
| The result - works OK, howver the two cables can be slightly closer to each other and the 'length' of the bent part needs extending to provide clearance of the sump for the cables. The CAD drawing modified and we'll wait for the right materials and final bowden push/pull cables. | 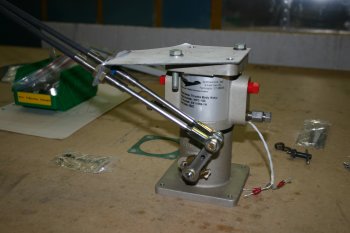 |
Sat 15 October 2005 | |
| Dad finished the day measuring / making notes on the push/pull control cable lengths needed for the quadrants. Looks like we might be able to use VANs standard cables in 3 of the 4 locations. The P2 prop control is a monster and will need a custom cable. |  |
Thu 27 October 2005 | |
| I moved onto the Filtered Air Box (FAB). The vertical induction kit is pretty good, the instructions slightly less so. A single decent ISO exploded diagram would help greatly but I'm muddling through. VANs has just released a revised service bulletin with regard to the alternate air source - so I won't be making final decisions until I've seen that. | 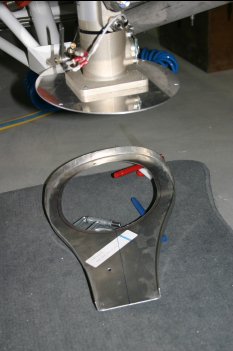 |
| After some initial fitting / layout the basic line up worked OK. The top plate was a little long (sander fixed that) and the centre line just requires multiple guess, clamp and try of the lower cowl. | 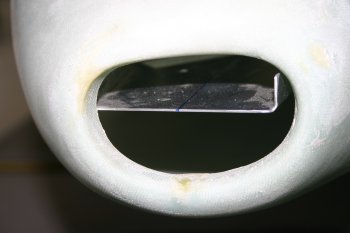 |
| I used two lines on both the pieces (1/4" and 1/2" from the edges) when the front lined up, and no lines showed on top or bottom surface I called it a winner. | 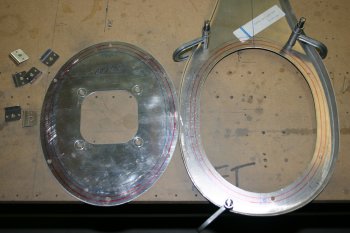 |
| Then the front of the plate needed bending by about 1/2" upwards, this is the after picture which I was quite pleased with. | 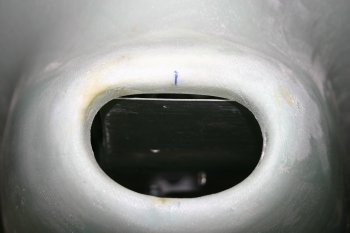 |
| This was the process - I used 3 big flutes on each side and everything worked great. I'm still not that confident with fluting but it seems to be going a little better as we get more experience. | 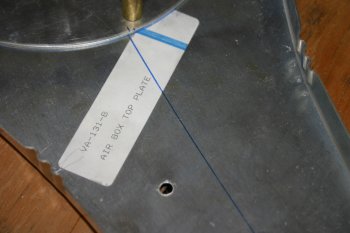 |
| Final step for today was making the retainer tabs, drilling the top and centre plate together and fitting the filter. I've left this over night and will look at the fibreglass shape / drilling tomorrow. |  |
Fri 28 October 2005 | |
| I continued with the FAB, rattle can sprayed the nutplate locations, riveted and piloted the top plate for the AD3 rivets. I tried to adjust the heights by measure and drilled the 4 locations on the fibreglass and try an initial fit. | 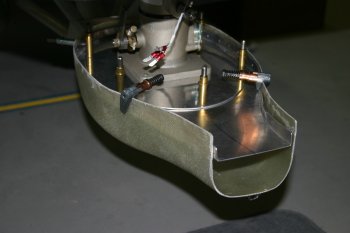 |
| It looks like the position is a) too 'low' - ie the filter won't quite fit, b) a bigger problem, I don't think the front gear leg will go in. | 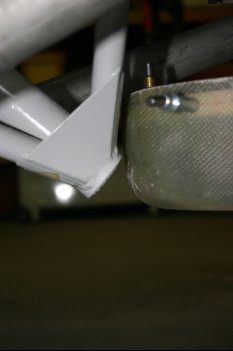 |
| I re-did the heights by using a better method (which I should have done first time). I added a single washer under each of the bolts / top plate, compressed and drilled the top plate / fibreglass - then just removed the washers which meant everything pulled down tightly. | 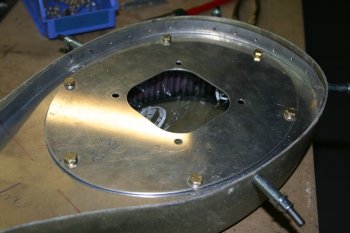 |
| The result was good and the front even lines up! The gear leg problem is going to need more thought, probably a new 0.063 sheet and re-drill. | 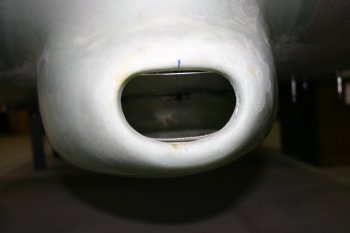 |
Thu 03 November 2005 | |
| Late start to the day as we were out this morning and I spent some time sorting logistics with VANs and Rainbow Paints first thing. Then with the weather still cool and some rain in the air we went round hunting for other things. Dad sorted the nutplates for the brake reservoir. Our plane is for all firewall nut/bolt penetrations to be into nutplates and have a smear of pro-seal on them. | 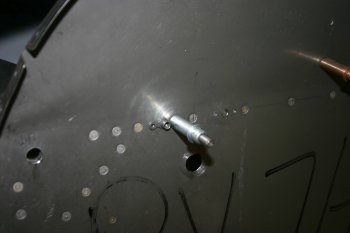 |
Tue 08 November 2005 | |
| And the brake reservoir to the firewall. Also the lower cowl aft hinge was goo'd and riveted to the fuselage. | 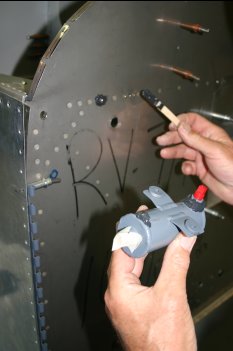 |
Fri 18 November 2005 | |
| Actually put the engine back on the fuselage. The shipment from VANs is in the country, but held in customs - nothing until next week now.... I really need some of the 'bits' to help layout the firewall before making any other decisions / finalising anything. I'm sure we will find something else to do for the rest of the weekend - the weather is looking good and the canopy front section needs trimming / finishing. | 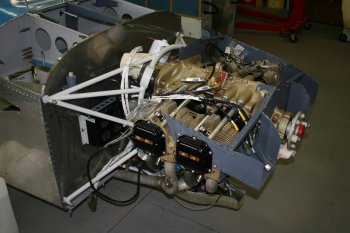 |
Fri 25 November 2005 | |
| After inventory / clean up I starting looking at the second battery box among other things - action reply of the first. Note the new computer filled / printed 'brown bag' from VANs - really good except they continue to mix AD3-3 and AD3-3.5 in the SAME bag....... | 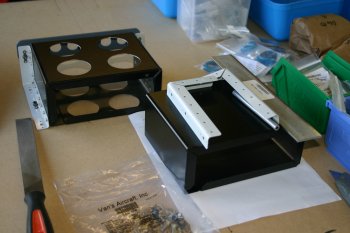 |
Sat 26 November 2005 | |
| Second time round is always quicker - this time I knew roughly what I was aiming at. Four large holes later in the steel battery box and filing etc. | 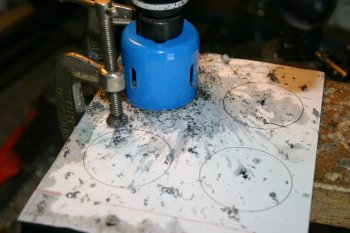 |
| Plus alignment of the brackets - a better way. | 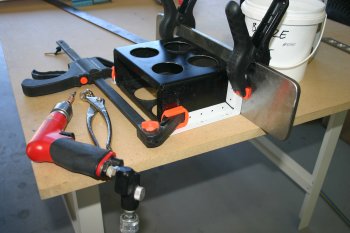 |
| Countersink (generously) and rivet. I haven't decided yet which way round the second battery will go - the firewall layout may dictate a specific orientation. Therefore I've left off all the nutplates for the moment. | 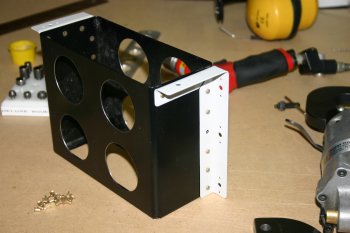 |
Mon 28 November 2005 | |
| Then moving onto the spinner plate, Dad knocked up a wood base plate for mounting on the pillar drill. | 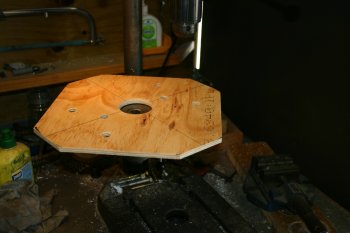 |
| I sorted a layout and transferred to the spinner. | 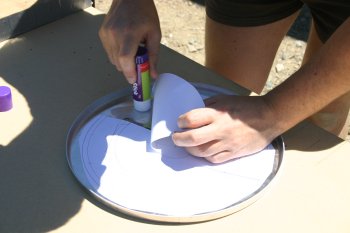 |
| With the spinner plate mounted and the locations defined the base can then be rotated - this results in a nice circular pattern! | 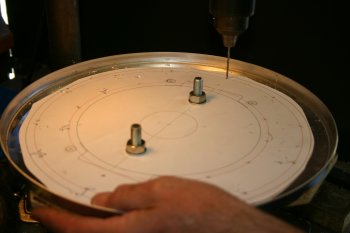 |
| This is the rear of the prop - sounds obvious now, but we went looking for the prop bolts - they are captive and already on the prop! | 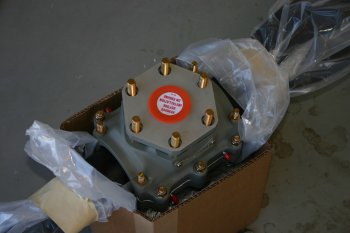 |
Tue 29 November 2005 | |
| Continuing with the cool work first thing - spinner cut out and filing needed. | 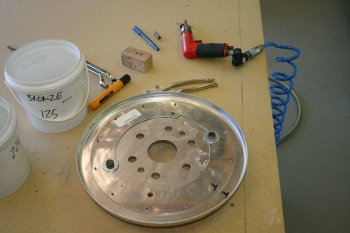 |
| The rotating wooden base worked really well along with a rotor burr. | 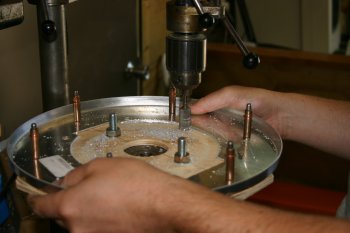 |
| A little more clean up and filing and everything fitted neatly. | 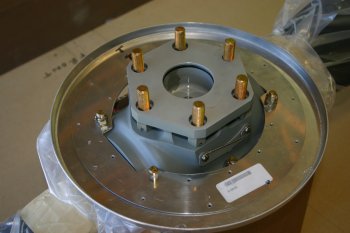 |
| The first mounting of the prop wasn't too successful - a) it is a slow process of doing each of the 6 bolts up, 2 turns at a time, by hand. b) after about 80% was completed one bolt started tightening considerably and we decided to back off and remove the prop again (just as slow in reverse!) | 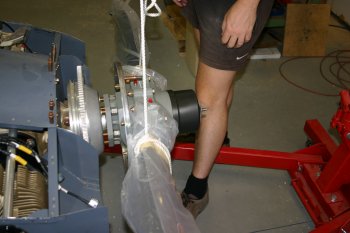 |
| This was the problem location - a little use of a 1/2" UNF tap helped and should solve the problem. | 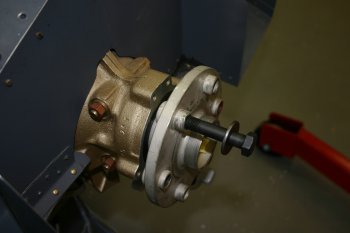 |
Wed 30 November 2005 | |
| With the weather not so hot today - no canopy work. Continuing with the prop - got it mounted OK. | 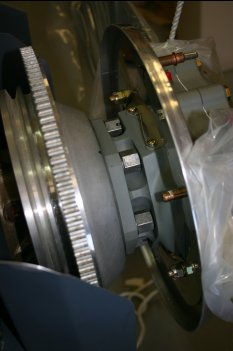 |
Sun 29 January 2006 | |
| After a few hours, I got bored and moved onto something else. With the spinner gap fairly sorted, we don't need the prop on for a while and the spinner plates need painting. Removal of the prop takes a while, but not hard. | 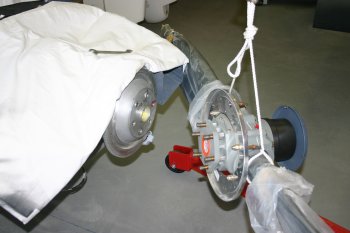 |
Sat 11 February 2006 | |
| A couple of firewall components have been on the list for a little while - the governor recess needed to be match drilled and dimpled after I removed the engine / frame on the hoist. | 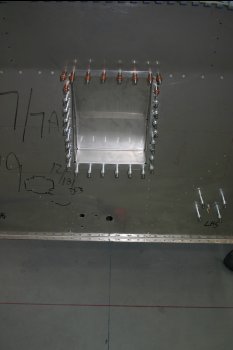 |
| And the brake valve bracket needed some nutplates. We are trying to use ONLY nutplates on the firewall rather than having to worry about access to nuts / bolts combinations which will hopefully reduce some of the maintenance pain. | 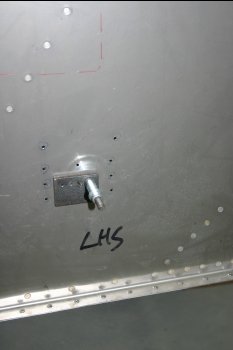 |
| Then onto the main recess - generous provision to seal the joint. | 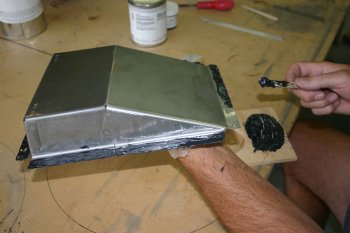 |
| Some masking to remove the gross excesses helps make the job look respectable at the end. | 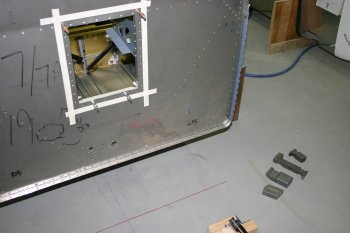 |
| The shooting / bucking is messy with Pro-Seal, we ended up doing a few locations then cleaning the tools. The VANs callout for the side rivets (AD426 3-4's) are rather marginal, I would probably go for -5 'next time'. Also gooed the brake bracket and cleco'd it on, I'll worry about that riveting later. | 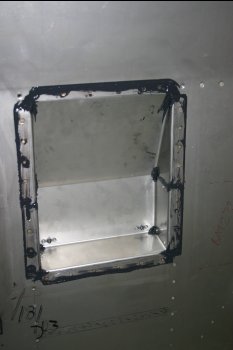 |
Mon 06 March 2006 | |
| Most of the afternoon we spent going back over the firewall layout options. The challenge is mounting the two battery boxes with enough space above them to get the batteries in/out, plus the two bulky ECUs which have the spark plug leads. I think we are getting to a possible solution...... | 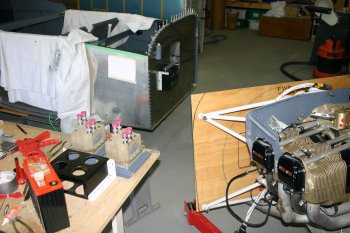 |
Tue 07 March 2006 | |
| Did a number of bits first thing, but most of the day was spent on firewall layout and positioning. This is a development of our initial ideas, P2 battery in the 'standard' VANs location and the ECUs dotted around. | 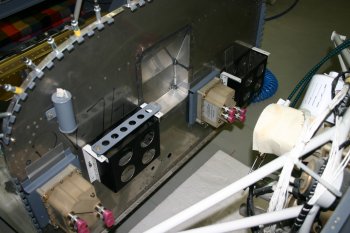 |
| The challenge with the batteries is to provide enough clear space above so that it can be removed without removing the whole carrier. After more thought the idea of two symetrically outboard locations was considered and looks promising. | 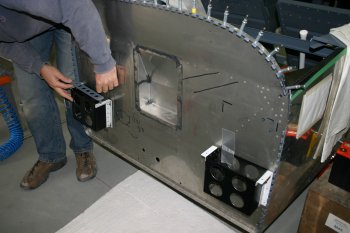 |
| This left enough space for either a split left / right configuration of the ECUs or both on one side. On the LHS (P1) side the problem is the fuel line, oil lines and prop cables are all in that area too. Therefore the P2 / RHS is the current preferred option, but with two ECUs the cable route needs a slightly off | 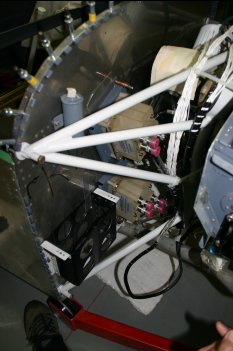 |
| This was waht we came up with, the upper ECU is slanted outboard and the main cable passes under the governor control / arm. | 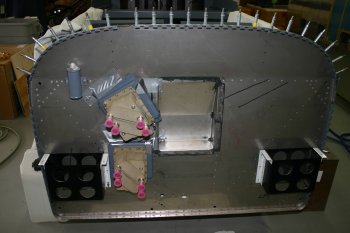 |
| The good news is the engine frame still fits and the spark plug cables have access. Time to leave it and re-visit with fresh a mind tomorrow. | 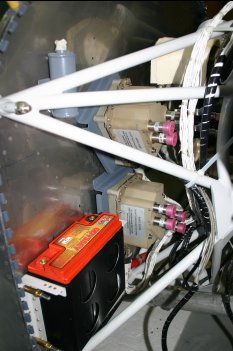 |
Wed 08 March 2006 | |
| Continuing with the firewall layout, after a night sleep the proposed solution still seemed to make sense (for now). I started adding lots of extra rivet locations and also a 032 doubler plate for the rear side. | 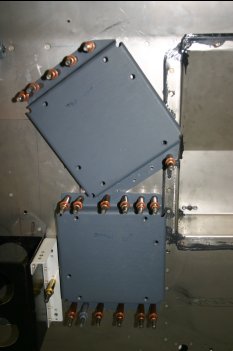 |
Thu 09 March 2006 | |
| I spent most of the day fabricating multiple backing stiffeners for the battery boxes and ECU mounts. Generally 032 plus the needed holes and one or more bent lips for rigidity. | 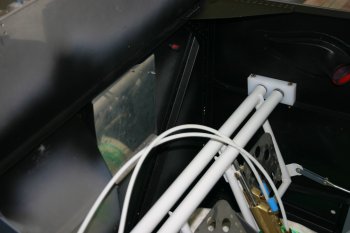 |
Sat 11 March 2006 | |
| First part of the day was spent looking at fabrics for seats and spending some time with UK visitors. In the afternoon the weather wasn't up to spraying but I completed all the basic scuffing prep work. Meanwhile Dad was fixing the compressor which needed a service and maintenance. | 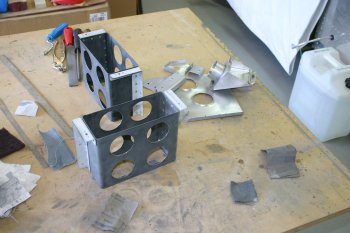 |
Tue 14 March 2006 | |
| With all the stiffeners painted, the firewall parts were shot/bucked. The ECUs and battery boxes are now mounted - maybe for good. | 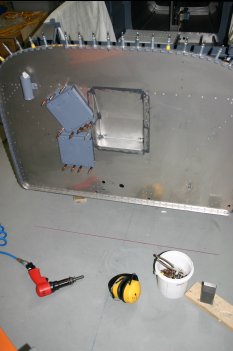 |
Fri 17 March 2006 | |
| Also everything is now available to re-check the alternator clearances - no problems. Looks like the belt will be about 850mm - another thing for the shopping list. | 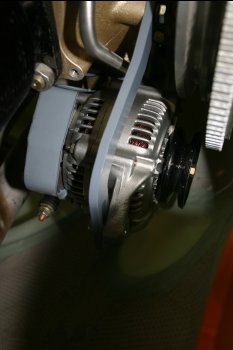 |
Mon 27 March 2006 | |
| Back into the shed today, Dad started working with the highvoltage spark plug leads. The supplied leads don't work in the labelled order, but might just about work after a re-organisation. Currently the upper #4 lead is the main concern. |  |
| Also being worked on is re-positioning the FAB forward slightly to provide clearance for the nose gear leg. We have some new .063 material, but limited supply so scrap is being used first. |  |
Tue 28 March 2006 | |
| Dad continued with the new FAB mounting - I think we will end up with it being about an extra 5/8" forward. |  |
Sun 09 April 2006 | |
| Then onto contactors and various mounting options. As always the things mounted previously get in the way / don't quite work, but I think a probable layout is coming together. |  |
Tue 11 April 2006 | |
| Dad had a bit more time on the contactors, current plan is for the Battery A, Starter and Cross feed will go in a line on the LHS, Battery B on its own on the RHS. |  |
Thu 13 April 2006 | |
| Dad continued with the stiffener plates and contactor mounting. |  |
Tue 18 April 2006 | |
| Dad continued with the stiffener plates and nutplate drilling for the contactors |  |
Wed 19 April 2006 | |
| Once the stiffeners were all match drilled, they were split, edged and then formed |  |
| The home made bending break is still going strong and working well. |  |
| The LHS done. |  |
| Then the RHS location just below the battery. |  |
| The product for a days work..... fiddly bits. |  |
Fri 21 April 2006 | |
| Dad continued with grounding and layout work on the firewall. |  |
| After more thought, we took the plunge on the first large eyeball location. Hopefully this will be for the P2 prop control. |  |
Tue 02 May 2006 | |
| The rest of the afternoon was spent putting the engine frame on and off the fuse and trying the push/pull cables. This location is going to be too close for the prop control, but looks like it should work for the P1 throttle cable. | 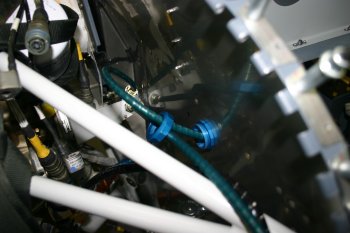 |
Wed 03 May 2006 | |
| Dad remade the throttle bracket out of .63 AL, this will be a template for the steel 4130 version. | |
Thu 04 May 2006 | |
| Dad worked on the steel throttle bracket. We have trialed 2 other AL version and think we have a valid solution - time will tell. | 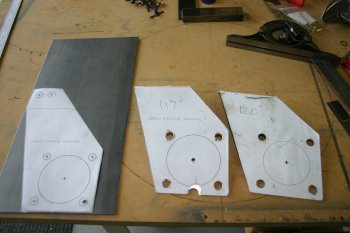 |
| The 4130 steel does seem to work fairly well, jigsaw for the shaping, then more drilling and edging. | 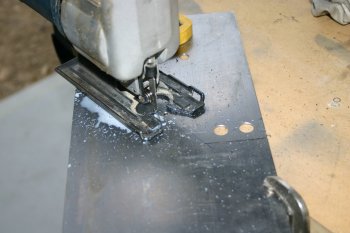 |
Sat 06 May 2006 | |
| Dad finished the shaping and bent the new throttle bracket - looks like it should work OK although we may add stiffening gusset. | 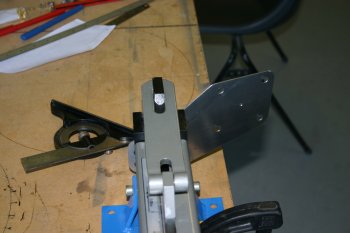 |
Tue 06 June 2006 | |
| Dad also had some time on the project, continuing with the throttle bracket bending / shaping. | 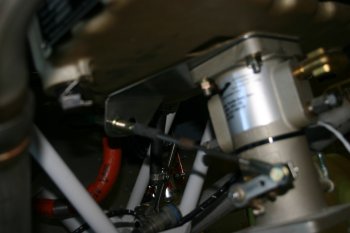 |
| After getting things aligned he also welded a small gusset to the side of the bracket | 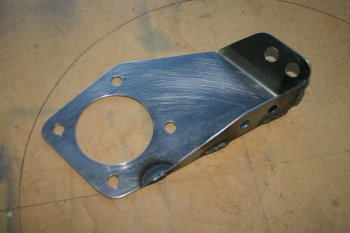 |
Mon 12 June 2006 | |
| Dad re-visited the FAB and alignment. We are continuing to try and move the whole structure forward to clear the nose leg. | 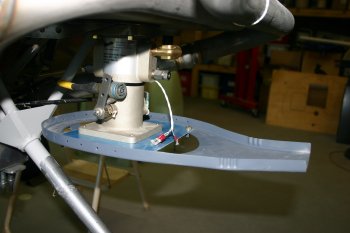 |
Tue 13 June 2006 | |
| Dad continued with the FAB - still too long, too low and off to the left. | 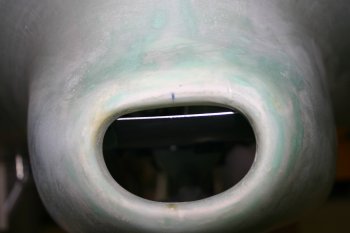 |
| More test drilling, shaping, fitting - I think we have a plan. | 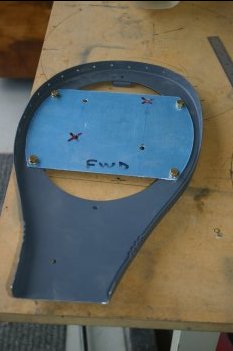 |
Wed 14 June 2006 | |
| Dad continued with the FAB (in between other things) and made a new support plate. | 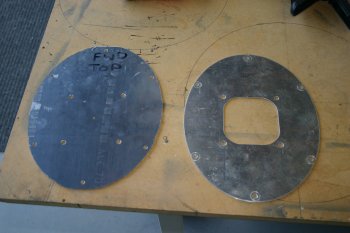 |
| The center location we ended up with a circular hole rather than a shaped one - makes no difference to the throttle body inlet. More tweaking of the alignment and height of the front needed. | 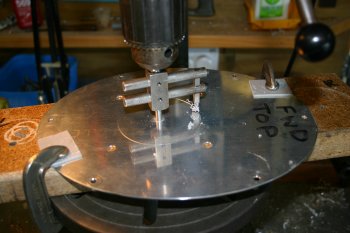 |
Sat 22 July 2006 | |
| Not much done today - more thinking / planning inside, but we did remove the engine / frame. | 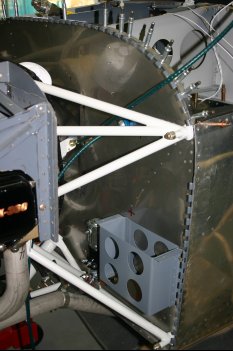 |
| A number of locations still need to be drilled, one of those - not quite sure what I need until after I've got the holes in the wrong place. The first thing is the large cables for the grounds and battery feeds firewall forward. | 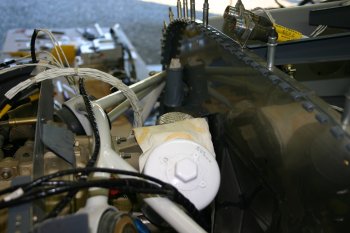 |
| We still have the choices for the prop governor locations along with the other electrical transitions. The project is going really 'slowly' at the moment, as we progress to the customised parts there is much more thought and planning needed, compared with earlier on when it is pretty much follow the instructions. | 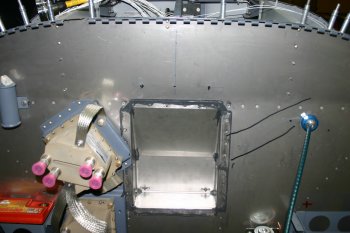 |
Mon 31 July 2006 | |
| The weather started to improve a bit and I wanted to get back out onto something physical - the FADEC harness has two bulkhard connections between the firewall forward and the cockpit side (including all the power connections). | 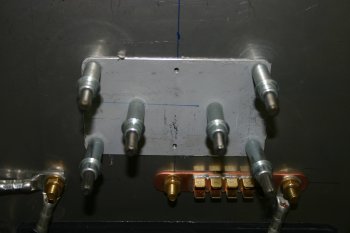 |
| For the first attempt I tried making a clever shaped hole in the doubler but the firewall is too thin to 'lock' the orientation. | 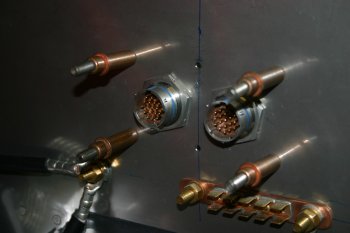 |
| The second attempt was a simple round hole with the possibilty to add a alignment key if needed. | 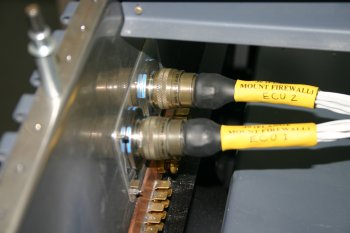 |
Tue 01 August 2006 | |
| Dad continued with the firewall electrics. This diode combination is for spike supression for the main / starter contactors. | 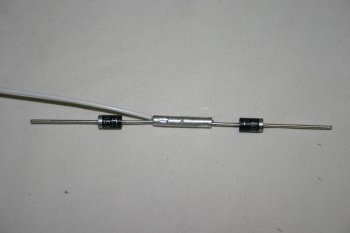 |
Thu 03 August 2006 | |
| Dad modified the Main/Starter/X-Feed bus bar to include a stud as the thread lengths weren't going to be enough otherwise. |  |
Mon 21 August 2006 | |
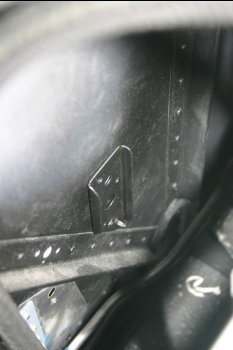
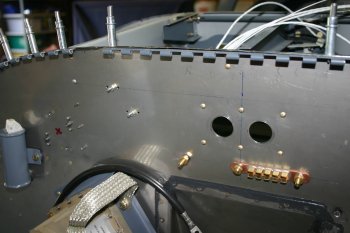
| Dad did a bit of work on the firewall for the electrical penetrations - this is the RHS (B battery) location. | 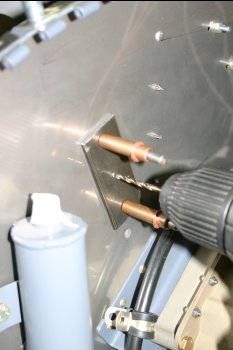 |
Wed 13 September 2006 | |
 | |
Thu 14 September 2006 | |
 | |
 | |
Fri 15 September 2006 | |
 | |
Sat 16 September 2006 | |
 | |
 | |
Tue 19 September 2006 | |
 | |
Wed 20 September 2006 | |
 | |
Sat 23 September 2006 | |
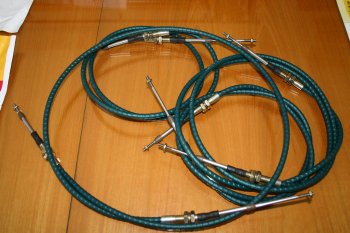
| Then we returned to the engine / firewall forward. We needed to validate the new push-pull cable penetrations and some of the wiring lengths. | 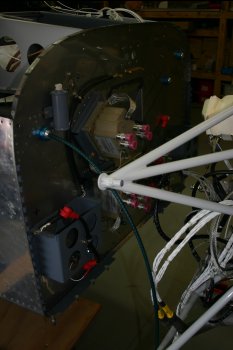 |
| With the engine back on, the P2 throttle cable should be fine with another 67" and routing looks simple enough. | 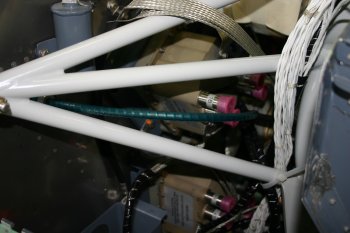 |
| The mixture cable eye-ball is not quite as perfect, but will work. Not sure if this will be the P1 or the P2 control. | 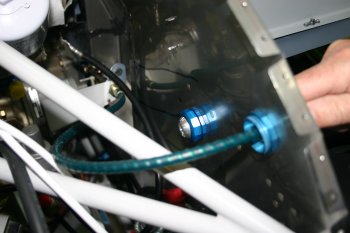 |
Sun 24 September 2006 | |
| Looking around for some bits to do, re-checked and trimmed the FAB glass part. | 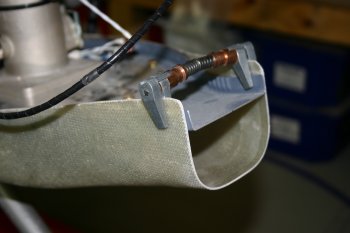 |
| Dad continued with the firewall penetrations. The two lower transitions will be for the A & B alternator B leads - in and back from the circuit breakers. | 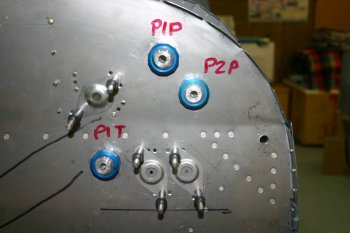 |
Thu 05 October 2006 | |
| Dad sorted a stiffener plate for the P1 push/pull cables |  |
Sun 08 October 2006 | |
 | |
 | |
 | |
 | |
Mon 09 October 2006 | |
 | |
Sun 15 October 2006 | |
| Knocked off the bits of rivetting first thing - mainly firewall plates and brackets. | 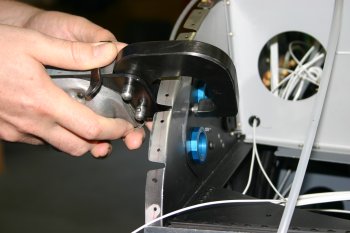 |
Sun 22 October 2006 | |
| Along with the main bus feeds being completed we were then ready for actually using the first switches that are working on the plane. The 3 contactor controls, A, B bus and X-Feed. A re-assurring 'thud' is heard and 12V appears on all the right places. The smoke stayed inside the wires so we called it sucessfull! Silly how such a trivial thing can actually be quite rewarding..... | 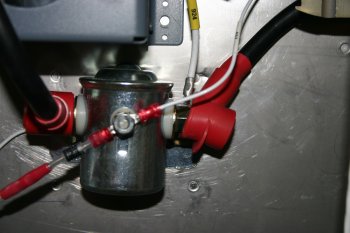 |
Tue 31 October 2006 | |
 | |
Thu 02 November 2006 | |
 | |
Sun 05 November 2006 | |
| Dad did a few bits on the firewall forward wiring - the crimps weren't going down very well - some replacements need plus some thought. | 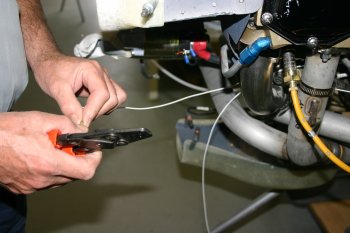 |
Sun 12 November 2006 | |
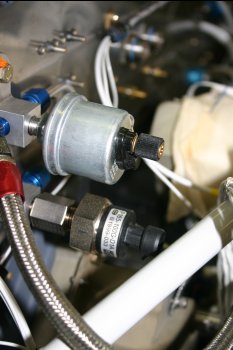
| I terminated the Oil presure / temp sensors on the new bulkhead fitting, Dad started the mounting. | 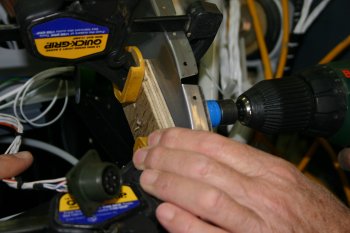 |
Mon 13 November 2006 | |
| Dad continued with the firewall bulkhead connector for the Oil Pres / Temp sensors. Following the principle used everywhere else nutplates were sorted. We currently have no nuts on the firewall bolts / screws - nutplates everywhere (Thanks to Gary Sobek for this pointer way back when...) | 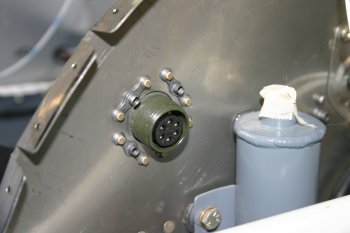 |
| After some more thought, Dad reterminated the solder connections, this helps reduce some of the excess cable and also added some heat shrink in a couple of areas. | 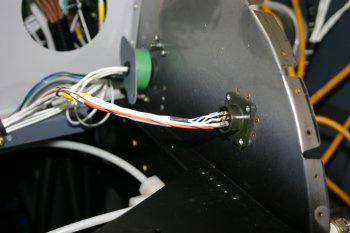 |
| Dad managed to find some local spades that have the barbs on the back. The alternator connectors could then be completed. | 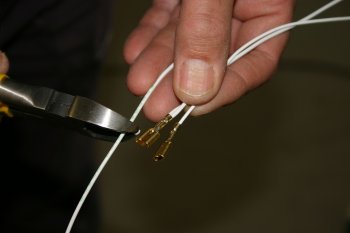 |
Tue 21 November 2006 | |
| One of the observations was the clearance between the vertical induction filtered airbox and the LHS of the cowl scoop is very tight (< 3/8" - the RHS is ~1") so we will need to relayout / remake the plate again. | 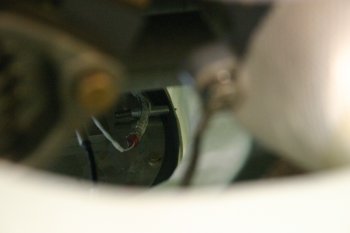 |
Wed 22 November 2006 | |
| Dad worked on the positioning of the FAB plate. The problem is layout wise getting a balance between the LHS clearance, the space for the filter to fit, the rear edge clearance to the gear leg and the alignment of the front of the throat with the cowl inlet. Basically you can have any two, but not the other 2! | 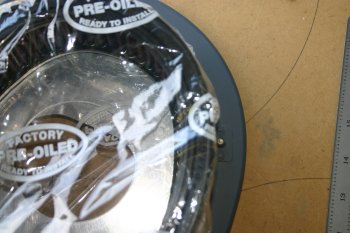 |
Mon 27 November 2006 | |
 | |
Tue 28 November 2006 | |
 | |
Wed 29 November 2006 | |
 | |
 | |
Thu 30 November 2006 | |
| The PVA glue worked well and I continued with the oil cooler exit duct. | 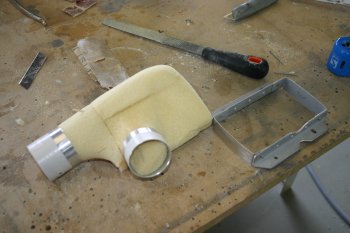 |
| A few gaps needed filling to get closer to a final shape, tried pollyfiller, not sure if it was a good idea. I'll let it dry properly first, there is plenty of other glass work to do in the mean time. | 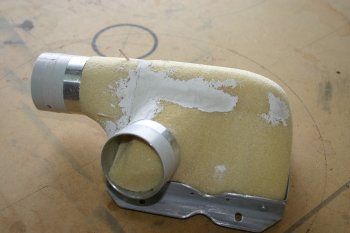 |
Sat 02 December 2006 | |
| Then more fibreglass work, a couple more layers on the oil cooler duct. | 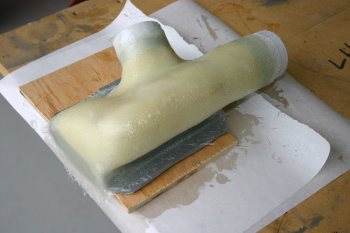 |
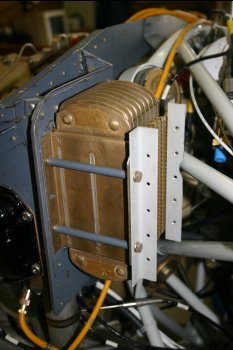
| The two 2" outlets are roughly equal to the exit area of the cooler - one outlet we are planning on using as the feed for the heat muff / cabin heat, the second is a straight vent but potenially can be throttled down if we need to increase oil temps which others locally are doing. | 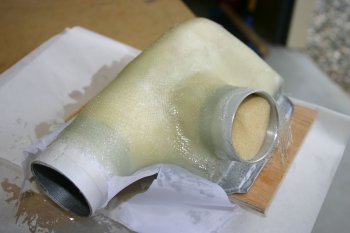 |
Sun 03 December 2006 | |
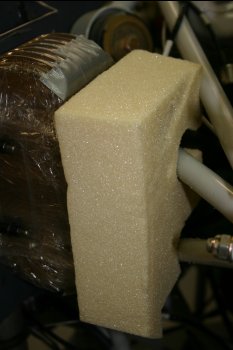
| Short day, clean up work on yesterdays fibreglass work, cut out the bulk of the foam from the oil cooler and sanded out the rest. | 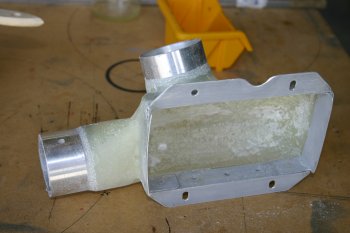 |
Mon 04 December 2006 | |
| Finally started to serious work on a shopping list for Aircraft Spruce. We have a reasonably long list of things needed, but working the details of exactly which AN fittings hasn't been done. Slow process. | 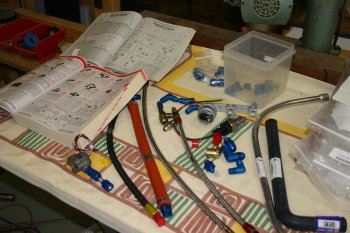 |
| The oil cooler links in particular provided some interesting thoughts / options. I've decided to just order a selection of options at this point, including some steel fittings for the engine end of the lines. | 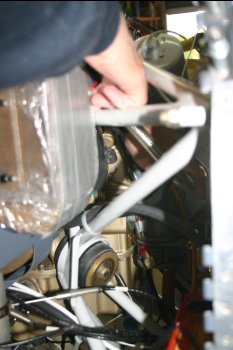 |
Tue 05 December 2006 | |
| Spent another day working out shopping lists for Aircraft Spruce and processing the order - slow going, but needs to be done. | |
Wed 06 December 2006 | |
| Finally got the ACS order complete and sent through. > US$1000 + shipping for 'bits'...... | |
Thu 07 December 2006 | |
| Then oil cooler interior finishing with 2oz, not sure if has all bonded fully, but I can sand out any problem areas later | 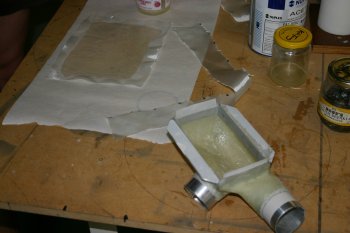 |
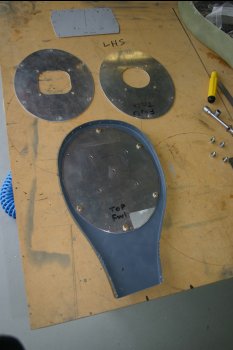
| A little experiement for the FAB recess that is going to be needed for the nose gear leg. Might work, might not - but good prep. | 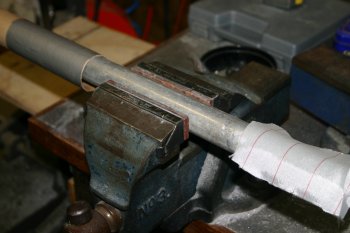 |
Fri 08 December 2006 | |
| More clean-up / sanding work - the oil cooler duct looks good, one spot that will need a little rework. | 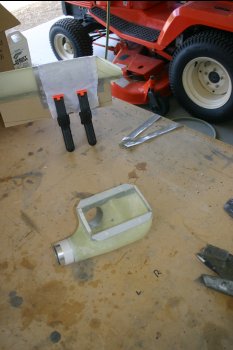 |
Mon 11 December 2006 | |
| Dad started modifying the FAB for the nose gear leg - starting with a hole saw and then sanding / shaping by hand. | 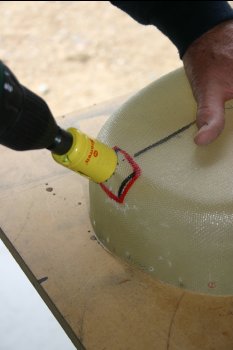 |
| This shows the area with gear leg. We have minimised this as mush as possible via the positioning of the connecting plate - I guess this is one of the areas where the tail dragger would be easier..... | 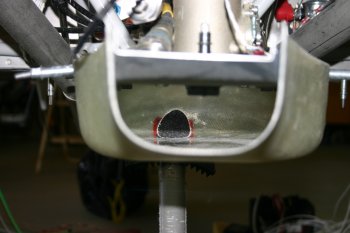 |
Wed 13 December 2006 | |
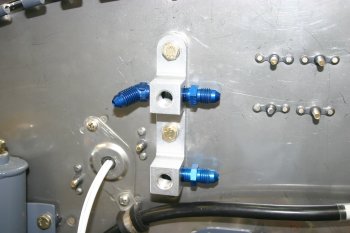
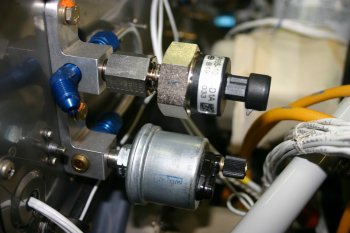
| Misc bits to do - IF we go with dual Oil Pres sensors we will need to use a manifold - I made the U bend loop and roughed out some mounting options. | 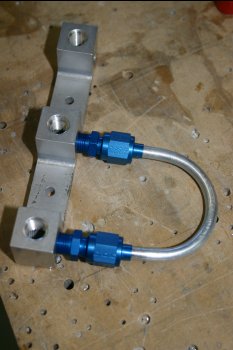 |
Thu 14 December 2006 | |
| Dad glassed in the mini-half round previously made into the FAB - a little flox around the edges helped greatly in getting a smoothing contour - hopefully the whole of this will be outside the line of the K & R filter. | 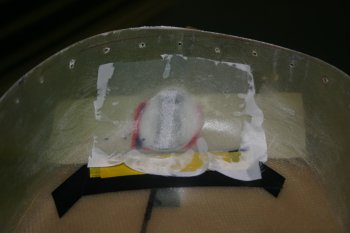 |
Sat 30 December 2006 | |
 | |
Sun 14 January 2007 | |
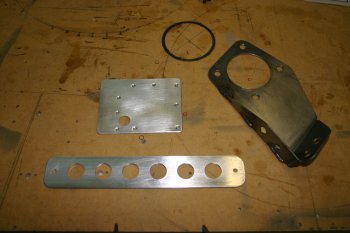
| Dad cleaned up the new stainless cover plates and mounted them up. | 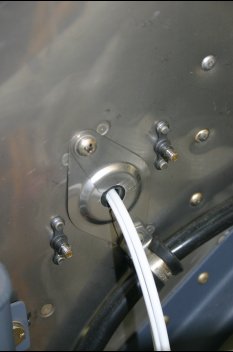 |
Tue 16 January 2007 | |
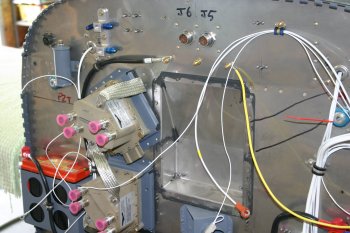
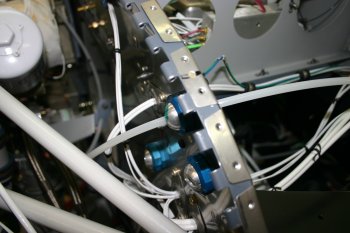
| Dad worked on the SS firewall covers - as shipped they are pretty rough and need detailed deburring etc, the A side alternator cables were too large for the standard hole. Hole saw and careful mounting seemed to work | 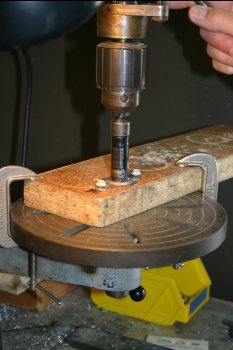 |
Wed 17 January 2007 | |
 | |
Thu 18 January 2007 | |
 | |
Sat 20 January 2007 | |
 | |
Tue 30 January 2007 | |
 | |
 | |
Wed 31 January 2007 | |
 | |
 | |
Thu 01 February 2007 | |
 | |
Thu 08 February 2007 | |
| Dad worked on the oil breather options from the engine - this is the current favourite - out of the way and provides a path through all the oil and fuel hoses without getting in the way too much. | 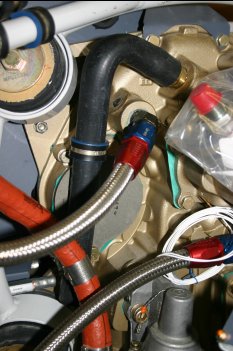 |
Sun 11 February 2007 | |
| Dad continued with the breather routing - bending spring on the AL tube works OK, but it is fairly stiff. | 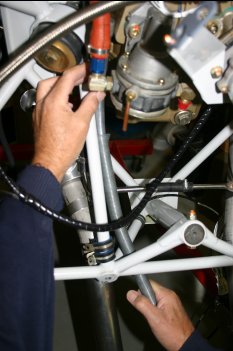 |
| This is the final result, we still need to cut the bottom section, currently debating on forward / reward / angled / flat cuts. Seems to be a mixture of options / thinking. The lower Adel clamps have a 3/8" spacer between them. | 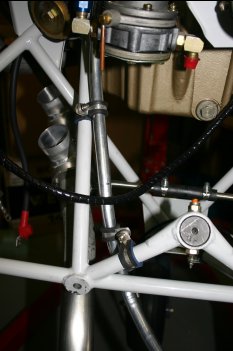 |
| Also sorted a route for the oil cooler air exit to heat muff inlet. The breather route can be seen in full here too. | 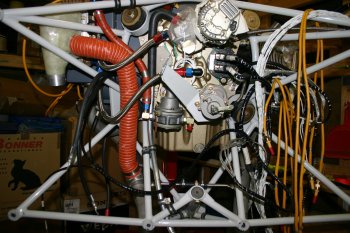 |
Thu 15 February 2007 | |
| Then we got all keen and did some pro-seal'ing, it has been a while since we played with 'black death'. | 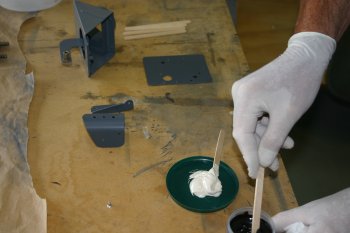 |
| Main items to be completed were the firewall corners and doubler plate - these are needed before the engine frame can be mounted for good. | 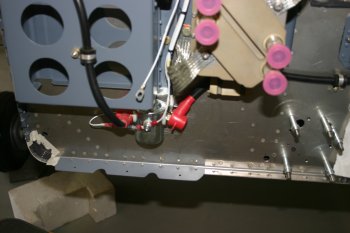 |
Tue 06 March 2007 | |
 | |
Mon 12 March 2007 | |
 | |
 | |
 | |
 | |
Fri 23 March 2007 | |
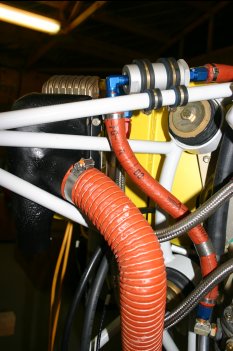
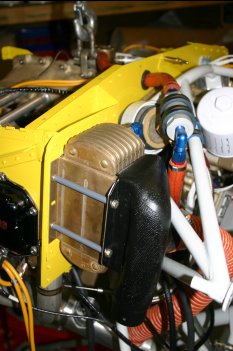
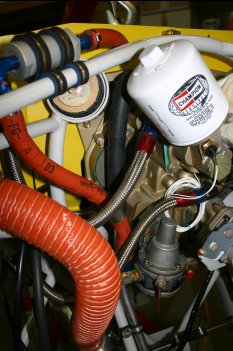
| This is the upper left (P1 side) corner, from above - it is tight getting the dual prop controls, throttle controls and FAB alternate air line. In addition the oil cooler / hot air duct and in-line fuel filter are in 'final' locaitons. | 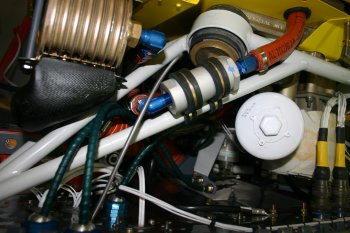 |
| This is the best SCAT tube layout that we can come up with so far. | 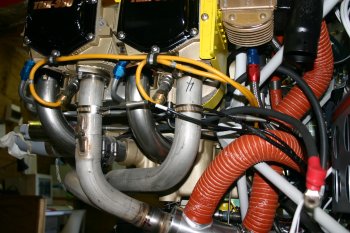 |
Sat 24 March 2007 | |
| Went round sorting some of the cable clamps that are defined for the engine. The FADEC harness is going to need more work, but at least the high voltage spark plug leads seem to work length wise. | 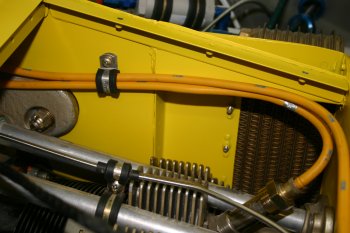 |
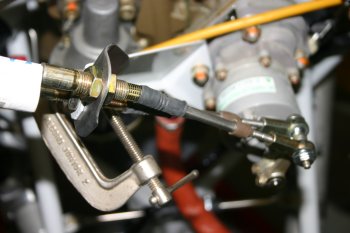
| After trying the push-pull throttle cables we decided the bracket needed a bit of tweaking to help the alignment and clearances. Dad ground off the weld and increased the bend somewhat. | 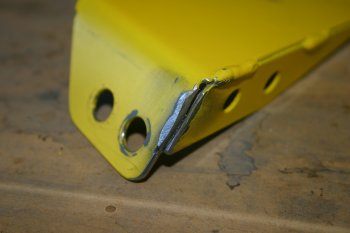 |
| And finished with some more push / pull cable trials. Got the basic system all working, although it is fairly stiff with the current levers / leverage and quadrants - more work needed. | 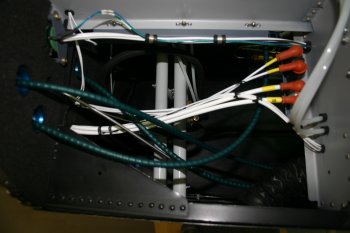 |
Sun 25 March 2007 | |
| Dad re-welded the throttle bracket with the modified angle - now 111 degrees. The 4130 steel does weld and work very well - it is sorta 'soft/maluable' but steel tough and hard. (Materials are one of the biggest learning parts of the project todate - very rewarding). | 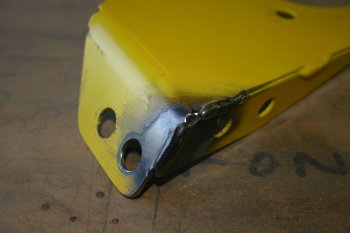 |
| I spent some time looking at clearances and layout of the plenum and cowl. This is the first time the full setup has been installed for quite a while. The forward edges look tight, but hopefully the engine will drop a little and everything well be fine. The RV's in general are tightly cowled and I'll have to wait and see if it rubs / needs other solutions. | 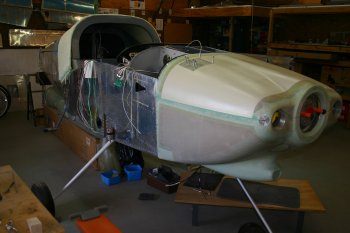 |
Mon 26 March 2007 | |
| The filtered air box also needed another outer layer of glass around the gear leg recess, so I prep'ed and smoothed this. | 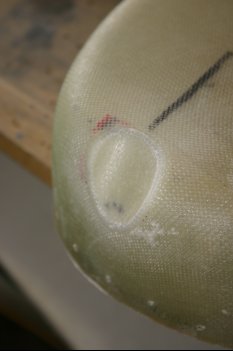 |
Sun 01 April 2007 | |
| Spent some more time on the dual prop / engine controls. This is the dual prop controls - lower location is the P1 side. | 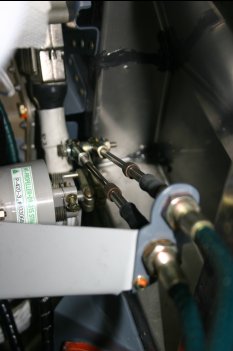 |
| This is the custom bracket for the throttle - not sure of which sides make most sense for the P1 or P2 yet - but a detail. New alignment seems to be working well. | 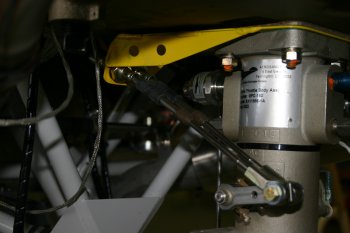 |
| These are the new stainless steel arms that Dad has been making - P1 side - we have added a little height and 'kink' to both arms and reduced the distance between the pivot and the clevis pin - this increases the leverage. It is amazing the amount of difference in feel for only a 5mm change in location. | 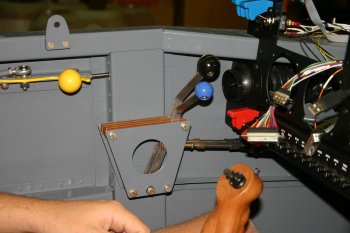 |
| And the P2 side. For information the Prop is 60mm between centers and the Throttle is 66mm. Although it will probably be reduced by 3 or 6mm depending on the travel needed for full throw. | 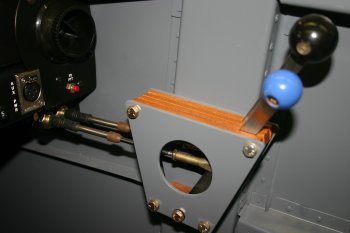 |
Tue 03 April 2007 | |
| Even better news, after some fitting work the FAB fits, with the filter in it and even aligns with the cowl entry - bonus! The space between cowl / FAB is very tight - not sure if I'll need to tweak something a little here - more thought needed. | 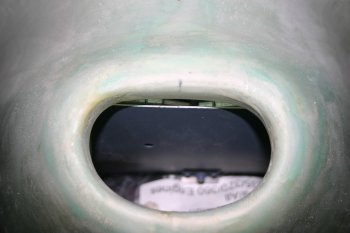 |
Tue 10 April 2007 | |
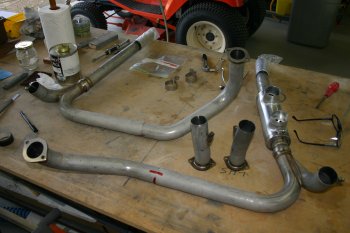 | |
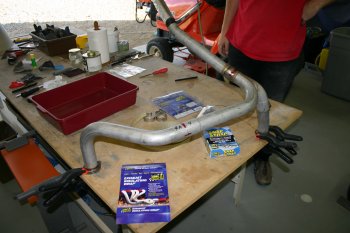 | |
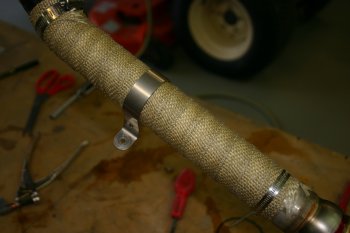 | |
Wed 11 April 2007 | |
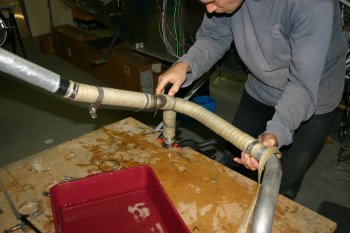 | |
 | |
 | |
 | |
Thu 12 April 2007 | |
 | |
 | |
Sat 14 April 2007 | |
 | |
 | |
 | |
 | |
Sun 15 April 2007 | |
 | |
 | |
Sun 29 April 2007 | |
| An area that we been thinking about / playing with ideas is the starter / alternator cabling running around the side of the engine sump. A few different problems to over come, UNC bolts / lengths, adel clamp orientations etc - replacing with L washers and this looks like a possible. We won't know until the engine frame is mounted back up for the final time. | 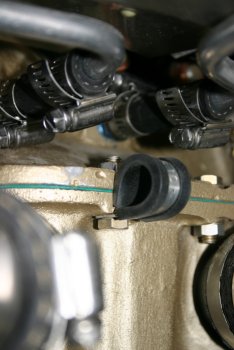 |
| Put the newly painted exhaust back with gaskets etc, also re-sorted the hanger supports. | 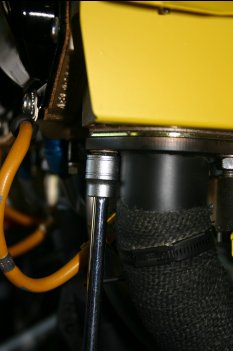 |
| Alternator ground completed - decided to use braid between the alt bracket and the starter boss - should provide a solid path for charging. | 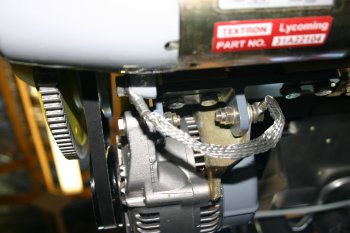 |
Mon 30 April 2007 | |
| Dad sorted the Oil Pressure / Temp cable connection, we are starting to finish up the firewall forward bits now. | 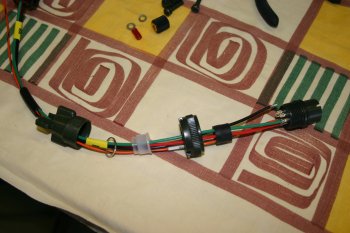 |
| I spent ages re-wrapping and laying out the plenum cabling - the black hi-temp wrap provides good support and coupled with simple clamps should hold eveything in place. | 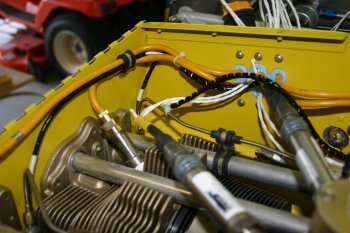 |
Wed 02 May 2007 | |
| Added the fly wheel and alternator belt - tensioning I used the torque wrench method with it set at about 140 inch lbs - seems to work well. |  |
Thu 03 May 2007 | |
| Dad did a few bits early on - fuel over flow needed 'tweaking' to clear the exhaust muff to cabin air control SCAT tube. | 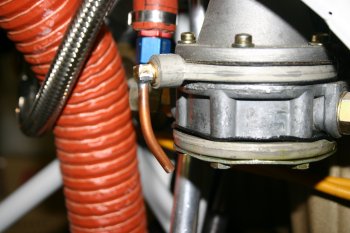 |
| Straightened and cut off the oil breather pipe. | 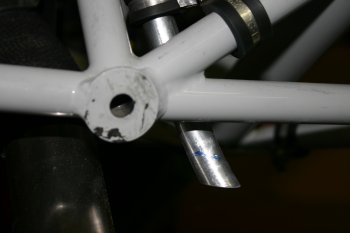 |
Sat 05 May 2007 | |
 | |
 | |
Tue 22 May 2007 | |
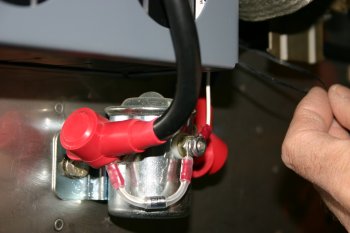 | |
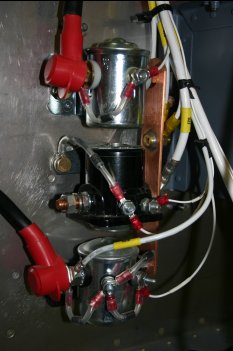 | |
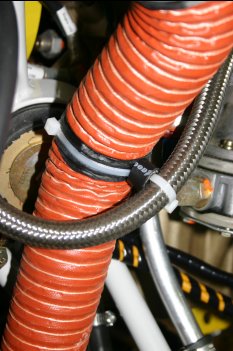 | |
Wed 23 May 2007 | |
 | |
 | |
| And the engine frame is mounted - hopefully for the last time. Now to go through all the connections..... | 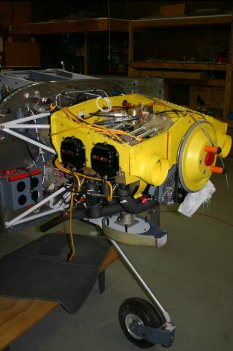 |
Thu 24 May 2007 | |
| Throttle cables checked and connected up. Re-routed a couple of times, it is all a balance of not letting things rub, but still get from A to B. | 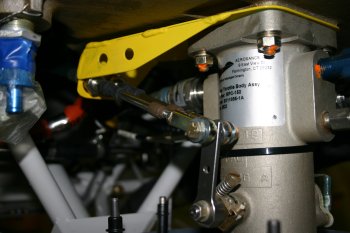 |
| Pitch controls connected up - although, like the throttle cables, some tweaking of the cable routing and end stops will probably be needed later. | 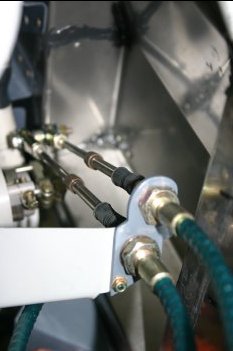 |
| More prep for the remaining items between the engine and the firewall. | 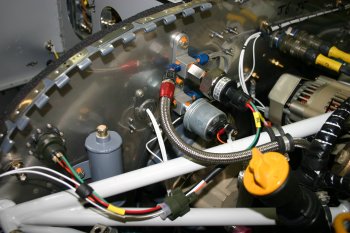 |
Fri 25 May 2007 | |
| Started on the spark plug leads - trying to find neat routes for them that don't rub / chaff with anything else. | 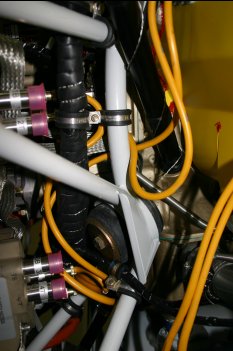 |
Thu 31 May 2007 | |
| I had a slow day - firstly looking at the front of the FAB and the transition from the cowl. | 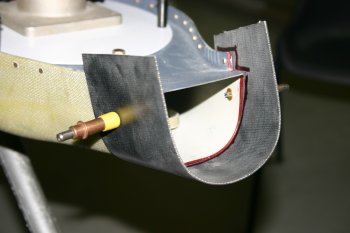 |
Mon 04 June 2007 | |
| I started the FAB alternate air mechinism - it took a while to understand how the main ring was meant to be bent / crushed. | 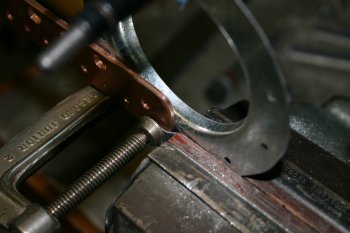 |
Tue 05 June 2007 | |
| I continued with the FAB alternate air door - lots of thinking / positioning and trialing. | 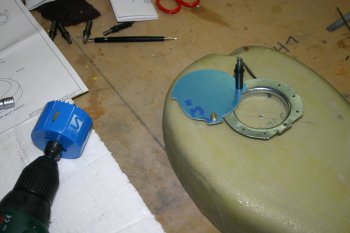 |
| Ready for flox / glass work. | 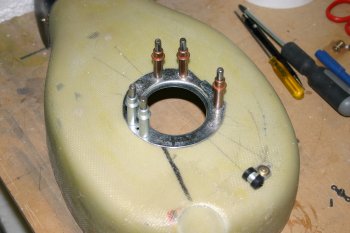 |
Wed 06 June 2007 | |
| Dad worked on the fuel pump overflow - we have decided to vent in the center of the cowl, rather than outboard. | 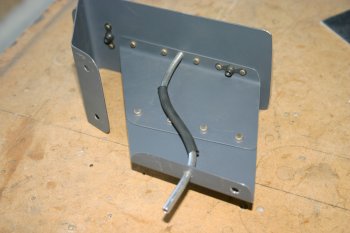 |
| Finished component to be mounted up later. | 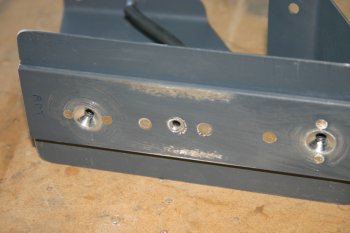 |
| The FAB went together very well and seems to have come out fine. After looking at / working on the slightly over simple alternate door I'm begining to come round to the design. | 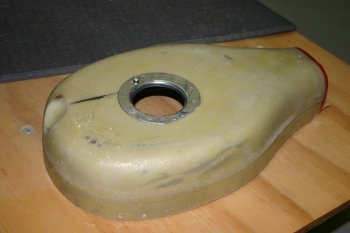 |
Thu 09 August 2007 | |
| Then back to the firewall forward FAB. This is the baffle seal between the cowl and air inlet. | 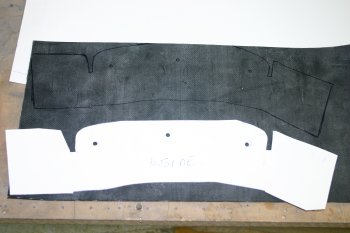 |
| Getting closer but not sitting cleanly in the lip - more sanding / shaping. | 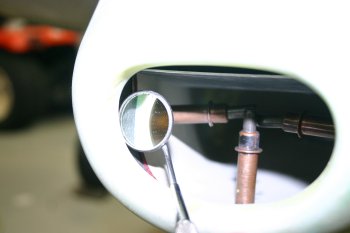 |
Thu 23 August 2007 | |
| In the afternoon a couple of hours doing firewall forward tieing / support of various items. | 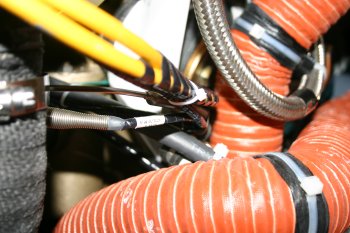 |
Mon 24 September 2007 | |
| Alternator safety wiring sorted and retentioned. | 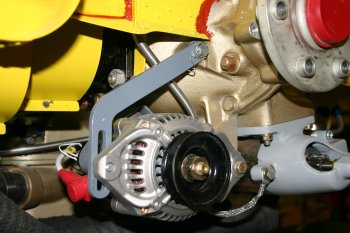 |
| Prop re-installed and spinner mounted.... | 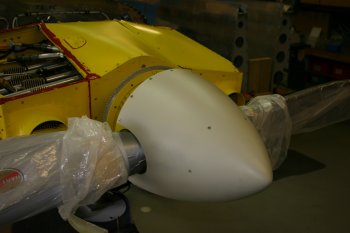 |
Tue 25 September 2007 | |
| Dad continued with the spinner, finished trimming / shaping and coutersunk the screw locations for the tinnerman washers | 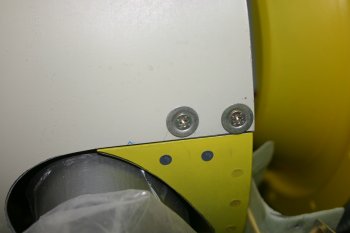 |
Sat 03 November 2007 | |
 | |
 | |
Sun 04 November 2007 | |
 | |
Thu 15 November 2007 | |
 | |
Tue 20 November 2007 | |
 | |
Wed 21 November 2007 | |
 | |
| Home | Carl Morgan | Previous|Next|Latest |