Fairings |
|
| Started looking at the gear leg fairings. I duplicated the DWG templates and marked out the fairings. The trailing edge is bigger than the template - but at this point I've left it. | 
|
| For the main fairings I've been able to cleco the rear edge, and I've pre-drilled hinge. | 
|
|
| | 
|
| | 
|
| | 
|
| | 
|
| | 
|
| | 
|
| | 
|
| | 
|
|
| I went back to the wheel fairings, more trimming on both the inboard location where the leg comes out and also around the front / rear edges of the tire. | 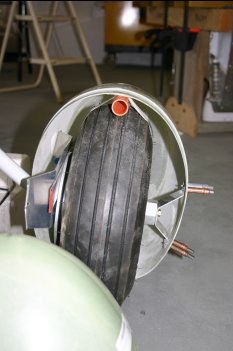
|
| After getting a rough idea, the inboard bracket locations were marked | 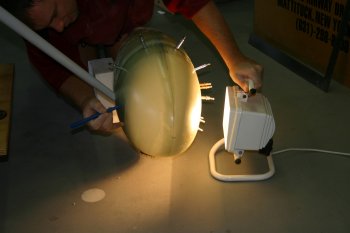
|
| Then lots of measuring and checking. The principle is the wheel pants should be in line horizontally with the airflow when the wheels are unloaded. The tip to tail of the fairing should be parrellal to air frame and the distance between the left / right tips / tails should all also be the same. The thing that took a bit of getting our head round was the 'rotation' of the wheel pant around the 'roll axis' of the tire centre. I think we are there, but Dad was busy this evening and it was a good spot to stop - fresh eyes tomorrow. | 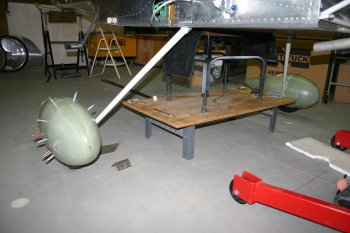
|
|
| I continued with the fairings. The hinges are now drilled and everything is countersunk. I'm planning on not using flox to bed this as I think the risk of blocking the 'lugs' is too high. | 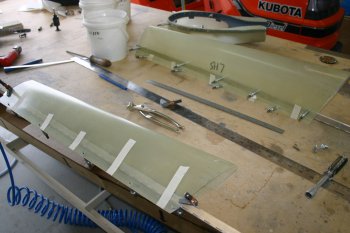
|
| Then we re-levelled the fuselage, a small block of foam on the tail and wood block on the nose. | 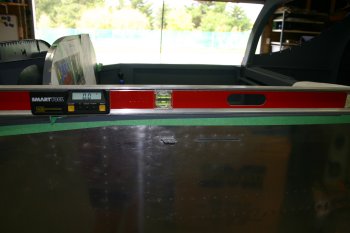
|
| The wheel pant alignment took a while, we used a selection of steel offcuts we had around to make a measuring jig. Everything seems to be within 1/16" and it all moves around a bit anyway on the sprung steel legs. | 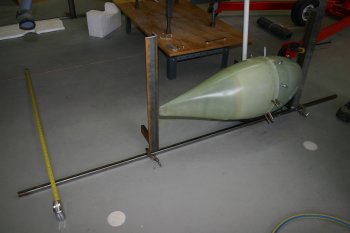
|
| Several more hours for openning up locations for the nutplates, rechecking etc. | 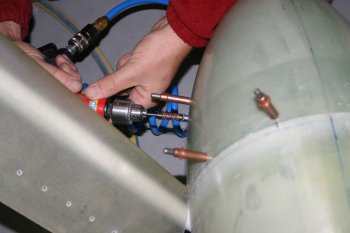
|
|
| Continuing with the front wheel fairing it is pretty similar to the mains. The normal problems with marking a straight line on a set of compound curves. Also discovered the front nose fairing has 'dimples' marking the bearing line, it is a shame the rest of the fibre glass parts don't have the same. | 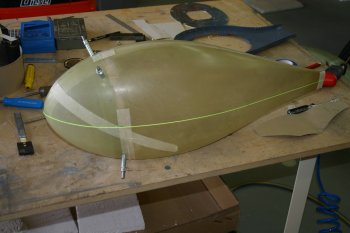
|
| With the weather improving, we diverted track to some spraying. This should enable some progress on the fairings mounting. | 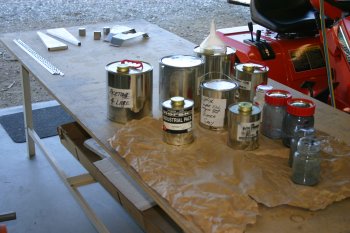
|
| The top coat painting went OK, but primer was proving difficult - no idea why, maybe air flow rate was a little high. | 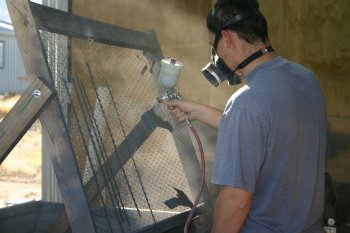
|
| Finishing the day, went back to fairing. Aft locations were mounted up, I considered using #8 screws but that doesn't work as the brackets are wider than the fairing front. | 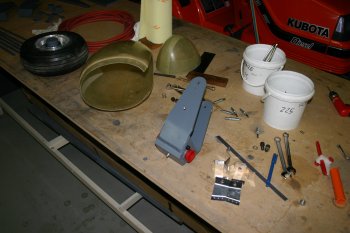
|
|
| Half day today. Started with rivetting all the fairing hinges. Not too bad, the nose leg one is a little more of a problem, some aft edge trimming needed. | 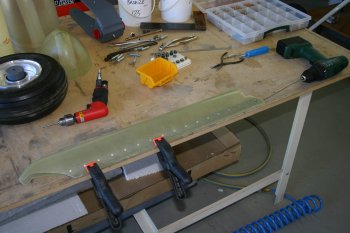
|
| Then onto the nose wheel fairing. After drilling out the axel locations to 20mm and remounting we found the tail of the fairing isn't perpendicular - about 1/4" to the LHS. We are not sure if this is 'as designed or wrong, some questions out on the email / VAF groups. | 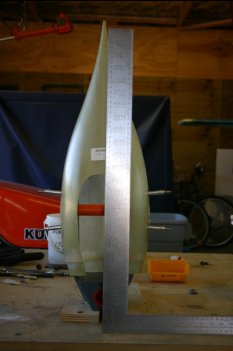
|
|
| Continuing with the nose wheel fairing, the next observation was the gap between the wheel forks and the fairing brackets - this is about 1/4", but I'm planning on building the inside of the fibreglass up with a few layers. | 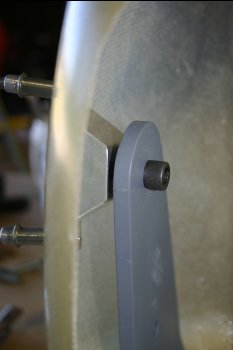
|
| The next step was to trim the rear edge for clearance with the wheel. To start with I took about 1/4" off each time, however I finally wised up and just used the bolt plus a rule to get the 5.5" clearance. I tried moving one bracket by about 1/16" inch - this however didn't solve the alignement issue, that was too much - it is very subtle amounts. | 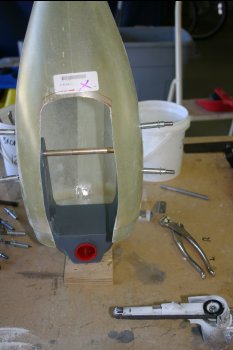
|
| This is the initial position - you can see the blue mark was the starting position. A final trim was completed to provide clearance (the black lines). | 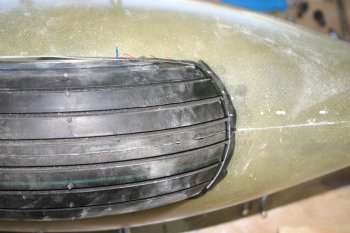
|
|
| The word came back from VANs on the fairing alignment - nothing clever, it should be completely straight. I ended up openning the original locations to #30's and that variation was enough to get the alignment correct. Then the remaining locations could be drilled. I decided to leave the forward brackets until after the axle ones are primed, painted and rivetted on. Then things won't move! | 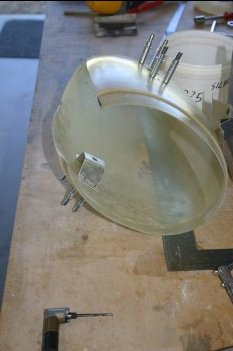
|
|
| I then realised the nosewheel fairing was too big and also interfered with the cowl. One problem that we have had was getting the hinge pin in with the fairing 'springing open'. The clamps like this helped greatly and simplified the process significantly. | 
|
| After multiple small trims it is now much closer to the final configuration. One question I have is how the upper end is fastened. | 
|
|
| Short day, so looking for bits to do. With the lower cowl getting closer to be finished I trimmed the nose gear leg fairing further and laid up the multiple fibreglass and clamped it up. | 
|
|
| Continuing with the fariings theme, Dan (and other reports) have commented on the rivets working over time on the rear hinges. To try and stiffen any finishing / paint work I've decided to add a single layer of 2oz cloth over the aft halve of the sides. I used the masking tape method as a trim line. | 
|
| Normal sort of f/g process, I used a folded strip of grease proof paper between the two edges to stop them being glued together. | 
|
| One side of the nose leg fairing was also done and peel ply added to all the surfaces to help remove the excess resin. | 
|
|
| First up was peel-ply removal and rough trimming of the edges. All in all, it has worked well and should sand down well for finishing. | 
|
| Then onto the other main fairing and side of nose leg. | 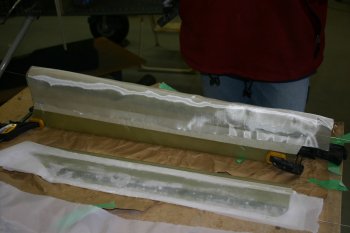
|
| With the temperatures dropping further today (high of about 4 degree C's in the shed) the resin is taking quite a while to cure. Squeegy works well and peel ply finishes the surface. | 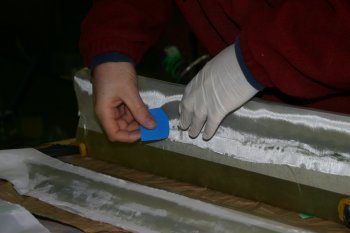
|
| The finished glassing, ready to cure, I'll leave until tomorrow morning for trimming the edges. | 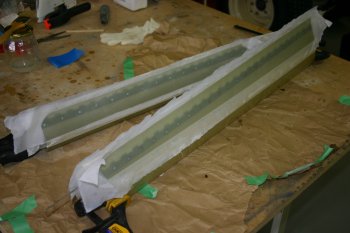
|
|
| Finished the rough trimming of the fairings - I should have done some of this yesterday - 'green' cured flass is fine, 2 day old cured is too set. Then brought them in to warm up in the sunshine in the house (Mum's study worked well ;-) | 
|
|
| For something different, final couple of hours I spent feathering the 2oz cloth stip on the nose gear fairing. Almost something 'soothing' about coming back to fibreglass sanding! | 
|
|
| I went back to the main gear fairings and feathering of resin / glass. | 
|
|
| I did some misc trimming of the VS tip and clearance checks on the rudder. Also noticed the tip vs rudder alignment isn't that great, need to come up with a plan for the foam plug onto which the fibreglass gets laid. | 
|
|
| Dad went back to the emmpenage fairing and worked on sanding and preping for some additional glass layups on the forward inner surfaces. | 
|
| | 
|
|
| | 
|
| | 
|
| | 
|
| | 
|
|
| Dad re-did the sides of the empenage fairing and the rear corners. | 
|
|
| Dad continued to keep cutting glass, whilst I mixed and pasted. | 
|
| Same sort of prep thinking with the nose gear leg, this might be used for the 'inner' of the upper fairing. | 
|
| Also added fibreglass / flox reinforcement and brackets on the main gear fairings. | 
|
|
| The main fairings mounted up well, next step is the #6 screws. | 
|
| I then spent a little while looking at the nose gear, I was stuggling to understand, until I realised I was missing two of the four brackets! Cleco is always interested in exactly what ever we are doing..... | 
|
| I pulled the tail further down and released the weight off the nose. The front brackets still aren't lining up properly - more thought..... | 
|
|
| I squeezed the nutplates on the joints for all the fairings and then more prep work on the nose wheel. | 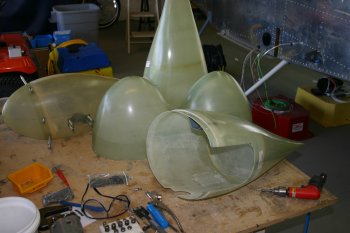
|
| Finished the day glassing some additional support and the aft brackets. I ended up using CS4-4 pop-rivets rather than trying to shoot / buck with fibreglass. It pulled down really well. | 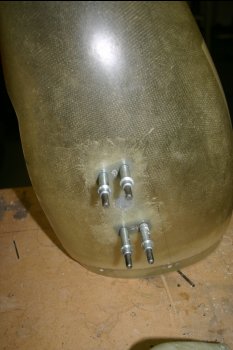
|
|
| Short day with social activities, but did get to look at the gear fairing from yesterday. It goes on OK, but seems to be deforming the shape somewhat - I think I'll need to add more reinforcement layers to pack the brackets out more. | 
|
|
| Continuing on from yesterday fibreglass session, I did some clean up / mounting of the plenum bubbles and then prep'ed and put the first layup on the VS tip and dressed the inner surface of the nose wheel pant. | 
|
| The temps today meant things were setting reasonably quickly so I also managed to get a second glass session to re-mount the main axel brackets on the nose fairing. This time I used a simple 6 oz, thick flox and 2 oz cover and just cleco'd the brackets. | 
|
|
| Spent the first part of the day fighting to get the nose wheel axel and brackets to all go together. Then the front locations could be finally set. | 
|
| Then time to guess where the gear leg goes and make a random hole saw location - got it roughly right.... | 
|
| Starting to look more encouraging, continued trimming the nose section for turning clearances | 
|
| Also marked up the nose leg fairing for trimming. | 
|
| The problem is the stops on the front of the gear weldment (which provide the turning stops) were rubbing on full left turn on the nose section. More adjustment (read re-drilling of the forward brackets) and moving the fairing tail tip down about 1/8" and things look better. | 
|
| Dad spent the majority of the day cleaning up and sanding back the excess resin on the empennage fairing - slow and boring, but needs to be sorted. | 
|
|
| More nose fairing work - this time the lower hole for the wheel. The nose section was the first to get a rough cut. | 
|
| Then with the wheel in place I aimmed for a 1/2" gap around the tire. This is a first cut, I'll open up further later, but should get us going for the moment. | 
|
| Finally decided the after brackets weren't working - too much stress / deformation of the glass structure, so drilled them off and made .063 spacers for the inner surfaces. | 
|
|
| Finished making the spacers for the aft nose fairing mounts, pop riveted it all together and trimmed various areas. | 
|
| The nose intersection between the fairing and the gear leg is pretty ugly and shows a large gap for the hose clamp. I had a look around my photos of other peoples examples and copied Sam / Tony's principle. After scuffing and prepping I moulded a clay surround to give a suitable platform to build on. Then final sculpting and release wax. | 
|
|
| Short day - just did one batch of glass work, laid up the nose fairing bump on the clay from yesterday. | 
|
|
| The main work for the day was fairings, including sanding and cleaning up the nose gear intersection. | 
|
| Also finished drilling and mounting the nose / main sections. | 
|
|
| Another day - more fibreglass. | 
|
| This is hopefully the last glass layup on the nose fairing - the little cover ramp seems to be working out well. | 
|
| Also made a mini guide for cables going into the rudder fairing - the snap bush was a bit too tight. It will make more sense when we install it.... | 
|
|
| On my own for a couple of days - taking it easy with K9 and other things on too. Micro balloon filing seemed to be a good 'misc' job so I set to on the nose fairing and misc glass work. | 
|
| The main aft section I did in situ - taking the fairing and wheel off is a real pain / hassle. Some initial sanding done, but need to let it cure more first. | 
|
|
| More fairings / sanding work. The nose fairing seems to be coming together well - still have the outstanding question for the tire valve access / options. | 
|
|
| Also did another batch of micro-balloon resin mix, this time adding a little acetone to help it flow. Surfaced the inside of the filtered air box which had some dry areas and nicks in it and then went onto other fairings. | 
|
| The turtle deck fairing is strange floppy piece and hard to sand due to all the compound curves. Hopefully the skimming worked ok and I won't have too many ridges. | 
|
|
| | 
|
| | 
|
| | 
|
| | 
|
| | 
|
|
| The fuselage needs to be raised for fairing alignment, this needs a support around 80cm high. Got some stock material from local supplier and went to work with the mill drill. The end result. | 
|
|
| The next problem was lifting the fuselage high enough to get the table in..... It needs to go a long way up and the gear / wheels have a surprising amount of spring in them. | 
|
| The best location I could come up with was multiple shop bolts through the lower spar and a large sling onto the engine hoist. Actually worked really well! | 
|
| Then found the table was just too tall / high - some minor tweaks.... chop 3" off each leg. | 
|
| Table in - with rubber mat supporting the main spar box. All safe and secure. | 
|
| Only a few bits done today - mainly main wheel fairing triming / opening of clearance around the main wheel. | 
|
|
| Cut / shaped the upper main leg fairings ready for the jubilee clamps. | 
|
|
| Then lots of positioning and measuring - this is a critical step to ensure the aircraft is 'balanced'. | 
|
| The plan is to get it all sort, probably first flight with fairings and then a few hours to run the engine in and get the basics sorted without fairings. Then they can be added back one at a time. | 
|
| Here you can see the line going back to an equivelent location back at the tail section. The leg fairings need to be parallel with the main airflow. | 
|
| Picture from the other end of the equation. | 
|
| The clamp and try and hold everything in place. The wheel fairings and lower edge of the gear fairing needed a bit of trimming. | 
|
|
| Today was the first step on the main wheel intersection fairings. I've been dreading this a bit as I'm still not sure if the DIY option is the best or whether the better solution is to use the fairings inc / VANs pre-made ones or do it like this in situ. I've heard there is still significant work to do with the pre-made one, plus US200+ for a set, so decided to have a go, I can always go back and redo them if I need to. The first step is to mark up a grid structure on the wheel pants and then start laying clay up for the shape. | 
|
| It is a very emperical process and lots of 'by eye' judgements. | 
|
| The other challenge is getting the two side to look something like each other - not easy..... | 
|
| Then it is a good coat of release wax and start with the glass work. | 
|
| This time I'm using 9oz glass, will be interesting to see how it goes. | 
|
|
| Drilled a couple of locations and trimmed the first glass layers. | 
|
|
| Warmer afternoon so went back to another few layers of glass on the intersection fairings. | 
|
|
| After more trimming and shaping of the intersections I preped and floxed the wheel pants / fairing joint. | 
|
| The clecos provided location registration, everything else is just left to set. | 
|
|
| After more sanding / trimming the fairings are starting to look reasonable. Tape was used to provide a cut line. | 
|
| The sabre saw plus knife split the two halves again. | 
|
| The two fairings side by side - similar but different. It won't matter when I'm flying along - I won't be able to see them :-) | 
|
| Test fitting, more shaping and sanding. | 
|
| Another layer of glass - this time on the outer surface and joined to the main fairing. Tape around the edge for sanding / blending the surface between the surfaces. | 
|
| | 
|
| Leave to cure.... I had to hold the inboard edges together to stop warping of the surface. | 
|
|
| Back to wheel fairings - only a knife needed to split them this time. More sanding / finishing work | 
|
| Some additional squares for the top of the gear leg fairings tounges. | 
|
| Plus some micro balloons on the wheel pants. | 
|
|
| Yesterday's upper leg reinforcement didn't work - it stuck to the leg too much. I extracted, added release wax and re-did. | 
|
| More sanding and then more micro balloons for the wheel pants. | 
|
|
| More sanding / shaping..... | 
|
| Aircraft back onto it's own 3 feet. | 
|
|
| The wheel fairing more sanding and finishing.... | 
|
|
| Wheel pant trimming and access routes for the flexible brake lines. | 
|
|
| More incremental trimming of the wheel pants clearance. I'm now aimming at around 3/8" clearance minimum with more on the sides. | 
|
| Also worked on the nose wheel pant clearances - slow process as the wheel has to be removed each time - not a great design! | 
|
|
| Lots of other stuff going on, but the main work in the shed was around the upper interesection fairings. | 
|
|
| | 
|
| | 
|
| | 
|
| | 
|
|
| | 
|
| | 
|
|
| | 
|
| | 
|
| | 
|
| | 
|
|
| | 
|
| | 
|
|
| | 
|
|
| | 
|
|
| | 
|
|
| | 
|
| | 
|
|
| | 
|
| | 
|
| | 
|
| | 
|
| | 
|
| | 
|
| | 
|
|
| | 
|
| | 
|
|
| | 
|
|
| | 
|


